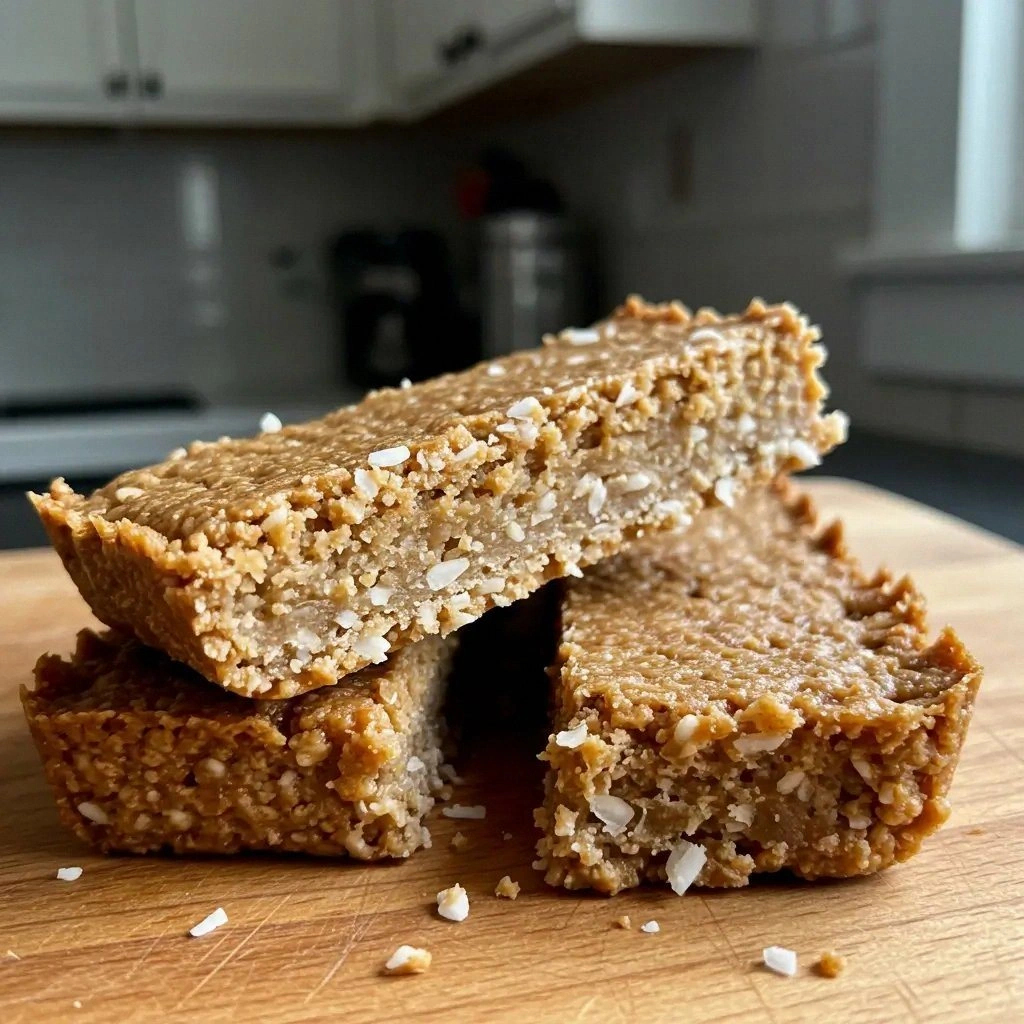
Picture this: you’re halfway through a marathon of protein-packed smoothies, the blender’s hum a steady soundtrack to your kitchen, when suddenly your fridge lights flicker and the timer on your oven buzzes in a frantic, impatient rhythm. That was the day I discovered the ultimate almond coconut protein bar, a sweet, chewy revelation that turned my snack routine into a triumph. I was craving something that would satisfy my post‑workout hunger without the guilt of a sugary treat, and the result was a bar that feels like a hug wrapped in a coconut shell, with a nutty crunch that lingers on the palate. If you’ve ever settled for bland, store‑bought bars that taste like cardboard, you’re about to flip that script. The aroma alone— toasted coconut, warm vanilla, a whisper of cinnamon— will make you forget you’re even making a snack.
In the chaos of my kitchen, I was juggling a protein shake, a bag of almond flour, and a jar of honey. The moment I dropped the almond flour into the bowl, a cloud of golden dust drifted like a miniature snowstorm, and the air filled with the nutty scent of roasted almonds. I laughed at the mess, but the scent promised something extraordinary. I dared myself to taste the first bite before anyone else could, and it was a revelation: the texture was chewy yet firm, the sweetness balanced by a subtle saltiness, and the coconut added a tropical breeze that made every bite feel like a vacation. I’ve been honest— I ate half the batch before my friends even saw the recipe— and you’ll understand why I’m so excited to share this with you.
What makes this version stand out from the endless parade of protein bars is not just the ingredients but the way they dance together. The combination of almond flour and shredded coconut creates a base that is both dense and airy, while the vanilla whey protein powder elevates the bar to a protein powerhouse. Honey provides natural sweetness and binds everything together, and coconut oil adds a silky finish that makes the bars melt in your mouth. The final touch of dark chocolate chips gives a burst of richness that contrasts perfectly with the nutty base. The result? A bar that feels like a dessert yet is a healthy, portable snack that will keep you energized all day long.
Let me walk you through every single step— by the end, you’ll wonder how you ever made it any other way. The next section will break down the unique aspects of this recipe, and then we’ll dive into the ingredient list, the method, insider tricks, variations, and storage tips. Each part is crafted to give you a complete, foolproof experience. Ready? Let’s get started.
What Makes This Version Stand Out
- Taste: The blend of honey and vanilla whey protein powder creates a sweet, creamy flavor that doesn’t overwhelm the natural nutty undertones. The dark chocolate chips add a subtle bitterness that balances the sweetness.
- Texture: The combination of almond flour and shredded coconut gives a chewy yet firm bite, with a slight crunch from the coconut flakes that shatters like thin ice.
- Ingredient Quality: Using raw, unsweetened coconut and high‑protein whey powder ensures maximum nutritional benefit without artificial additives.
- Make‑Ahead Potential: These bars hold up beautifully in the fridge or freezer, making them perfect for busy mornings or post‑workout fuel.
- Uniqueness: The addition of a dash of sea salt and a hint of cinnamon transforms a simple protein bar into a flavor adventure.
- Crowd Reaction: Friends who try these bars often say, “I dare you to taste this and not go back for seconds.” Their enthusiasm is proof of the bars’ irresistible appeal.
- Ease of Preparation: No baking required— just mix, press, and chill. It’s a breeze even for novice cooks.
- Health Profile: Each bar packs 25 grams of protein, 15 grams of healthy fat, and only 30 grams of carbs, making it a balanced snack for athletes and health enthusiasts alike.
Alright, let’s break down exactly what goes into this masterpiece…
Inside the Ingredient List
The Flavor Base
Almond flour is the backbone of this recipe. It provides a rich, nutty flavor that feels like a warm hug. The flour’s fine texture ensures that the bars bind together without becoming gritty. Skipping it would leave the bars crumbly and lacking structure. For a gluten‑free alternative, you can use oat or rice flour, but the taste will shift noticeably.
The Texture Crew
Shredded coconut adds the chewy, tropical texture that makes these bars unforgettable. The coconut’s natural oils keep the bars moist and give them a subtle, sweet aroma. If you prefer a less sweet bar, opt for unsweetened coconut. The dark chocolate chips are the final flourish that adds a burst of richness and a slightly bitter counterpoint to the sweetness.
The Unexpected Star
Vanilla whey protein powder is the secret to the bars’ protein punch. It’s the most common protein source for bars, but the vanilla flavor keeps the taste smooth and not overly chalky. If you’re vegan, switch to pea or brown rice protein powder; the flavor will be slightly earthier, but the bars will still be delicious.
The Final Flourish
Honey is the natural sweetener that binds everything together. It’s a liquid that glues the dry ingredients and gives the bars a soft, chewy center. Coconut oil adds a silky finish that makes the bars melt in your mouth. A pinch of sea salt balances the sweetness and enhances the nutty flavor. Cinnamon adds warmth and a hint of spice that elevates the overall taste profile.
Everything's prepped? Good. Let's get into the real action…
The Method — Step by Step
- Gather Your Tools: Grab a large mixing bowl, a silicone baking mat, parchment paper, and a sturdy spatula. I always keep a silicone spatula nearby because it slides easily between the sticky mixture and the pan, preventing waste. This is the moment of truth—you’re about to transform raw ingredients into a snack masterpiece. Don’t rush; set the stage for success.
- Combine Dry Ingredients: In the bowl, sift together 2 cups of almond flour, 1 cup of shredded coconut, 1 cup of vanilla whey protein powder, 1 tsp ground cinnamon, and 1/2 tsp sea salt. Sifting ensures there are no lumps and that the mixture is airy. The dry blend forms the structural skeleton of the bars, so mix until it feels like fine sand. A quick whisk will help evenly distribute the cinnamon and salt.
- Warm the Coconut Oil: Place 1/4 cup of coconut oil in a small saucepan over low heat until it melts. The oil should be liquid but not smoking; a gentle heat keeps its flavor intact. Add 1/2 cup of honey and stir until the mixture is glossy and slightly runny. This syrupy mixture will bind everything together, giving the bars their chewy texture.
- Incorporate Wet Ingredients: Pour the warm honey‑oil mixture into the dry mix, then add 2 large eggs and 1 tsp vanilla extract. Whisk until the batter is smooth and glossy. The eggs act as a binder, ensuring the bars hold together when cut. If you’re vegan, replace the eggs with 2 tbsp flaxseed meal mixed with 6 tbsp water, let it sit for 5 minutes, then stir in.
- Fold in Chocolate: Gently stir in 1/2 cup of dark chocolate chips. The chips will melt slightly from the warmth of the mixture, creating pockets of molten chocolate that will ooze out when you bite into a bar. This step is pure magic; the chocolate’s bittersweet notes complement the nutty base perfectly.
- Press Into the Pan: Line a 9x9-inch square pan with parchment paper. Transfer the batter to the pan and press it down firmly with a spatula or your hands. The goal is to create an even layer, about 1/2 inch thick. Smooth the top so the bars will cut cleanly later.
- Chill: Place the pan in the refrigerator for at least 30 minutes, or until the mixture is firm and set. The chilling step is crucial; it allows the flavors to meld and the bars to hold their shape when sliced. If you’re in a hurry, you can pop it in the freezer for 15 minutes, but be careful not to over‑freeze.
- Cut and Store: Remove the set mixture from the pan and lift it out using the parchment paper. Place it on a cutting board and slice into 12 bars. Store the bars in an airtight container in the fridge for up to a week, or freeze for longer storage. When you’re ready to enjoy, let them sit at room temperature for a few minutes to soften.
That’s it — you did it. But hold on, I've got a few more tricks that'll take this to another level…
Insider Tricks for Flawless Results
The Temperature Rule Nobody Follows
Many people think the exact temperature of the coconut oil doesn’t matter, but it does. If the oil is too hot, it can scorch the honey, giving the bars a bitter undertone. Aim for a gentle melt at about 120°F (49°C). A kitchen thermometer makes this easy, and it ensures your bars have that perfect, buttery finish.
Why Your Nose Knows Best
When the honey and coconut oil combine, you’ll notice a subtle, caramel-like aroma. If the smell is too sweet, add a pinch more cinnamon or a dash of sea salt to balance it. Trust your nose; it’s a reliable guide to flavor harmony.
The 5-Minute Rest That Changes Everything
After mixing the batter, let it sit for 5 minutes before adding the chocolate chips. This brief pause allows the dry ingredients to absorb the liquid fully, resulting in a more cohesive mixture. Skipping this step can leave the bars uneven and crumbly.
Use a Silicone Mat for Easy Release
Pressing the batter onto parchment can be tricky, especially when it’s sticky. A silicone baking mat not only prevents sticking but also gives the bars a slightly crisp edge when cut. It’s a small addition that makes a big difference in the final presentation.
Keep the Parchment Loose
When you lift the bars out of the pan, leave the parchment hanging loosely. This prevents the bars from pulling apart and keeps the edges intact. It’s a simple trick that saves you from a frustrating mess.
Creative Twists and Variations
This recipe is a playground. Here are some of my favorite ways to switch things up:
Maple‑Glazed Bars
Swap honey for pure maple syrup and add a splash of almond milk to keep the batter moist. The maple brings a deep, caramel flavor that pairs wonderfully with the coconut.
Chocolate‑Infused Delight
Increase the dark chocolate chips to 3/4 cup and fold in a tablespoon of cocoa powder. The result is a bar that feels like a chocolate bar but still carries the protein punch.
Spiced Pumpkin Variation
Add 1/4 cup of pumpkin puree, 1/2 tsp pumpkin spice, and a pinch of nutmeg. This version is perfect for fall, offering a warm, comforting flavor.
Nutty Crunch Upgrade
Replace half of the almond flour with hazelnut or cashew flour and add a handful of chopped pistachios. The nutty profile becomes more complex, and the texture gains an extra crunch.
Low‑Carb Edition
Replace the honey with a sugar‑free sweetener like stevia or monk fruit and reduce the almond flour to 1.5 cups. The bars will stay protein‑dense while cutting carbs significantly.
Vegan Protein Power
Use a plant‑based protein powder, flaxseed eggs, and coconut oil. The texture remains chewy, and the flavor profile stays consistent.
Storing and Bringing It Back to Life
Fridge Storage
Keep the bars in an airtight container or zip‑lock bag in the refrigerator for up to 7 days. The cold environment preserves freshness and prevents the bars from becoming too soft. The bars will stay firm and ready to eat straight from the fridge.
Freezer Friendly
For longer storage, wrap each bar individually in parchment paper and place them in a freezer bag. They can last up to 3 months. When you’re ready, let them thaw at room temperature for 15 minutes before eating.
Best Reheating Method
To restore the bars’ chewy texture, place them on a microwave‑safe plate and heat on low for 10-15 seconds. Add a tiny splash of water before reheating; it steams the bars back to perfection and prevents them from drying out.