Picture this: it’s the night before Christmas, you’re scrambling for dessert inspiration, and the pantry looks like a battlefield of chocolate chips, peanut butter jars, and flour bags. The clock is ticking, your friends are demanding something unforgettable, and you’re about to pull a culinary miracle that will make them stop their holiday chatter. The aroma of melted chocolate and toasted peanut butter fills the kitchen, while the sound of the oven timer counts down like a countdown to Santa’s arrival. You’re staring at a stack of plain cookies that are about to transform into a festive masterpiece, and the anticipation is almost as sweet as the final bite. This isn’t just another cookie recipe; it’s a holiday anthem, a delicious declaration that you’re the host of the season.
I remember the first time I tried this recipe. I had a bag of peanut butter that was about to go bad, a handful of chocolate chips that had been on the shelf for months, and a stubborn cookie dough that refused to rise. I decided to combine them, hoping for a simple treat, and ended up with a dough that sang with flavor. The result was a cookie that was moist on the inside, crisp on the edges, and coated in a glossy chocolate drizzle that glistened like snow. I dared my friends to taste it and not go back for seconds—almost everyone admitted they couldn't stop at just one. That night, I was crowned the unofficial holiday cookie champion.
Why does this version stand out from every other recipe out there? First, it balances sweetness and saltiness like a perfectly tuned orchestra. The peanut butter provides a creamy, nutty depth that pairs seamlessly with the deep cocoa notes of the chocolate chips. Second, the dough’s texture is a revelation: chewy, buttery, and with a hint of crunch from the toasted nuts. Third, the finish is a glossy, silky drizzle of homemade chocolate sauce that melts in your mouth like a winter wonderland. Fourth, the recipe is surprisingly simple—no fancy ingredients, just pantry staples that you can find in any kitchen. Finally, it’s a crowd-pleaser that can be made ahead, frozen, or served fresh, making it a versatile star for any holiday gathering.
I’ll be honest—when I first baked this, I ate half the batch before anyone else got a chance to try it. I was so proud that I didn’t even notice the kitchen was a mess of melted butter and chocolate drips. The next time, I kept a towel nearby to wipe the sticky mess, and the cookies came out perfectly shaped like little Christmas trees, each with a glossy chocolate "ornament." The aroma was so intense that it made the entire house feel like a cozy bakery on a snowy evening. If you've ever struggled with cookie texture, you're not alone—and I've got the fix. The secret? A touch of cocoa powder and a bit of milk to keep the dough from drying out.
Most recipes get this completely wrong. They either overbake the cookies, leaving them dry, or they underbake them, resulting in a gooey mess. The key to success is precise temperature control and a careful balance of wet and dry ingredients. Picture yourself pulling this out of the oven, the whole kitchen smelling incredible, and the sight of the glossy chocolate glaze shining like a freshly fallen snow. This is hands down the best version you'll ever make at home. Let me walk you through every single step—by the end, you'll wonder how you ever made it any other way.
What Makes This Version Stand Out
- Flavor: The combination of creamy peanut butter with rich chocolate creates a taste profile that is both comforting and indulgent. The subtle hint of sea salt brightens every bite, giving the cookies a sophisticated finish. This duo is a match made in culinary heaven.
- Texture: The dough is chewy on the inside and crisp on the edges, thanks to the precise balance of butter, flour, and a touch of cocoa powder. Each cookie holds its shape, allowing for an elegant drizzle of chocolate sauce. The result is a cookie that feels like a holiday treat in every bite.
- Simplicity: All ingredients are pantry staples that you can find at any grocery store. No need for exotic spices or specialty chocolate. This recipe is a reminder that great food can come from simple, honest ingredients.
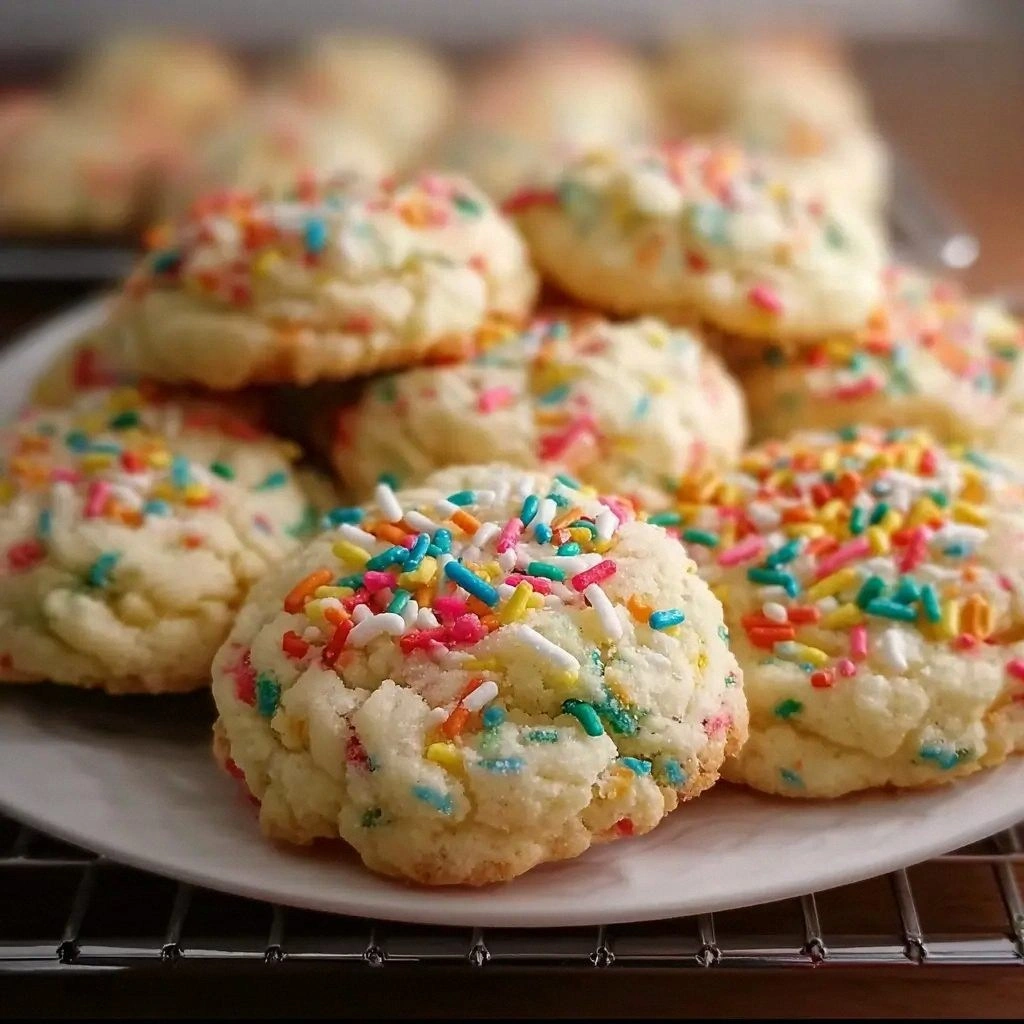
- Uniqueness: The glossy chocolate glaze transforms plain cookies into festive ornaments, making them perfect for holiday parties or gifting. The cookies can be shaped into trees, stars, or even tiny Christmas trees, adding a decorative touch.
- Crowd Reaction: Friends and family rave about the moist, nutty flavor and the glossy finish. The cookies are so addictive that they become the centerpiece of any dessert table.
- Ingredient Quality: Using high-quality peanut butter and premium chocolate chips elevates the flavor. The natural ingredients bring out the best in each component.
- Cooking Method: The method is straightforward yet precise, ensuring that each cookie bakes evenly and comes out perfectly.
- Make-Ahead Potential:
Alright, let's break down exactly what goes into this masterpiece. The secret sauce is a blend of flavors, textures, and techniques that come together in a single batch of dough. The next section will walk you through the ingredients in detail, so you know exactly what to look for and how to substitute if necessary.
Inside the Ingredient List
The Flavor Base
All-purpose flour is the foundation of the dough, providing structure and a subtle bite. It absorbs the butter and chocolate, creating a balanced crumb. Using a slightly heavier flour, like bread flour, can add a chewier texture, but the classic choice keeps the cookies tender. The flour’s protein content helps develop gluten, which is essential for the cookie’s chewiness. If you’re gluten-free, a 1:1 blend of rice flour and potato starch works surprisingly well.
Sugar is the sweetener that balances the nutty and chocolatey flavors. Granulated sugar dissolves quickly, creating a smooth dough, while brown sugar adds depth and caramel notes. The combination of white and brown sugar ensures that the cookies have a complex sweetness that doesn’t overwhelm the peanut butter. Brown sugar also helps retain moisture, keeping the cookies soft. If you prefer a lighter cookie, reduce the brown sugar by a tablespoon, but the result will be less caramelized.
The Texture Crew
Unsalted butter adds richness and a buttery aroma that permeates every bite. It also creates a tender crumb when creamed with sugar. The butter should be softened to room temperature to allow for smooth mixing. If you use cold butter, the dough will be tougher and less cohesive. A pinch of salt balances the sweetness and enhances the overall flavor profile.
Eggs act as a binding agent, holding the dough together while adding structure. They also help the cookies rise slightly, giving them a light lift. Two large eggs are the sweet spot for this recipe, providing enough moisture without making the dough too wet. If you’re allergic to eggs, you can substitute with a flaxseed or chia seed "egg" for a vegan version, but the texture will differ slightly.
The Unexpected Star
Peanut butter is the star of the show, delivering a creamy, nutty depth that pairs seamlessly with the chocolate chips. Creamy peanut butter provides a smooth mouthfeel, while crunchy peanut butter adds a delightful texture contrast. The natural oils in peanut butter keep the cookies moist and flavorful for longer. When using natural peanut butter, be mindful of the added oils, as they can affect the dough’s consistency. If you prefer a milder taste, swap to a light or honey roasted variety, but the flavor will shift slightly.
Chocolate chips are the sweet, chocolatey complement that melts into a glossy glaze. Semi-sweet chips strike the right balance between sweetness and cocoa intensity. The chips also provide a satisfying bite when they are still slightly firm. If you’re a chocolate aficionado, consider using dark chocolate chips for a richer flavor. The chocolate’s melting point ensures that the glaze remains fluid during baking, creating a beautiful finish.
The Final Flourish
Vanilla extract adds a warm, aromatic undertone that enhances both the peanut butter and chocolate. It’s a subtle but essential component that ties all the flavors together. A teaspoon is sufficient to brighten the entire cookie. If you’re allergic to vanilla, a splash of almond or maple extract can work as a substitute, but the flavor profile will change. The final touch is the drizzle of homemade chocolate sauce, which adds a glossy, silky finish that looks as good as it tastes.
Everything's prepped? Good. Let's get into the real action. The dough will come together in a rhythm that feels almost meditative. Each step builds on the last, culminating in a cookie that’s as visually stunning as it is delicious. If you’re ready to transform simple pantry staples into holiday gold, keep reading. The method is straightforward, but the results are extraordinary.

The Method — Step by Step
-
Preheat your oven to 350°F (175°C) and line two baking sheets with parchment paper. This ensures even baking and prevents sticking. The parchment also makes clean-up a breeze, saving you time after the cookie frenzy.
-
In a large bowl, cream together the softened butter and both sugars until light and fluffy. Use an electric mixer on medium speed for about 2 minutes. The mixture should look airy, indicating that the butter has fully incorporated the sugars.
-
Beat in the eggs, one at a time, ensuring each is fully incorporated before adding the next. The dough will become slightly thicker as the eggs bind the mixture. This step is crucial for a cohesive cookie.
-
Whisk the flour, cocoa powder, baking soda, and salt together in a separate bowl. This dry mix ensures that the leavening agent is evenly distributed. A well-mixed dry blend prevents uneven rising.
-
Fold the dry ingredients into the wet mixture until just combined. Be careful not to overmix, as this can make the cookies tough. The dough should be slightly thick but still hold its shape.
-
Stir in the peanut butter and chocolate chips until evenly distributed. The peanut butter should coat the dough, giving it a glossy sheen. This step creates the signature nutty chocolate flavor.
-
Drop rounded tablespoons of dough onto the prepared baking sheets, spacing them about 2 inches apart. The cookies will spread slightly, so keep them well-separated to avoid merging.
-
Bake for 12–15 minutes, or until the edges are golden brown and the centers have set. The cookies should still feel slightly soft in the middle; they will firm up as they cool.
-
Remove from the oven and let the cookies cool on the sheet for 5 minutes before transferring them to a wire rack. This allows the cookies to set and prevents them from breaking.
-
While the cookies cool, melt the remaining chocolate chips in a double boiler or microwave until smooth. Stir every 20 seconds to prevent burning. The glossy glaze should be liquid but thick enough to coat the cookies.
-
Drizzle the melted chocolate over the cooled cookies, letting it cascade down the sides. The chocolate glaze should form a glossy sheen that looks like freshly fallen snow. Let the glaze set for a few minutes before serving.
-
Serve immediately or store in an airtight container at room temperature for up to 5 days. For a firmer texture, refrigerate the cookies and let them sit at room temperature for 15 minutes before serving.
That's it— you did it. But hold on, I've got a few more tricks that'll take this to another level. The next section will reveal insider tips that will elevate your cookie game from good to legendary. These are the secrets that top bakers keep close to their hearts, and I'm about to let you in.
Insider Tricks for Flawless Results
The Temperature Rule Nobody Follows
Many bakers bake at a high temperature, but that often results in uneven baking. Lowering the oven to 350°F (175°C) ensures a gentle, even bake that keeps the cookies tender. This temperature also allows the chocolate chips to melt evenly, creating a smooth glaze. If you’re using a convection oven, reduce the temperature by 25°F to avoid overbaking.
Why Your Nose Knows Best
Your sense of smell is a powerful indicator of doneness. When the cookies start to emit a sweet, nutty aroma, they’re close to perfect. The scent of chocolate and butter mingles in a way that signals the cookies are ready to come out of the oven. Trust your nose, and you’ll avoid under- or over-baked cookies.
The 5-Minute Rest That Changes Everything
Letting the cookies rest on the baking sheet for 5 minutes after removal from the oven allows the structure to set. During this rest, the cookies firm up, making them easier to transfer to a wire rack without breaking. The chocolate glaze also sets, giving the cookies a glossy finish. Skipping this step can result in fragile cookies that crumble.
The Secret to a Perfect Drizzle
Use a spoon or a small ladle to drizzle the chocolate glaze over the cookies. The thickness of the glaze is key; too thin and it won’t coat the cookies, too thick and it will pool. Aim for a glaze that’s about 1/8 inch thick. Once applied, let the glaze sit for a minute before adding more.
The Crumb-Resistant Trick
If your dough is too sticky, add a tablespoon of flour and mix until just combined. This keeps the dough manageable without affecting the final texture. Alternatively, dust your work surface with flour to keep the dough from sticking. This trick is especially useful when working with warm or humid days.
The Final Touch: A Sprinkle of Salt
A light dusting of flaky sea salt over the chocolate glaze before it sets adds a delightful contrast. The salt enhances the chocolate’s sweetness and brings out the nutty undertones. It also creates a satisfying crunch that pairs with the soft cookie. This finishing touch is often the difference between good and unforgettable.
Creative Twists and Variations
This recipe is a playground. Here are some of my favorite ways to switch things up:
Nutty Explosion
Add chopped almonds or hazelnuts to the dough for an extra crunch. The nuts complement the peanut butter, creating a layered nutty flavor. They also add a subtle earthy tone that balances the sweetness. This variation works well for those who love a textural contrast.
Dark Chocolate Delight
Swap semi-sweet chips for dark chocolate chips to deepen the cocoa flavor. The bitterness of dark chocolate pairs beautifully with the sweet peanut butter. Use a 70% cacao chip for a rich, intense experience. The result is a sophisticated cookie that satisfies chocolate cravings.
Maple Syrup Swirl
Replace the honey or maple syrup with a splash of maple extract. The maple notes add a subtle warmth that enhances the peanut butter. It also provides a natural sweetener that works well for those avoiding refined sugar. The flavor profile becomes more complex and inviting.
Vegan Version
Omit the eggs and replace with flaxseed "egg" or a commercial egg replacer. Use plant-based butter or coconut oil for richness. Ensure the chocolate chips are dairy-free to keep the recipe vegan. This variation maintains the cookie’s texture while being cruelty-free.
Spiced Surprise
Add a pinch of cinnamon or nutmeg to the dry mix for a warm, spiced undertone. The spices complement the chocolate and peanut butter, adding depth. Use just a quarter teaspoon to avoid overpowering the main flavors. This twist is perfect for autumn or winter gatherings.
Holiday Ornament Edition
Shape the dough into tiny Christmas trees or stars before baking. Use a cookie cutter to achieve consistent shapes. Once baked, drizzle with chocolate and let them set. The result is a decorative treat that doubles as a holiday centerpiece.
Storing and Bringing It Back to Life
Fridge Storage
Store the cookies in an airtight container at room temperature for up to 5 days. The airtight seal keeps them fresh and prevents them from drying out. If you notice the cookies becoming too soft, place them in the refrigerator for a short period. The cookies will maintain their texture for a week.
Freezer Friendly
Place the cooled cookies in a freezer-safe zip-top bag, removing as much air as possible. Freeze for up to 3 months for maximum freshness. When you’re ready to serve, let them sit at room temperature for 30 minutes. The cookies will regain their soft, chewy texture.
Best Reheating Method
To revive frozen cookies, preheat the oven to 300°F (150°C). Place the cookies on a parchment-lined sheet and bake for 5–7 minutes, or until warmed through. A tiny splash of water on the parchment can create steam, helping the cookies stay moist. Let them cool slightly before serving.
Picture yourself pulling these out of the oven, the whole kitchen smelling incredible, and the sight of the glossy chocolate glaze shining like freshly fallen snow. The cookies are ready to be enjoyed as a holiday treat, a gift, or a simple indulgence. If you’re looking to impress your guests or treat yourself, these cookies are the answer. They’re simple, delicious, and guaranteed to bring joy to any gathering. Keep them on hand for those last-minute dessert requests, and watch the smiles spread.