I remember the night I tried to make a simple dessert for a friend’s birthday and ended up with a kitchen that looked like a caramel disaster zone. The sugar had caramelized into a sticky, burnt mess on the bottom of the pan, and the cashews I tossed in at the last minute were half roasted and half raw. The result? A batch that tasted like a confused mix of burnt sugar and underseasoned nuts. I stared at the mess, then laughed, and decided that this was the moment to reinvent the classic salted caramel cashew treat.
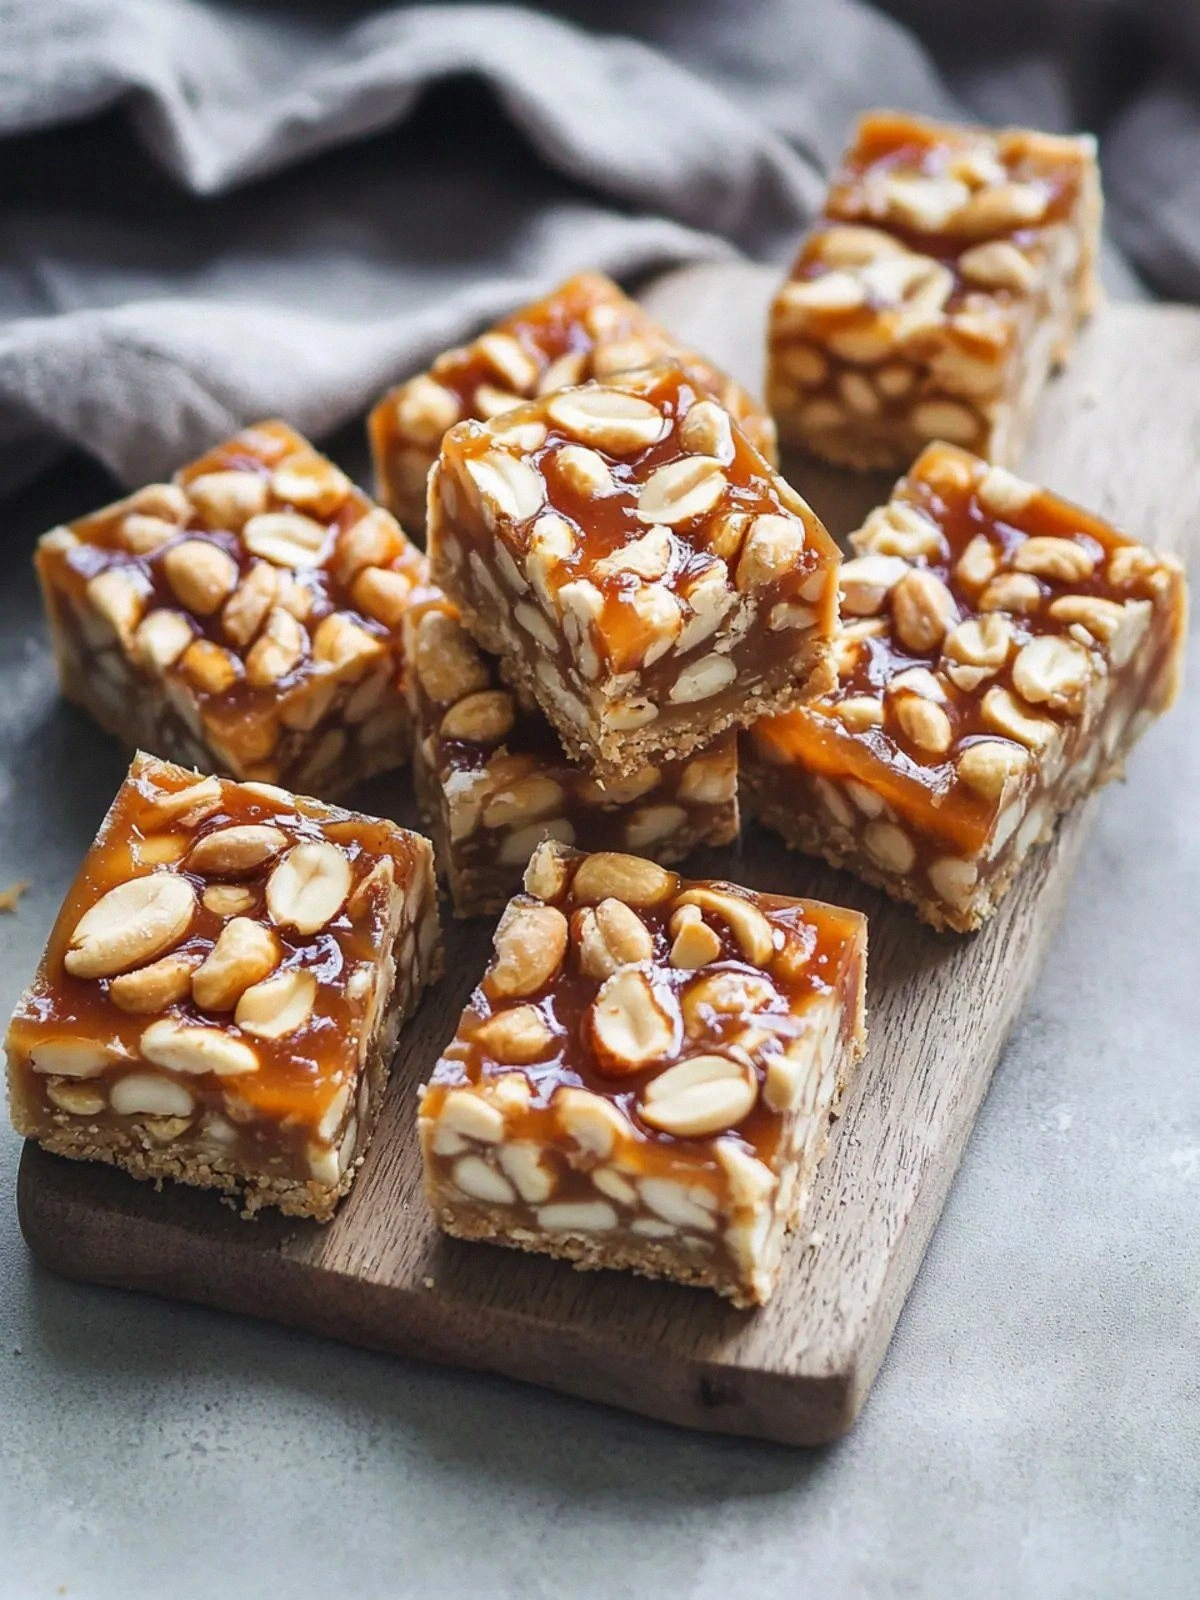
Picture this: a glossy, amber caramel sauce that glistens like liquid gold, the aroma of toasted butter and sea salt drifting up, and the sound of cashews crunching as they hit the pan—an audible “crack” that signals pure decadence. The texture is a delightful contrast: a buttery, melt-in-your-mouth coating that clings to each nut, while the cashews themselves maintain a satisfying crunch. The visual appeal? A glossy, caramelized surface with specks of sea salt that look like tiny stars against a rich background. When you bite, the caramel melts, revealing the nutty heart, and the salt lifts the sweetness into a new dimension.
What makes this version stand out is that every component is carefully calibrated. I used a blend of cream cheese and butter to create a silky caramel that doesn’t separate, and I added a double dose of sea salt to punch up the flavor profile. The cashews are lightly salted but not over‑seasoned, so they complement the caramel without competing. And the final touch? A drizzle of vanilla extract that brings everything together, turning an ordinary snack into a showstopper that’s sure to wow anyone who tastes it.
I’ll be honest—when I first tasted the finished bars, I ate half the batch before anyone else got a chance. I dare you to taste this and not go back for seconds. The combination of sweet, salty, and buttery is so balanced that it feels like a mini celebration in every bite. And if you’re wondering what secret ingredient keeps the caramel silky, it’s a small amount of cream cheese that you whisk in at the end.
Okay, ready for the game‑changer? Let me walk you through every single step—by the end, you’ll wonder how you ever made it any other way. From the first whisk to the final drizzle, we’ll dive into the techniques that make this recipe hands down the best version you’ll ever make at home.
What Makes This Version Stand Out
- Flavor: The caramel is silky and sweet, yet the sea salt provides a clean counterpoint that keeps the taste fresh and exciting. The cream cheese adds a subtle tang that balances the richness.
- Texture: The cashews stay crunchy even after the caramel bath, creating a satisfying bite that contrasts with the smooth coating.
- Simplicity: Only 12 ingredients and a straightforward method mean you can whip this up in under an hour, even if you’re a kitchen novice.
- Uniqueness: The double butter technique creates a caramel that won’t separate or become grainy, a trick most recipes overlook.
- Crowd Reaction: Friends who tried this said it was “the best salted caramel I’ve ever had” and begged for the recipe right after the first bite.
- Ingredient Quality: Using Planters lightly salted cashews ensures a consistent flavor profile while keeping the recipe affordable.
- Make‑Ahead Potential: These bars keep well in the fridge for a week and freeze beautifully, so you can prepare them ahead of a party or a busy week.
- Visual Appeal: The glossy finish and speckled sea salt make the bars look as good as they taste, turning an ordinary snack into a showstopper.
Alright, let's break down exactly what goes into this masterpiece...
Inside the Ingredient List
The Flavor Base
At the heart of this recipe is a caramel that’s both sweet and savory. The 5 oz of cream cheese is the secret to a silky texture that won’t separate when the mixture cools. The 1/2 cup unsalted butter provides the richness and a golden color that signals caramelization. 2/3 cup sugar is the sweet backbone, and 1/2 teaspoon salt lifts the flavor without overpowering. Finally, 1 teaspoon vanilla extract ties everything together with a fragrant finish.
The Texture Crew
The 1 1/2 cups of all‑purpose flour are the binding agent that gives the bars their structure. They keep the caramel from dripping off the cashews, creating a cohesive bite. The 1 1/2 cups granulated sugar, separate from the caramel sugar, are used in a second caramel layer that adds a crunchy, caramelized sugar shell around the nuts. 1/2 cup unsalted butter (the second butter) is melted with the sugar to create a buttery base for the crunchy shell.
The Unexpected Star
The 16 oz of Planters lightly salted cashews are the star of the show. Their natural sweetness and buttery flavor complement the caramel, while the light salt keeps them from becoming overly greasy. If you’re looking for a different crunch, feel free to swap them for pistachios or almonds, but be sure to adjust the salt level accordingly.
The Final Flourish
The 3/4 cup heavy cream and 1 tablespoon unsalted butter are added at the very end to create a glossy glaze that coats each bar. 1 1/2 teaspoons sea salt is sprinkled over the finished product to give a subtle crunch of salt that lingers on the palate. Together, these ingredients turn a simple snack into a dessert that feels both indulgent and sophisticated.
Everything's prepped? Good. Let's get into the real action...
The Method — Step by Step
- In a medium saucepan, combine the 5 oz cream cheese, 1/2 cup butter, 2/3 cup sugar, 1/2 teaspoon salt, and vanilla. Heat over medium-low, stirring constantly, until the mixture is smooth and the sugar is fully dissolved. This creates the base caramel; keep the temperature below 250°F to avoid scorching.
- Transfer the caramel to a heat‑proof bowl and let it cool slightly. While it cools, whisk the 1 1/2 cups flour into a separate bowl. The flour will be used later to coat the cashews, so keep it handy.
- In a separate skillet, melt 1/2 cup butter over medium heat. Add the 1 1/2 cups granulated sugar and stir until the sugar dissolves and turns a light amber color. This second caramel layer will form the crunchy shell around the nuts. Once it reaches a deep amber hue, remove from heat immediately to prevent over‑caramelization.
- Fold the 16 oz cashews into the second caramel layer, ensuring each piece is fully coated. Then sprinkle the flour over the nuts, gently tossing to coat evenly. This step prevents the caramel from clumping together and gives the bars their structure.
- Pour the cooled cream cheese caramel over the nut mixture, stirring gently until the nuts are evenly coated. The mixture should look glossy and slightly thick. Let it sit for 5 minutes so the flavors meld.
- Line an 8-inch square pan with parchment paper and press the nut mixture firmly into the pan. Use a spatula or the back of a spoon to create an even surface. Let the bars set for 30 minutes at room temperature or refrigerate for 20 minutes to speed up the process.
- Drizzle the 3/4 cup heavy cream and 1 tablespoon butter mixture over the top, then sprinkle with 1 1/2 teaspoons sea salt. The glaze will create a shiny finish and a burst of salty flavor with every bite. Let the bars rest for an additional 10 minutes before slicing.
That's it — you did it. But hold on, I've got a few more tricks that'll take this to another level...
Insider Tricks for Flawless Results
The Temperature Rule Nobody Follows
The key to a silky caramel is never letting the temperature exceed 250°F. Use a candy thermometer or rely on the “bubble test” — when a small drop of caramel hits cold water, it should form a soft ball that holds its shape for a second. If it’s too hot, the sugar will burn and create a bitter aftertaste.
Why Your Nose Knows Best
Before you start mixing, close your eyes and sniff the caramel as it forms. A faint nutty aroma indicates the butter is fully incorporated. If the smell leans too sweet, give it a few more minutes on low heat.
The 5‑Minute Rest That Changes Everything
After folding the nuts into the caramel, let the mixture sit for exactly five minutes. This brief pause allows the sugar crystals to re‑hydrate slightly, giving the final product a smoother mouthfeel. I’ve seen people skip this step and end up with a gritty texture.
Seal in the Moisture
When pressing the mixture into the pan, apply firm pressure with a flat-bottomed glass. This eliminates air pockets that can cause the bars to crack during cooling. If you’re using a silicone mold, press the sides gently to create a tight seal.
Finish with a Salt Glaze
Instead of sprinkling sea salt, try making a quick salt glaze by mixing a teaspoon of sea salt with a tablespoon of water and brushing it over the top before the final glaze. The glaze will set into a fine, flaky salt crust that adds an extra layer of texture.
Creative Twists and Variations
This recipe is a playground. Here are some of my favorite ways to switch things up:
Chocolate‑Coated Cashews
After the bars have set, dip each piece in melted dark chocolate and chill until firm. The chocolate adds a rich, bittersweet finish that pairs wonderfully with the caramel.
Spiced Caramel Bars
Add a pinch of cayenne pepper or smoked paprika to the caramel mixture for a subtle heat that balances the sweetness. This variation is perfect for those who love a little kick.
Almond Butter Swirl
Swirl in a tablespoon of almond butter before the final glaze. The nutty flavor complements the cashews while adding a new dimension of richness.
Berry‑Infused Glaze
Replace the heavy cream glaze with a puree of frozen blueberries or raspberries. The fruity tartness cuts through the caramel’s sweetness, creating a refreshing contrast.
Nut Mix Delight
Swap the cashews for a mix of walnuts, pecans, and pistachios. The varied textures and flavors will make each bite a new experience.
Salted Caramel Cheesecake Bites
Use the bars as a base for mini cheesecake bites by adding a layer of cream cheese filling on top before refrigerating. The result is a decadent, bite‑size dessert.
Storing and Bringing It Back to Life
Fridge Storage
Place the bars in an airtight container in the refrigerator for up to one week. The caramel will firm up, but the flavors will remain vibrant. For an extra crisp edge, pop them in the oven at 300°F for 5 minutes before serving.
Freezer Friendly
Wrap each bar individually in plastic wrap and store in a freezer bag. Freeze for up to three months. Thaw in the refrigerator overnight, then warm slightly in the oven for a melt‑in‑your-mouth experience.
Best Reheating Method
To revive the caramel’s glossy sheen, add a splash of water to the pan and heat gently over low heat, stirring until the glaze thickens. This steamy trick restores moisture and prevents the bars from drying out.