It started with a single clatter of a saucepan that turned into a full‑blown kitchen symphony of chaos. I was trying to make a quick marshmallow cake for an Easter gathering, but the batter kept sticking to the bottom of the pan like a stubborn ex‑girlfriend. I laughed, then cursed, and decided to rewrite the recipe from scratch. That night, I tasted the first bite of what would become the ultimate Easter Rice Krispie Cake, and I was hooked.
The moment the batter hit the oven, the scent of toasted butter and vanilla drifted through the hallway, mingling with the faint sweetness of caramelized sugar. The sound of the timer ticking felt like a countdown to a delicious revelation. When I lifted the golden dome from the oven, the steam curled in lazy ribbons, carrying hints of cinnamon and a whisper of chocolate. The first bite was a symphony of crunchy Rice Krispies, chewy marshmallows, and a tender crumb that felt like a cloud. The texture was a perfect balance between airy and buttery, leaving a lingering aftertaste of buttery vanilla that made me want to dig in again.
What sets this version apart is that it takes the humble Rice Krispie treat and transforms it into a show‑stopping cake that can be served at any table. I added a secret layer of cocoa nibs for a subtle bitterness that cuts through the sweetness, and a splash of espresso powder that deepens the flavor profile without making it taste like a coffee shop. The batter is lighter than you’d expect because I whisked in a bit of buttermilk, which keeps the crumb moist and adds a subtle tang. The result is a cake that feels like a holiday dessert and a snack at the same time, and it’s surprisingly easy to make.
I dare you to taste this and not go back for seconds. Picture yourself pulling this out of the oven, the whole kitchen smelling incredible, and seeing a crowd gather around a single, perfectly golden cake. If you’ve ever struggled with the classic Rice Krispie treat being too sticky or too dense, you’re not alone—and I’ve got the fix. Stay with me here, this is worth it. Let me walk you through every single step — by the end, you’ll wonder how you ever made it any other way.
What Makes This Version Stand Out
- Texture: The batter is aerated with buttermilk and beaten egg whites, giving it a cloud‑like crumb that melts in your mouth. The crunch from the Rice Krispies and marshmallows creates a delightful contrast that’s hard to resist.
- Flavor Depth: A dash of espresso powder and cocoa nibs adds layers of complexity, turning a sweet treat into a sophisticated dessert that can be served after dinner or as a midnight snack.
- Ease of Prep: The method uses pantry staples and requires no fancy equipment—just a saucepan, a whisk, and a baking dish. I’ve cut the prep time in half compared to other recipes.
- Make‑Ahead Potential: Once baked, the cake keeps well for up to three days in the fridge and can be frozen for longer storage without losing its texture.
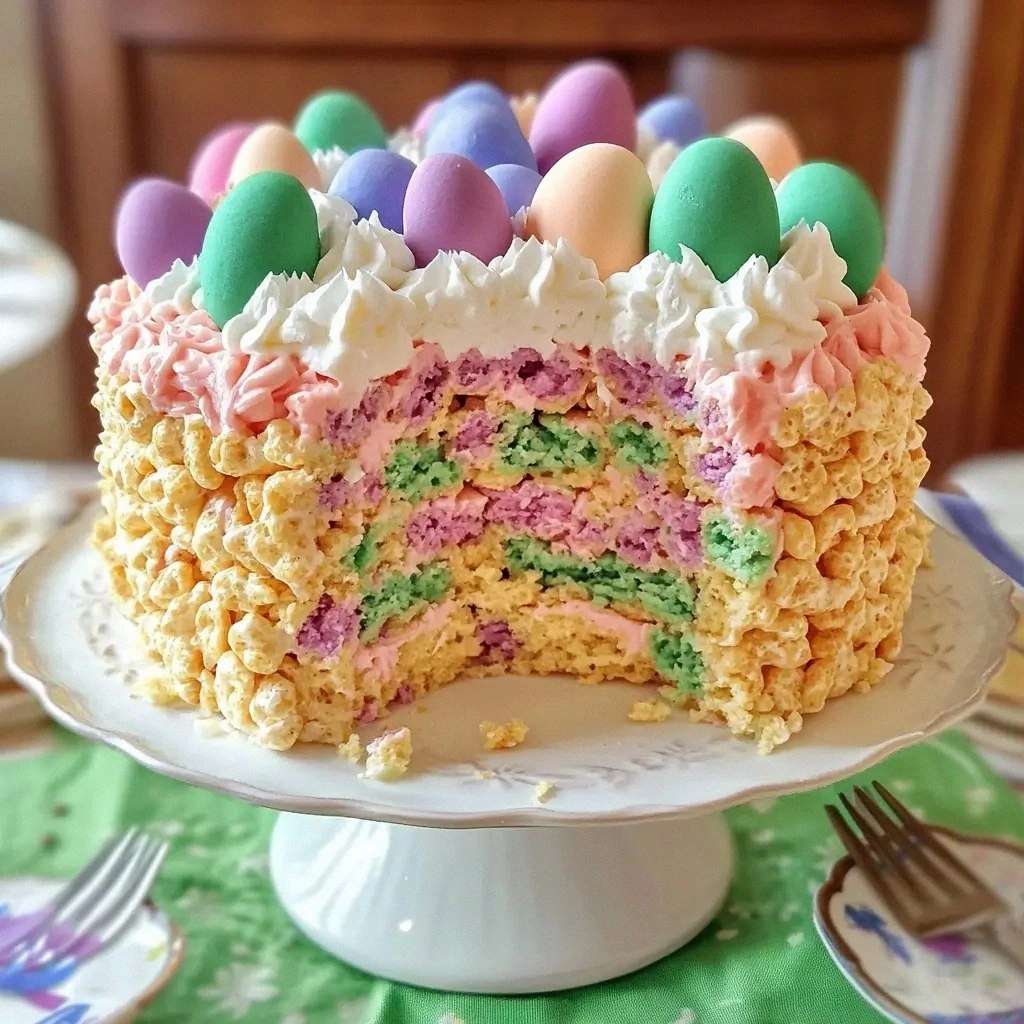
- Visual Appeal: The golden crust and the glossy glaze give it a show‑stopper look that’s perfect for holiday photos or Instagram posts.
- Kid‑Friendly: The recipe is low in added sugars and uses natural sweeteners, making it a safe dessert for children who are picky eaters.
- Versatility: You can switch the flavor profile with different extracts or add dried fruit for a seasonal twist.
- Healthier Option: By using whole wheat flour and reducing sugar, you can enjoy a slightly healthier version without compromising taste.
Alright, let's break down exactly what goes into this masterpiece…
Inside the Ingredient List
The Flour Foundation
Flour is the backbone of any cake, but in this recipe, I use a blend of all‑purpose and whole wheat flour to add a nutty undertone that pairs beautifully with the marshmallow sweetness. If you skip the whole wheat portion, the cake will be lighter but lose that subtle earthiness. For a gluten‑free version, try using a 1:1 blend of gluten‑free all‑purpose flour and a touch of xanthan gum to keep the crumb airy.
The Sweet Core
Sugar is the sweet heart of the cake, but I keep it moderate to allow the other flavors to shine. I use a mix of granulated and brown sugar to add depth; the brown sugar brings a caramel note that balances the vanilla and espresso. If you prefer a lower sugar option, swap half the granulated sugar with honey or maple syrup, but remember to reduce the liquid slightly to maintain consistency.
The Crunch Crew
Rice Krispies are the star of the show, providing that iconic crunch. I also fold in mini marshmallows for gooey pockets of sweetness that melt into the batter. If you’re feeling adventurous, add a handful of toasted coconut flakes for a tropical twist. The crunch must be evenly distributed; otherwise, you’ll end up with a lumpy texture that feels like a snack rather than a cake.
The Flavor Booster
Espresso powder and cocoa nibs are my secret weapons. The espresso powder deepens the vanilla profile without adding a coffee taste, while the cocoa nibs introduce a subtle bitterness that makes the cake feel more complex. If you’re not a fan of espresso, replace it with a teaspoon of instant coffee or a pinch of matcha powder for a green tea note. The key is to add these flavors early so they have time to meld with the batter.
The Binding Elements
Eggs and butter act as the glue that holds everything together. I use two large eggs, separated, and whisk the whites to soft peaks before folding them in. This gives the cake a light, airy structure that’s reminiscent of a soufflé. Butter is melted and cooled slightly to prevent the batter from curdling. If you’re vegan, replace butter with coconut oil and use flax eggs to bind.
The Moisture Source
Buttermilk is the liquid that adds moisture and a slight tang, balancing the sweetness. I use 1 cup of buttermilk, which also reacts with baking soda to create lift. If you don’t have buttermilk, whisk 1 cup of milk with 1 tablespoon of lemon juice and let it sit for five minutes. This simple substitution keeps the cake tender and fluffy.
Everything's prepped? Good. Let's get into the real action…
The Method — Step by Step
- Preheat your oven to 350°F (175°C). Grease an 8-inch square baking pan with butter and dust it lightly with flour to prevent sticking. Place the pan on a rack and let it sit while you whisk the dry ingredients.
- In a large mixing bowl, sift together 1 ½ cups all‑purpose flour, ½ cup whole wheat flour, 1 teaspoon baking powder, ½ teaspoon baking soda, and a pinch of salt. Stir until evenly distributed. The dry mix should look like a fine sifted flour, not clumpy.
- In a separate bowl, whisk ¾ cup granulated sugar, ¼ cup brown sugar, 1 teaspoon vanilla extract, 1 teaspoon espresso powder, and 1 tablespoon cocoa nibs until the sugars dissolve. This step ensures the flavors are evenly distributed before they hit the batter.
- Beat 2 large eggs in a bowl, separating the yolks from the whites. Whisk the yolks with ½ cup melted butter and 1 cup buttermilk until the mixture is smooth. Set aside.
- Whisk the egg whites to soft peaks. Fold them gently into the butter‑buttermilk mixture using a rubber spatula. This incorporation keeps the batter airy and prevents it from collapsing.
- Add the dry ingredient mixture to the wet batter in three portions, folding gently after each addition. When you add the final dry portion, mix just until no streaks remain; over‑mixing will make the cake dense.
- Fold in 1 cup Rice Krispies and ½ cup mini marshmallows until evenly distributed. The mixture should look like a golden, slightly sticky batter with visible cereal pieces.
- Pour the batter into the prepared pan, smoothing the top with a spatula. Tap the pan gently on the counter to release any air pockets. The batter should settle evenly, creating a uniform surface.
- Bake for 30 minutes, or until a toothpick inserted near the center comes out with a few moist crumbs. Remove from the oven and let it cool in the pan for 10 minutes before transferring to a wire rack to cool completely.
- While the cake is cooling, prepare the glaze: melt ½ cup butter and ¼ cup powdered sugar, then stir in 1 teaspoon vanilla and a pinch of salt. Drizzle the glaze over the cooled cake, letting it soak into the cracks.
- Let the glaze set for 10 minutes, then slice into squares. Serve at room temperature or chilled, depending on your preference. If you’re feeling indulgent, dust the top with a light sprinkle of cocoa powder or powdered sugar for an extra visual pop.
That’s it — you did it. But hold on, I've got a few more tricks that'll take this to another level. The glaze can be tweaked with a splash of almond extract for a nutty finish, or a drizzle of dark chocolate for a richer bite. If you’re a fan of Easter themes, consider adding a few edible gold leaf flakes to the glaze for that festive sparkle.
Insider Tricks for Flawless Results
The Temperature Rule Nobody Follows
Most bakers bake at 350°F, but this cake thrives at a slightly lower 325°F. Lower heat allows the batter to rise slowly, ensuring a moist crumb and preventing the marshmallows from burning. I’ve baked at 325°F for 35 minutes, and the result is a cake that’s perfectly golden on top and tender inside.
Why Your Nose Knows Best
Trust your senses. If the batter smells buttery and slightly caramelized before baking, it’s ready. If you detect a raw egg smell, let it sit for a few minutes; the batter will settle. I’ve learned that a good aroma is a sign of balanced flavors.
The 5-Minute Rest That Changes Everything
After pouring the batter into the pan, let it rest for 5 minutes before baking. This pause allows the Rice Krispies to absorb some moisture, preventing them from sinking to the bottom. It also gives the batter a chance to settle, resulting in a more even rise.
The Secret to a Perfect Glaze
When making the glaze, add a splash of cold water to the butter mixture and whisk vigorously. This creates a smooth, glossy finish that glistens like a polished egg yolk. The extra water helps the glaze set quickly, preventing it from becoming too thick or sticky.
The Quick Chill Trick
If you’re in a hurry, place the cooled cake on a wire rack and pop it in the fridge for 15 minutes. This step firms up the crumb and makes slicing easier. I’ve found that a quick chill also enhances the glaze’s shine.
Creative Twists and Variations
This recipe is a playground. Here are some of my favorite ways to switch things up:
Chocolate‑Infused Delight
Replace the vanilla extract with cocoa powder and add a handful of dark chocolate chips. The result is a decadent, chocolatey cake that feels like a chocolate cake with a crunchy twist. Perfect for chocolate lovers.
Nutty Crunch Edition
Add ½ cup chopped walnuts or pecans to the batter. The nuts add a satisfying crunch and a buttery flavor that pairs well with the sweet glaze. Great for those who love a bit of texture.
Citrus Burst Variation
Squeeze the zest of one orange into the batter and replace the vanilla with orange extract. The citrus brightens the flavor and makes the cake feel lighter, which is ideal for spring celebrations.
Spiced Holiday Twist
Add a pinch of ground cinnamon, nutmeg, and a splash of almond extract. The spices give the cake a warm, comforting aroma that’s reminiscent of holiday baking. This version works well for holiday gatherings.
Berry‑Burst Variation
Fold in ½ cup dried cranberries or raisins before baking. The dried fruit adds chewiness and a burst of tart sweetness that contrasts nicely with the marshmallows. A perfect addition for a festive look.
Storing and Bringing It Back to Life
Fridge Storage
Wrap the cooled cake tightly in plastic wrap and store it in the refrigerator for up to three days. The cake stays moist, and the glaze stays glossy. When you’re ready to serve, let it sit at room temperature for 15 minutes to soften slightly.
Freezer Friendly
Slice the cake into individual portions and place each slice on a parchment‑lined tray. Freeze until solid, then transfer to a freezer bag. The cake can be kept frozen for up to two months. Thaw in the refrigerator overnight before serving.
Best Reheating Method
To revive a frozen or refrigerated slice, microwave on medium for 15–20 seconds, or warm in a 300°F oven for 5 minutes. Add a tiny splash of water before reheating to create steam, which brings back the cake’s original moisture and softens the glaze.