Picture this: it’s a Saturday morning, the house is still half asleep, and you’ve just spilled a whole pot of honey onto the kitchen floor while trying to juggle a pan of coffee, a bag of flour, and a half‑awake toddler. That chaotic scene could have been the end of your day, but instead it sparked a revelation—what if the mess itself could become the secret ingredient that turns an ordinary cinnamon roll into a legendary, melt‑in‑your‑mouth masterpiece? I dare you to taste this and not go back for seconds, because the moment that sticky honey drizzles into the dough, it creates a caramel‑kissed sweetness that no store‑bought version can ever match.
The first time I pulled these rolls out of the oven, the entire kitchen was drenched in a perfume that could have convinced a pastry chef to quit his job and become a home baker. Imagine warm butter melting into the crust, cinnamon spiraling like a fragrant ribbon, and a glaze of cream‑cheese frosting that spreads like velvet over each roll, catching the light and the eyes of anyone within a five‑foot radius. You hear the soft sigh of the oven door closing, the faint crackle of caramelizing sugars, and the muted thud of a spoon tapping the mixing bowl as you stir in a splash of vanilla that feels like a secret handshake with the gods of flavor.
Most cinnamon roll recipes out there are a tangled mess of vague measurements, missing steps, and a frosting that either freezes solid or turns into a sugary puddle. This version stands out because it embraces simplicity without sacrificing depth, using just the core ingredients—flour, yeast, eggs, butter, honey, a trio of sugars, cinnamon, vanilla, and a decadent cream‑cheese frosting—to build layers of texture and taste that are both familiar and wildly new. The dough is buttery and tender, yet it holds its shape like a perfectly choreographed ballet; the filling is sweet but never cloying, and the frosting adds a tangy, creamy finish that makes every bite feel like a celebration.
And here’s the kicker: there’s a technique hidden in plain sight that most home bakers overlook—a brief, low‑heat “proof” of the dough that coax the yeast into a gentle rise, ensuring those rolls stay fluffy from edge to core. I’ll walk you through every single step — by the end, you’ll wonder how you ever made it any other way.
What Makes This Version Stand Out
- Flavor Explosion: The honey‑infused dough gives a natural sweetness that pairs perfectly with the brown sugar‑cinnamon swirl, creating a depth you won’t find in any store‑bought mix.
- Texture Mastery: A buttery crumb that’s soft on the inside and just a whisper of crisp on the outside, thanks to the gentle low‑heat proof and a final high‑heat bake.
- Simplicity at Its Core: Only nine essential ingredients, all pantry staples, meaning you won’t need a trip to the specialty store.
- Ingredient Quality: Using real butter, fresh eggs, and pure vanilla extracts turns a basic roll into a gourmet experience.
- Crowd‑Pleaser Factor: Even the pickiest eaters—kids, grandparents, and that one friend who claims “nothing beats a donut”—will be lining up for seconds.
- Make‑Ahead Potential: The rolls freeze beautifully, and the frosting can be stored separately, so you can prep ahead for brunch or holiday mornings.
- Visual Appeal: A glossy, caramel‑brown top that looks as good on Instagram as it tastes on the tongue.
- Versatile Base: The neutral dough makes it easy to swap in flavors later, from pumpkin spice to chocolate hazelnut.
Inside the Ingredient List
The Flavor Base
The honey isn’t just a sweetener; it’s a humectant that locks moisture into the dough, keeping each roll soft long after they’ve cooled. If you ever skip the honey, you’ll notice the rolls dry out faster, especially around the edges where the heat concentrates. You can swap honey for maple syrup if you prefer a deeper, woody note, but remember that maple will add a subtle amber hue to the dough.
The Texture Crew
Flour is the structural backbone, and using all‑purpose flour gives just the right amount of gluten development for a light, airy crumb. Eggs act as both binder and leavening aid, contributing richness and a slight golden hue. Butter, melted and incorporated at the right temperature, coats the flour particles, resulting in those flaky layers that separate with a soft sigh.
The Unexpected Star
Brown sugar brings a molasses undertone that contrasts beautifully with the bright, crystalline white sugar, which adds crunch on the surface and a quick burst of sweetness. The trio of sugars—white, brown, and powdered—creates a symphony of textures: crunchy, tender, and silky. If you’re watching sugar, you can reduce the brown sugar by a tablespoon without sacrificing flavor.
The Final Flourish
Cinnamon is the headline act, but it’s the vanilla that rounds out the flavor, adding a fragrant backdrop that makes the spice feel less harsh. Cream cheese in the frosting adds a tang that cuts through the sweetness, while powdered sugar provides the smooth, glossy finish. For a dairy‑free version, substitute the cream cheese with a plant‑based alternative and use coconut oil in place of butter, but expect a slightly different mouthfeel.
Everything's prepped? Good. Let's get into the real action…
The Method — Step by Step
- In a large mixing bowl, whisk together the flour and active dry yeast until they are evenly distributed. The yeast should look like a fine powder; if you see clumps, break them up with a fork. This dry blend ensures an even rise later on. Kitchen Hack: Sift the flour and yeast together; the extra aeration gives a lighter crumb.
- In a separate saucepan, melt the butter over low heat, then stir in the honey until fully combined. Remove from heat and let the mixture cool just enough so that when you add the eggs, they don’t scramble. This warm‑but‑not‑hot mixture is the secret to a glossy, tender dough.
- Add the eggs, white sugar, and vanilla extract to the butter‑honey blend, whisking vigorously until the mixture is smooth and pale. You’ll notice the color lighten—this is the sugar dissolving and the eggs emulsifying, creating a velvety base that will coat every flour particle.
- Pour the wet mixture into the dry flour‑yeast blend. Using a wooden spoon or a stand‑mixer on low, combine until a shaggy dough forms. At this stage, the dough will look a bit sticky; that’s perfectly normal and a sign that the honey is doing its job.
- Turn the dough onto a lightly floured surface and knead for about 5‑7 minutes until it becomes smooth and elastic. The dough should spring back when pressed with a fingertip. Watch Out: Over‑kneading can make the rolls tough; stop when the dough feels supple and slightly tacky.
- Place the dough in a lightly greased bowl, cover with a clean kitchen towel, and let it proof in a warm (about 85°F/29°C) spot for 45 minutes, or until doubled in size. If your kitchen is cool, pop the bowl in a turned‑off oven with the light on—yeast loves that gentle warmth.
- While the dough rises, prepare the filling. In a small bowl, combine the brown sugar, cinnamon, and a pinch of melted butter (just enough to bind). Stir until it forms a crumbly paste that clings to your fingers—this is the sweet, spiced core that will melt into the rolls.
- Once the dough has doubled, punch it down gently to release excess air, then roll it out on a parchment‑lined sheet into a rectangle about 1/4‑inch thick. Spread the cinnamon‑brown‑sugar mixture evenly over the surface, leaving a tiny border around the edges. Then, roll the dough tightly from the long side, like you’re making a jelly roll, and slice into 12 even pieces using a sharp serrated knife.
- Arrange the sliced rolls in a greased 9‑inch baking dish, leaving a little space between each for expansion. Cover again and let them rise for a second time, about 30 minutes. Meanwhile, preheat your oven to 350°F (175°C). When the rolls have puffed up, bake for 20‑25 minutes, or until the tops are golden‑brown and you hear a faint crackle as the sugars caramelize. Kitchen Hack: Rotate the pan halfway through baking for an even golden top.
- While the rolls bake, whip the frosting. Beat the softened cream cheese with the remaining butter until fluffy, then gradually add powdered sugar, a splash of vanilla, and a pinch of honey for extra shine. The frosting should be smooth enough to spread but thick enough to hold its shape on the warm rolls.
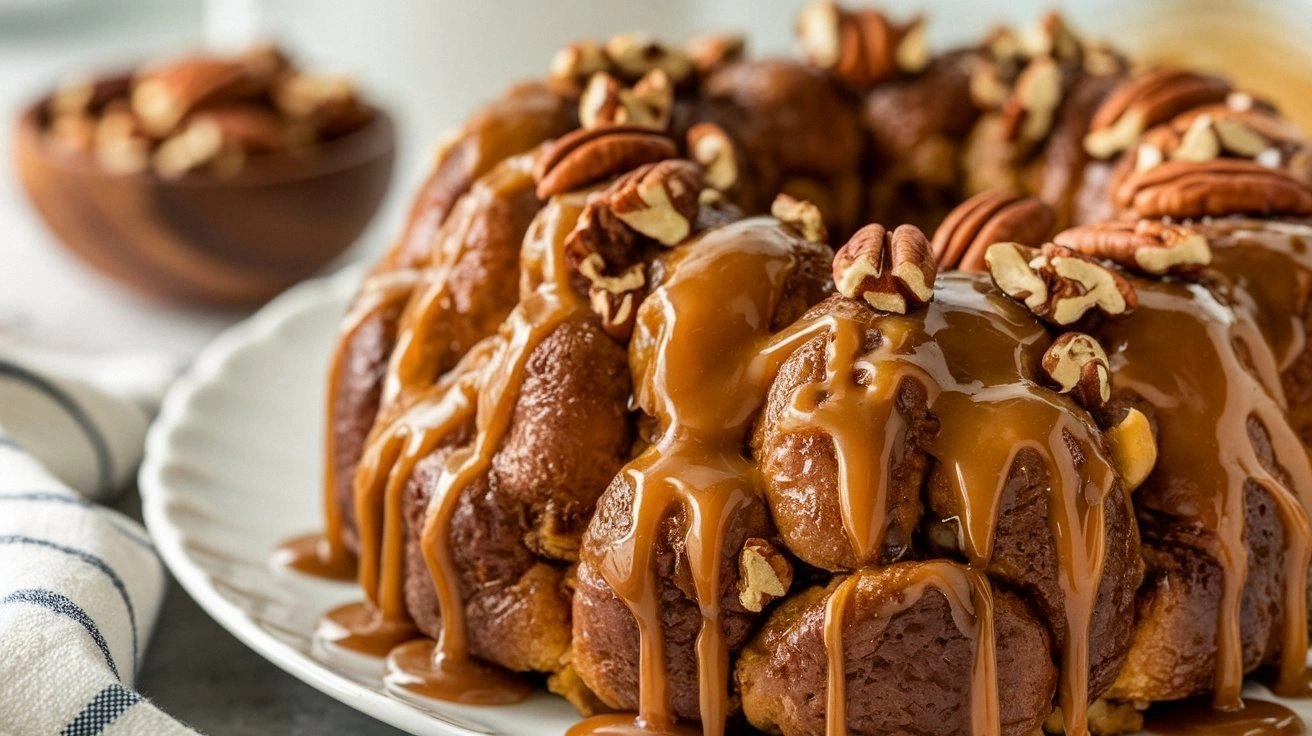
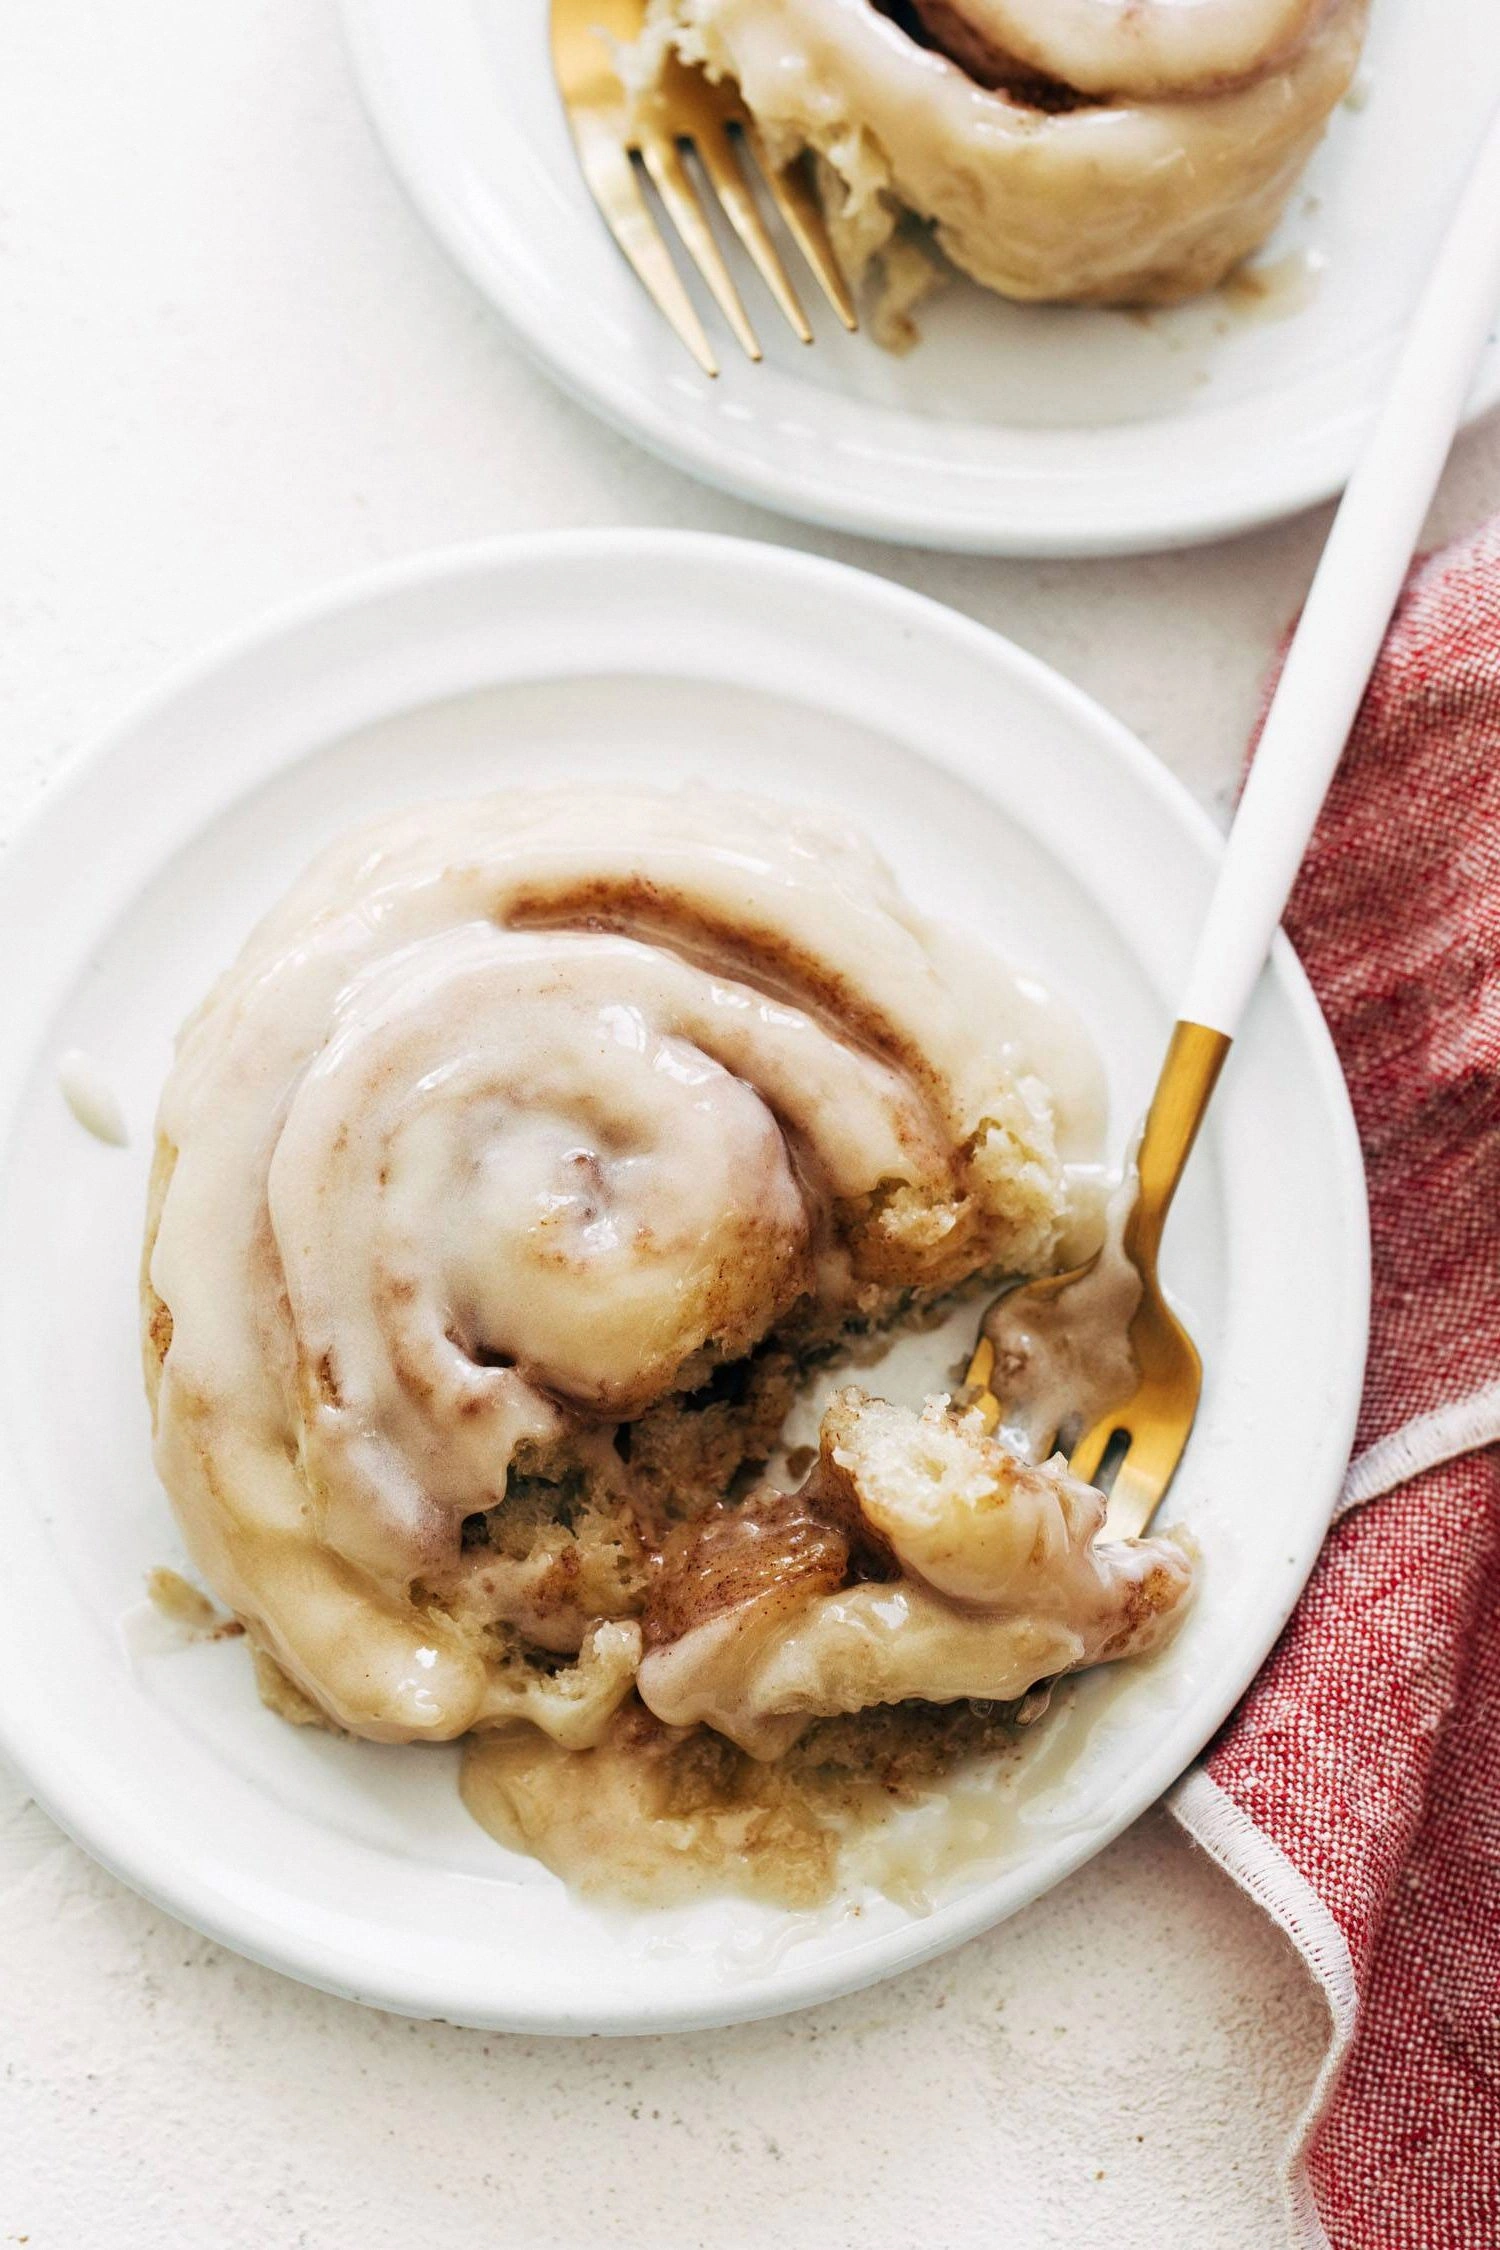
- When the rolls emerge from the oven, let them sit for five minutes, then drizzle the cream‑cheese frosting over each one, letting it melt into the nooks and crannies. The steam from the hot rolls will soften the frosting just enough to create a glossy, velvety glaze. Serve warm, and watch as the first bite sends a cascade of buttery, cinnamon‑sweet bliss across your palate.
Insider Tricks for Flawless Results
The Temperature Rule Nobody Follows
Never, ever let cold butter touch the dough after it’s been mixed. Keep your butter at room temperature, but not melted, when you’re preparing the filling. This ensures the butter layers stay distinct, creating those coveted flaky pockets. I once tried using chilled butter straight from the fridge and ended up with a dense, gummy roll—lesson learned.
Why Your Nose Knows Best
During the second proof, trust the aroma, not the clock. When the dough smells slightly sweet and yeasty, you’re ready to bake. If you wait too long, the dough can over‑proof, leading to a sour taste and a flat top. Your nose is the ultimate timer—if it smells like a bakery, go for it.
The 5‑Minute Rest That Changes Everything
Once out of the oven, let the rolls rest for exactly five minutes before frosting. This short pause allows the interior steam to settle, preventing the frosting from sliding off. The rolls stay moist, and the glaze adheres like a second skin. Skipping this step results in a soggy top that looks sad on the plate.
Butter‑Brush Finish
After the rolls have cooled slightly, brush them with a mixture of melted butter and a whisper of honey. This extra glaze adds a glossy sheen and a subtle sweet crunch on the edges. It’s the same trick pastry chefs use on croissants to achieve that irresistible shine.
Frosting Consistency Control
If your frosting is too runny, add a spoonful more powdered sugar; if it’s too stiff, whisk in a splash of milk or a tiny drizzle of honey. The goal is a spreadable yet thick texture that clings to each roll without pooling. I once over‑whipped the cream cheese, and the frosting turned grainy—adjusting with a bit of honey rescued it.
Creative Twists and Variations
This recipe is a playground. Here are some of my favorite ways to switch things up:
Maple‑Pecan Delight
Swap the honey for pure maple syrup in the dough and fold chopped toasted pecans into the filling. The nutty crunch pairs beautifully with the cinnamon, turning the rolls into an autumnal treat that feels like a hug in pastry form.
Chocolate Hazelnut Dream
Mix a tablespoon of cocoa powder into the flour and add a swirl of hazelnut spread (think Nutella) into the center before rolling. The result is a decadent, chocolate‑kissed roll that satisfies even the most stubborn sweet tooth.
Lemon‑Blueberry Burst
Replace the cinnamon with lemon zest and fold fresh blueberries into the filling. The citrus brightens the flavor profile, while the berries add a juicy pop that contrasts the buttery dough.
Spiced Apple Cider
Incorporate a splash of apple cider into the wet ingredients and add a pinch of nutmeg and allspice to the cinnamon mix. The subtle fruit undertones make these rolls perfect for a cozy brunch.
Vegan Velvet
Swap the eggs for a flax‑egg (1 tbsp ground flaxseed + 3 tbsp water) and use coconut oil in place of butter. Use a vegan cream cheese alternative for the frosting. The texture stays fluffy, and the flavor remains indulgent.
Caramel‑Apple Swirl
Caramelize sliced apples with a bit of butter and brown sugar, then layer them into the roll before the final bake. The caramelized fruit creates pockets of gooey goodness that melt into the dough.
Storing and Bringing It Back to Life
Fridge Storage
Place cooled rolls in an airtight container and store them in the refrigerator for up to three days. The butter keeps them from drying out, and the frosting stays firm without becoming grainy. When you’re ready to eat, reheat a single roll in the microwave for 15‑20 seconds; the steam will revive the softness.
Freezer Friendly
Wrap each roll tightly in plastic wrap, then place them in a freezer‑safe bag. They’ll keep for up to two months. To serve, let them thaw overnight in the fridge, then bake at 300°F for 10 minutes or until warmed through. The frosting will soften perfectly as the roll heats.
Best Reheating Method
For a bakery‑fresh finish, preheat your oven to 350°F, place the rolls on a parchment sheet, and sprinkle a tiny splash of water around them before covering loosely with foil. Heat for 8‑10 minutes; the steam generated revives the interior while the foil protects the frosting from over‑melting.