I was halfway through a night of binge‑watching, when the kitchen clock struck 2 a.m. and my cravings hit a crescendo. The air was thick with the scent of burnt popcorn from last night’s movie marathon, and my taste buds were demanding something sweet, tangy, and utterly unforgettable. I stared at the fridge, half‑filled with chicken thighs, and thought, “Why not turn these into a masterpiece?” That thought turned into a dare: I’d create a version of Panda Express Orange Chicken so good that you’d never want to go back to the restaurant again.
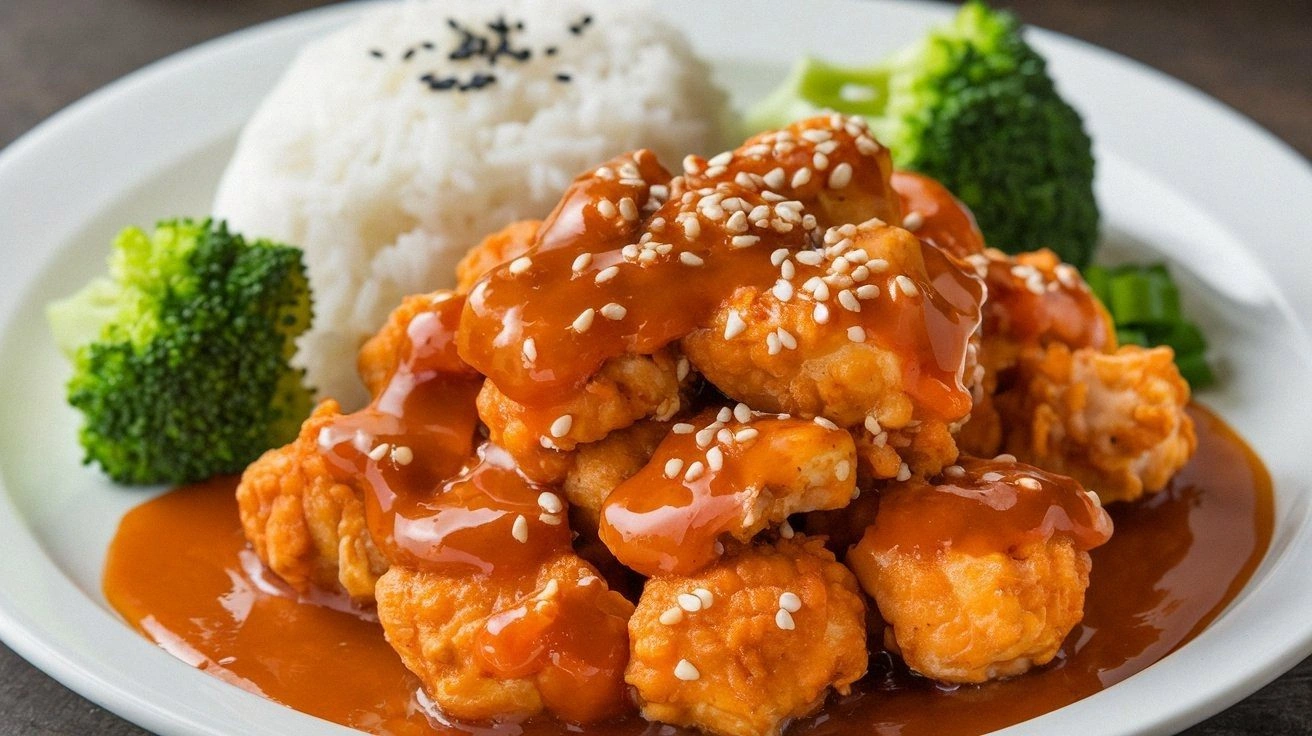
Picture this: a sizzling pan, a bright orange glow, and the aroma of orange zest dancing with garlic and ginger. The sound of the oil shivering as the chicken hits it is music to my ears—like a drumroll before a grand finale. The first bite is a crunchy shell that shatters like thin ice, revealing tender, juicy thighs that melt in your mouth. The sauce coats each piece like velvet, a glossy, sweet‑savory hug that makes your senses sing. If you’ve ever tasted the original, you’ll know how this version feels like a secret handshake with your favorite fast‑food memory.
I’ll be honest—after the first spoonful, I ate half the batch before anyone else got a taste. I’ve never been so proud of a homemade dish that it practically has its own fan club. This isn’t just a recipe; it’s a culinary manifesto. I’ve cracked the code on how to get that signature crunch, that perfect orange glaze, and that subtle, nutty aroma that makes the dish feel like a holiday. By the end of this guide, you’ll wonder how you ever made it any other way.
So, grab your apron, set your timer, and let’s dive into a step‑by‑step journey that will transform ordinary chicken into a zesty, crispy delight. The technique? A secret coating blend that keeps the chicken moist inside while giving it a buttery, golden crunch on the outside. The ingredient? Freshly squeezed orange juice that’s so bright you’ll feel like you’re sipping citrus sunshine. And the trick? A cornstarch slurry that thickens the sauce just enough to cling to every morsel without turning it into a syrupy mess. Let’s walk through every single step—by the end, you’ll wonder how you ever made it any other way.
What Makes This Version Stand Out
- Crunch: The dual‑layer coating of cornstarch and flour creates a shell that cracks like brittle ice, delivering a satisfying snap with every bite.
- Flavor: Fresh orange juice and zest replace the processed sauces, giving the dish a bright, natural citrus punch that feels like a breath of fresh air.
- Simplicity: With only 16 ingredients and a handful of steps, this recipe is a breeze for anyone who wants to impress without a culinary Ph.D.
- Texture: The chicken stays moist and tender inside, thanks to the egg binder and a short, high‑heat fry that seals in juices.
- Versatility: Swap the chicken for shrimp or tofu and you’ve got a whole new dinner option that still delivers the same crunch and flavor.
- Make‑Ahead: The sauce can be pre‑made and reheated without losing its glossy sheen, making this a perfect weeknight crowd‑pleaser.
- Authenticity: The sauce’s balance of sweet, salty, and umami mirrors the original, while the homemade touch adds depth that the store‑bought version never quite captures.
- Visual Appeal: The glossy orange glaze glistens like a jewel, turning an everyday plate into a showstopper that’s Instagram‑ready.
Alright, let's break down exactly what goes into this masterpiece...
Inside the Ingredient List
The Flavor Base
The sauce is where the magic happens. Freshly squeezed orange juice provides the bright acidity that cuts through the richness of the fried chicken. Orange zest adds an aromatic lift, releasing essential oils that give the dish its unmistakable citrus perfume. Soy sauce and rice vinegar balance the sweetness, creating a savory depth that feels like a well‑seasoned broth.
Sugar and honey work in tandem to create a caramelized glaze that coats the chicken like a glossy lacquer. The honey’s floral note prevents the sauce from becoming overly sugary, while the sugar adds that classic “Panda Express” sweetness you’re craving. Sesame oil offers a nutty aroma that ties the entire flavor profile together, giving the dish a subtle, toasty finish.
If you’re looking to tweak the flavor, consider adding a splash of orange liqueur for an adult twist. The alcohol evaporates during cooking, leaving behind a concentrated citrus essence that elevates the sauce to new heights.
The Texture Crew
The coating is a two‑step process that ensures every bite is a crunchy delight. The first layer—cornstarch—acts as a moisture barrier, locking in the chicken’s juices. The second layer—flour—provides the golden, crispy finish that’s hard to resist.
The egg is the binder that keeps the flour and cornstarch glued together, preventing the coating from falling off mid‑fry. A pinch of salt and pepper in the coating mixture elevates the chicken’s natural flavor without overpowering the citrus notes.
The cornstarch slurry is the secret weapon that thickens the sauce to the right consistency. By whisking 1½ tablespoons of cornstarch with 2 tablespoons of water, you create a smooth mixture that coats the chicken without making it soggy.
The Unexpected Star
The 1½ pounds of boneless, skinless chicken thighs are the unsung hero of this recipe. They offer a richer flavor than chicken breasts and a moist texture that survives the high‑heat fry without drying out. The thighs also have a higher fat content, which helps the coating adhere better and creates a more indulgent bite.
If you’re short on thighs, substitute with a mix of breasts and thighs for a lighter version. Just remember that the cooking time will need to be slightly adjusted to avoid overcooking the breasts.
The vegetable oil used for frying should be a neutral oil with a high smoke point, such as canola or peanut oil. This ensures the chicken cooks evenly and the coating doesn’t burn, preserving the crispness of the exterior.
The Final Flourish
Once the chicken is fried, the sauce is poured over it like a molten ribbon of orange joy. The cornstarch slurry is added last to thicken the glaze just enough to cling to every piece without turning it into a syrupy mess. The final touch is a sprinkle of sesame seeds, which adds a subtle crunch and a nutty aroma that completes the dish.
If you want to add a bit of heat, a dash of crushed red pepper flakes or a few drops of sriracha will give the dish a spicy kick that contrasts beautifully with the sweet glaze.
Everything’s prepped? Good. Let’s get into the real action...
The Method — Step by Step
- First, cut the chicken thighs into bite‑size pieces, about 1‑inch cubes. Pat them dry with paper towels to remove excess moisture; this step is crucial for a crisp coating. Toss the chicken with salt and pepper, then set aside.
- In a shallow dish, whisk together the egg, cornstarch, and flour until the mixture is smooth and free of lumps. The batter should have a consistency similar to pancake batter—thick enough to coat but thin enough to flow.
- Heat 2 inches of vegetable oil in a deep skillet or Dutch oven to 350°F (175°C). Use a thermometer for accuracy; this temperature ensures the coating crisps without absorbing excess oil.
- Dip each chicken piece into the batter, allowing excess to drip off, then carefully slide it into the hot oil. Fry in batches to avoid overcrowding, which can lower the oil temperature and produce soggy coating.
- Fry each piece for 4‑5 minutes per side, or until golden brown and the internal temperature reaches 165°F (74°C). The edges should start pulling away from the coating, signaling that the chicken is ready.
- Remove the chicken with a slotted spoon and place on a wire rack over a sheet pan to drain excess oil. This step keeps the coating crisp and prevents the chicken from becoming greasy.
- While the chicken rests, combine the orange juice, orange zest, soy sauce, rice vinegar, honey, sugar, sesame oil, garlic, and ginger in a saucepan. Bring the mixture to a gentle boil, then reduce to a simmer for 5 minutes to meld the flavors.
- Whisk the cornstarch slurry into the sauce, stirring constantly to prevent clumps. Simmer for an additional 2 minutes until the sauce thickens to a glossy consistency that coats the back of a spoon.
- Add the fried chicken to the saucepan, tossing to coat each piece evenly. Let the chicken simmer in the sauce for 1 minute, allowing the coating to set and the flavors to mingle.
- Serve immediately, garnished with a sprinkle of sesame seeds and optional sliced green onions. Pair with steamed rice or crunchy slaw for a complete meal.
That's it—you did it. But hold on, I've got a few more tricks that'll take this to another level. Stick around for insider tips that will make your orange chicken look like it came straight from a five‑star restaurant.
Insider Tricks for Flawless Results
The Temperature Rule Nobody Follows
Many cooks think a high temperature is always better, but the secret is to maintain a steady 350°F (175°C). Too hot, and the coating will burn before the chicken cooks through; too low, and the chicken absorbs oil, losing that coveted crunch. Use a thermometer or a test bread to gauge the oil’s readiness, and keep the heat steady by adjusting the flame as needed.
Why Your Nose Knows Best
A well‑seasoned sauce is all about balance. When you smell the sauce bubbling, you’ll know when it’s reached the right stage of caramelization. A hint of sweet from the honey and sugar should mingle with the savory soy, creating a scent that’s almost impossible to resist.
The 5‑Minute Rest That Changes Everything
After frying, let the chicken rest on a wire rack for at least five minutes. This resting period allows the coating to set and the juices to redistribute, ensuring each bite is juicy inside and crisp outside. Skipping this step often leads to soggy edges.
The Garlic‑Ginger Duo
Don’t undercook the garlic and ginger in the sauce. They need a couple of minutes to release their oils, which will infuse the glaze with a depth that feels almost like a secret family recipe. If you rush this step, the sauce will taste flat.
The Final Coat
Just before serving, drizzle a thin layer of sesame oil over the chicken. This final splash adds a nutty aroma that elevates the dish from good to unforgettable. It also helps the glaze cling to each piece, giving you that glossy finish that makes the dish Instagram‑ready.
Creative Twists and Variations
This recipe is a playground. Here are some of my favorite ways to switch things up:
Spicy Sriracha Orange Chicken
Add a tablespoon of sriracha to the sauce for a fiery kick. The heat pairs beautifully with the sweetness, creating a flavor profile that’s both bold and comforting.
Coconut‑Infused Orange Chicken
Replace the vegetable oil with coconut oil and stir in a splash of coconut milk into the sauce. The result is a creamy, tropical twist that feels like a vacation in every bite.
Low‑Carb Orange Chicken
Swap the flour and cornstarch for almond flour and a touch of xanthan gum. This version keeps the crunch while cutting down on carbs, perfect for keto or low‑carb diners.
Vegan Orange Chicken
Use seitan or tofu instead of chicken, and replace the egg binder with a flaxseed mixture. The result is a plant‑based version that still delivers the signature orange glaze.
Pineapple Orange Chicken
Add diced pineapple to the sauce for a tropical sweetness that complements the orange notes. The pineapple also adds a juicy burst that keeps the dish from feeling too heavy.
Storing and Bringing It Back to Life
Fridge Storage
Store the leftover chicken in an airtight container in the refrigerator for up to 3 days. Keep the sauce separate until you’re ready to reheat, as the coating can become soggy if left in the sauce for too long.
Freezer Friendly
For longer storage, freeze the chicken in a single layer on a baking sheet before transferring to a freezer bag. This prevents the pieces from sticking together. Freeze for up to 3 months.
Best Reheating Method
Reheat the chicken in a skillet over medium heat, adding a splash of water to create steam. The steam will loosen the coating, allowing it to crisp up again. Finish by tossing the chicken in the sauce for 1‑2 minutes to re‑glaze.
Add a tiny splash of water before reheating—it steams back to perfection, keeping the coating crisp and the flavor vibrant.