I was in the middle of a brunch rush, the kitchen smelling like burnt toast, when I realized my regular waffle batter had turned into a sticky, soggy mess. The batter had clumped, the batter had clumped, and the timer was ticking. That moment of panic sparked a frantic search for a rescue recipe, and I stumbled onto almond flour waffles with coconut cream. The thought of a light, nutty waffle with a creamy coconut crown sounded like a culinary salvation.
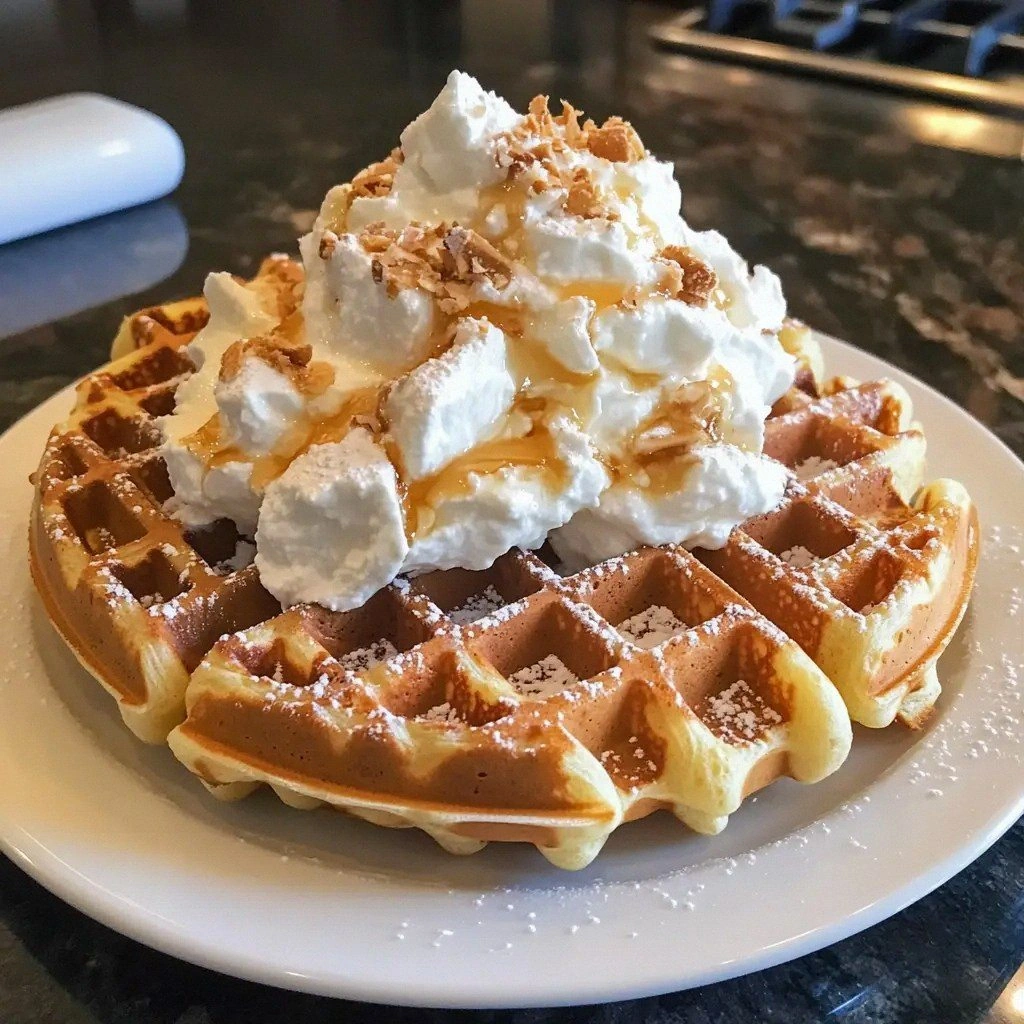
The first time I tasted these waffles, the aroma of toasted coconut danced in the air, the edges crisped like golden shards, and the interior was airy as a cloud. The sound of the waffle iron sizzling was a symphony, the crunch was satisfying, and the flavor profile was a perfect balance of sweet, nutty, and tropical. The silky coconut cream, whipped to a cloud‑like consistency, draped over the waffles like a gentle waterfall. The gentle sweetness of honey or maple syrup added a subtle caramel note that lingered on the palate.
What makes this version stand out is that it marries the wholesome texture of almond flour with the luxurious richness of coconut, all while remaining gluten‑free and low‑carb. The batter is surprisingly easy to handle, thanks to the combination of almond milk and coconut oil, which keeps it from drying out. The coconut cream topping adds a decadent layer that turns a simple breakfast into a dessert‑like experience. And best of all, the recipe is forgiving—if you’re a waffle novice, you’ll still come out with golden, fluffy results.
I’ll be honest—after the first batch, I ate half before anyone else could touch them. But that’s the promise of this recipe: it’s so irresistible that you’ll want to taste it again and again. I dare you to taste this and not go back for seconds. Picture yourself pulling these from the iron, the kitchen filling with the scent of toasted coconut and vanilla. Let me walk you through every single step—by the end, you’ll wonder how you ever made it any other way.
What Makes This Version Stand Out
- Flavor: This waffle delivers a nutty base that sings with the sweet, tropical coconut cream. The subtle vanilla lift ties everything together for a balanced taste.
- Texture: The almond flour keeps the batter moist and airy, while the coconut oil prevents drying and adds a buttery finish. The result is a waffle that is crispy on the outside and tender inside.
- Simplicity: No special equipment beyond a standard waffle iron is required, and the ingredients are pantry staples. Even a novice can whip up these waffles without a culinary degree.
- Crowd‑pleaser: Friends and family rave when they see the golden waffles topped with cloud‑like coconut cream. The visual appeal is almost as enticing as the taste.
- Health‑friendly: Gluten‑free, low‑carb, and high‑protein, these waffles are a smart choice for a balanced breakfast. The natural fats from almonds and coconut are heart‑healthy.
- Make‑ahead potential: The batter can be prepared a day ahead and refrigerated, and the waffles reheat beautifully in a toaster oven. This makes the recipe perfect for busy mornings.
Inside the Ingredient List
The Flavor Base
Almond Flour is the star of the show, giving the waffles a nutty depth that feels both familiar and exotic. When you sift it through a fine sieve, you remove any lumps that could compromise the batter’s smoothness. If you’re in a hurry, you can use a pre‑sifted brand, but the extra effort pays off in texture. A slight pinch of sea salt brightens the almond flavor and balances the sweetness that follows.
Baking Powder is the quiet hero that creates lift. Even a small amount of this leavening agent turns the batter from dense to cloud‑like. If you’re sensitive to sodium, look for a low‑sodium version; just double the amount to compensate for the salt you’re omitting. Keep it separate from the wet ingredients until you’re ready to combine, otherwise the powder can lose its potency.
The Texture Crew
Eggs are the glue that holds everything together while also adding protein and a slight richness. Whisk them until the whites start to froth; this aeration is essential for a light crumb. For a vegan version, replace eggs with a flaxseed mixture (1 tablespoon ground flaxseed + 3 tablespoons water) and let it sit for a minute to gel.
Almond Milk is the liquid that keeps the batter from becoming too thick. Choose an unsweetened variety to avoid overpowering the coconut flavor. If you prefer a thicker consistency, use a half‑and‑half almond milk or reduce the liquid slightly. The milk also helps the batter coat the iron evenly, preventing uneven browning.
The Unexpected Star
Coconut Oil is more than just a fat; it infuses a subtle, sweet coconut undertone that complements the cream topping. Because it’s solid at room temperature, melt it gently in a saucepan or microwave until it liquefies. If you’re looking to cut calories, you can substitute half the amount with a neutral oil like grapeseed, but the coconut flavor will be noticeably less pronounced.
Vanilla Extract adds depth and warmth to the batter. A single teaspoon is enough to lift the entire dish. If you’re a fan of vanilla, consider using vanilla bean paste for an extra burst of flavor, but the cost and effort might outweigh the benefit for this simple recipe.
The Final Flourish
Coconut Cream is the crowning glory that turns these waffles into a dessert‑like experience. Whip it until it holds stiff peaks, then sweeten lightly with honey or maple syrup for a glossy finish. If you’re allergic to nuts, look for a coconut cream made from pure coconut water and fruit; it’s a safer alternative that still delivers the same silky texture.
Honey or Maple Syrup is optional but recommended for a touch of natural sweetness. Use a light honey or a mild maple syrup to keep the tropical profile from being overpowered. If you prefer a lower glycemic index, a splash of stevia or a sugar substitute can work, but be mindful of the amount to avoid a bitter aftertaste.
Everything's prepped? Good. Let's get into the real action...
The Method — Step by Step
- Preheat the waffle iron to medium‑high heat, letting it reach the optimal temperature before the batter hits the metal. The preheat ritual is crucial; a cold iron will produce soggy waffles that never crisp up. While the iron is warming, lightly dust the plates with a small amount of coconut oil or a non‑stick spray to prevent sticking. This step may seem trivial, but it’s the difference between a flaky exterior and a gummy one. Remember, a hot iron is the foundation of a perfect waffle.
- In a large bowl, whisk together the dry ingredients: almond flour, baking powder, salt, and vanilla extract. Stir until the mixture is uniform, like a fine sifted sand. A well‑mixed dry base ensures even distribution of leavening agents and flavor. If you notice any lumps, give it a quick pass through a fine sieve. This will help the batter remain silky and prevent clumps in the final product.
- In a separate bowl, beat the eggs until the whites are slightly frothy. This airy base will help the waffles rise and keep them fluffy inside. The frothiness also helps incorporate the dry ingredients more evenly. If you’re using a vegan egg substitute, whisk it until it’s light and airy before adding to the batter. The goal is a batter that feels like a cloud in your hands.
- Add the almond milk to the eggs and stir until fully blended. The liquid will thin the batter slightly, making it easier to pour into the iron. This step also helps the batter settle and prevents it from becoming too thick. If you notice the mixture is too runny, add a tablespoon of almond flour to thicken it. A well‑balanced consistency is key for even cooking.
- Melt the coconut oil in a small saucepan over low heat or in a microwave until liquid. The warm oil will integrate smoothly, preventing lumps and adding a buttery coconut undertone. Once melted, let it cool slightly so it doesn’t scramble the eggs when added. This subtle step ensures the batter remains silky and free of clumps. The aroma of coconut oil will also hint at the tropical finish to come.
- Pour the wet mixture into the dry batter, whisking continuously until the batter is smooth and free of lumps. Let the batter rest for 5 minutes; this allows the almond flour to hydrate fully and the baking powder to activate. During this rest, the batter will thicken slightly, which is normal. If it looks too thick, add a splash of almond milk to reach the desired consistency. The rest period also lets the flavors meld together beautifully.
- Lightly grease the preheated waffle iron with a small amount of coconut oil or a non‑stick spray. Spoon the batter onto the center of the iron, using a ladle or measuring cup for consistent portions. The batter should spread evenly; if it’s too thick, let it sit for a minute to loosen. A good rule of thumb is to use about 1/4 cup per waffle for a medium‑sized iron. The goal is a uniform thickness that cooks evenly.
- Close the lid and cook for 4–5 minutes, or until the waffles are golden brown and crisp on the edges. The sizzle should be audible, and the aroma of toasted coconut will fill the kitchen. Check for doneness by gently lifting a corner; it should release easily. If the edges are still pale, give them an extra minute. The final product should feel firm yet tender when pressed lightly.
- Remove the waffles and let them cool slightly on a rack. While still warm, top each waffle with a dollop of whipped coconut cream, drizzle a touch of honey or maple syrup if desired, and add fresh berries or a sprinkle of toasted coconut flakes for extra texture. The contrast between the hot waffle and cool cream creates a delightful mouthfeel. Serve immediately, or stack them in a shallow container with parchment between layers if you need to keep them warm for a short while. The result is a breakfast that feels like a dessert, yet is perfectly balanced.
That's it — you did it. But hold on, I've got a few more tricks that'll take this to another level...
Insider Tricks for Flawless Results
The Temperature Rule Nobody Follows
Many bakers think any temperature works, but the waffle iron’s heat must be just right. If it’s too low, the batter will spread too much and lose its shape; too high, and the exterior will burn before the interior cooks. I always set my iron to medium‑high and let it heat for a full 10 minutes. This gives a stable, even heat that yields crisp edges and a fluffy center. Remember, a hot iron is the secret sauce.
Why Your Nose Knows Best
As the waffles cook, the aroma will change from raw batter to toasted coconut and almond. Trust your nose; when you smell a nutty, caramelized scent, it means the batter is developing the right browning. If the smell is too sweet or raw, lower the heat slightly or reduce the batter amount. Your sense of smell is your most reliable indicator of doneness.
The 5‑Minute Rest That Changes Everything
After pouring the batter into the iron, let it sit for 5 minutes before covering the lid. This brief pause allows the flour to fully absorb the liquid and the leavening agents to activate. The result is a smoother batter that spreads evenly and cooks more uniformly. Skipping this step can lead to uneven textures and a gummy bite.
Don't Skip the Oil
Many people omit coconut oil to cut calories, but doing so will cause the batter to dry out and stick to the iron. A light coating of oil keeps the waffles from sticking and adds a subtle coconut flavor that complements the topping. If you’re strict about calories, use a neutral oil like grapeseed or avocado, but the flavor profile will shift.
Use a Silicone Spatula
When scraping the batter into the iron, a silicone spatula is your best friend. It slides easily, prevents batter from sticking to the edges, and gives you a clean, even spread. Metal utensils can scrape the iron’s surface and leave scratches that affect future cooking. A silicone spatula also resists heat and stays flexible.
Creative Twists and Variations
This recipe is a playground. Here are some of my favorite ways to switch things up:
Berry Burst
Swirl fresh blueberries or strawberries into the batter before cooking for a burst of color and natural sweetness. The berries will burst slightly, creating pockets of juicy flavor that pair beautifully with the coconut cream. Serve with a drizzle of lemon‑infused honey for a zesty kick.
Chocolate Drizzle
Melt a small amount of dark chocolate and drizzle it over the finished waffles. The chocolate will harden into a crunchy shell as it cools, adding a rich contrast to the silky coconut cream. A pinch of sea salt on top will amplify the chocolate’s depth.
Almond Butter Swirl
Fold a few tablespoons of almond butter into the batter before cooking. This gives the waffles an extra nutty flavor and a slightly denser crumb that holds up well to the cream topping. Top with a drizzle of maple syrup and a sprinkle of toasted almond slivers.
Spiced Cinnamon
Add half a teaspoon of ground cinnamon and a pinch of nutmeg to the dry ingredients. The warm spices will complement the coconut’s tropical note and give the waffles a comforting, autumnal vibe. Finish with a dusting of powdered sugar for a sweet finish.
Savory Twist
Replace the vanilla extract with a pinch of dried herbs like thyme or rosemary for a savory version. Serve with a dollop of Greek yogurt, a sprinkle of feta, and a drizzle of olive oil. This version is great for brunch or a light lunch, offering a balance of sweet and savory.
Low‑Carb Option
Swap almond flour for a blend of almond flour and coconut flour (1:1 ratio). The coconut flour will absorb more liquid, so reduce the almond milk by ¼ cup. This tweak lowers the carb count while maintaining the fluffy texture. The result is a keto‑friendly waffle that still feels indulgent.
Storing and Bringing It Back to Life
Fridge Storage
Store the cooked waffles in an airtight container in the refrigerator for up to 3 days. Keep them on a rack or separate with parchment paper to maintain crispness. When ready to serve, let them sit at room temperature for 10 minutes before reheating.
Freezer Friendly
Place the waffles on a baking sheet and freeze until solid, then transfer to a freezer bag. They can stay in the freezer for up to 2 months. When you’re ready to eat, pop a waffle out and toast it in a toaster or oven at 350°F for 5 minutes. The texture will be close to fresh.
Best Reheating Method
The oven is the gold standard for reheating waffles. Preheat to 350°F and place the waffles on a wire rack for 5–7 minutes, or until hot and crisp. If you prefer a quick fix, use a toaster, but the waffle may lose some of its original crispness. Add a splash of water or a drizzle of coconut oil before reheating to keep the exterior from drying out.