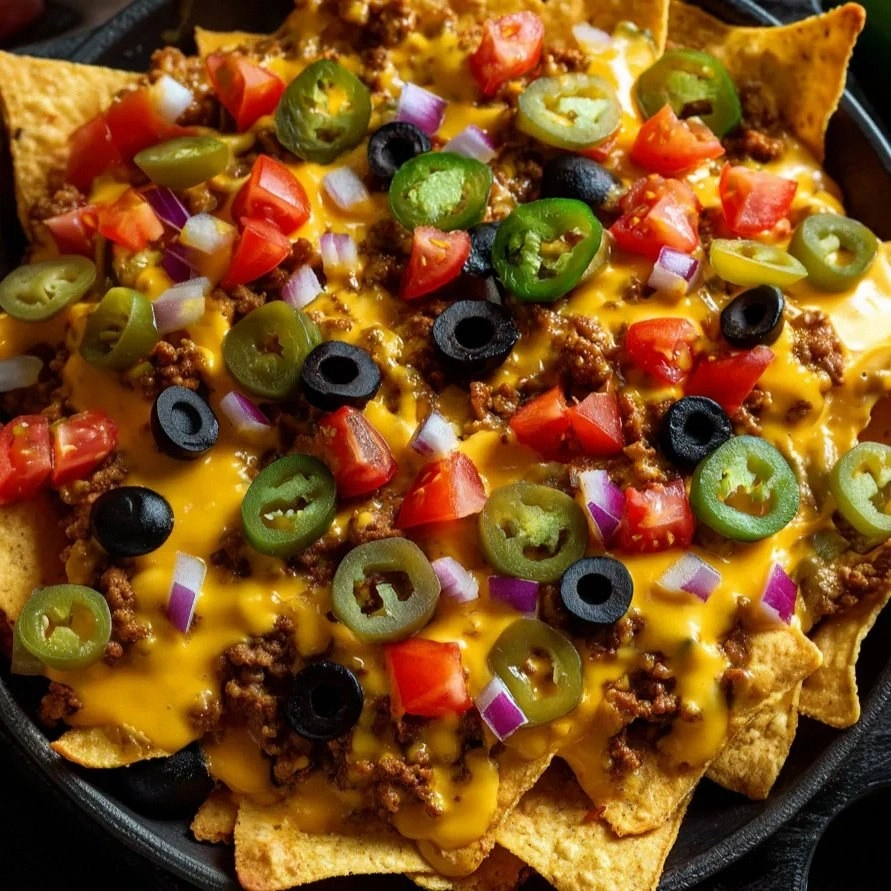
The next step is a game-changer: the way you melt the cheese matters. Too much heat and it burns; too little and it stays rubbery. The trick is to preheat the skillet over medium heat and let the tortilla sit for a minute before adding the cheese. This gives the cheese a chance to melt evenly, creating a gooey, golden layer that’s irresistible. The final touch? A light brush of oil on the outer edges to ensure a crispy, caramelized finish that will make your taste buds sing.
Let me walk you through every single step—by the end, you'll wonder how you ever made it any other way. I’m going to guide you through the process like we’re cooking side by side, with a few micro‑challenges along the way to keep things exciting. I’ll show you how to balance the flavors, how to achieve the perfect crisp, and how to add a finishing flourish that will wow anyone who sees it. This recipe is not just a meal; it’s an experience that will transform your kitchen routine into a culinary adventure. I promise you, the result will be worth every second spent in the kitchen. And if you’re ready, let’s get started.
What Makes This Version Stand Out
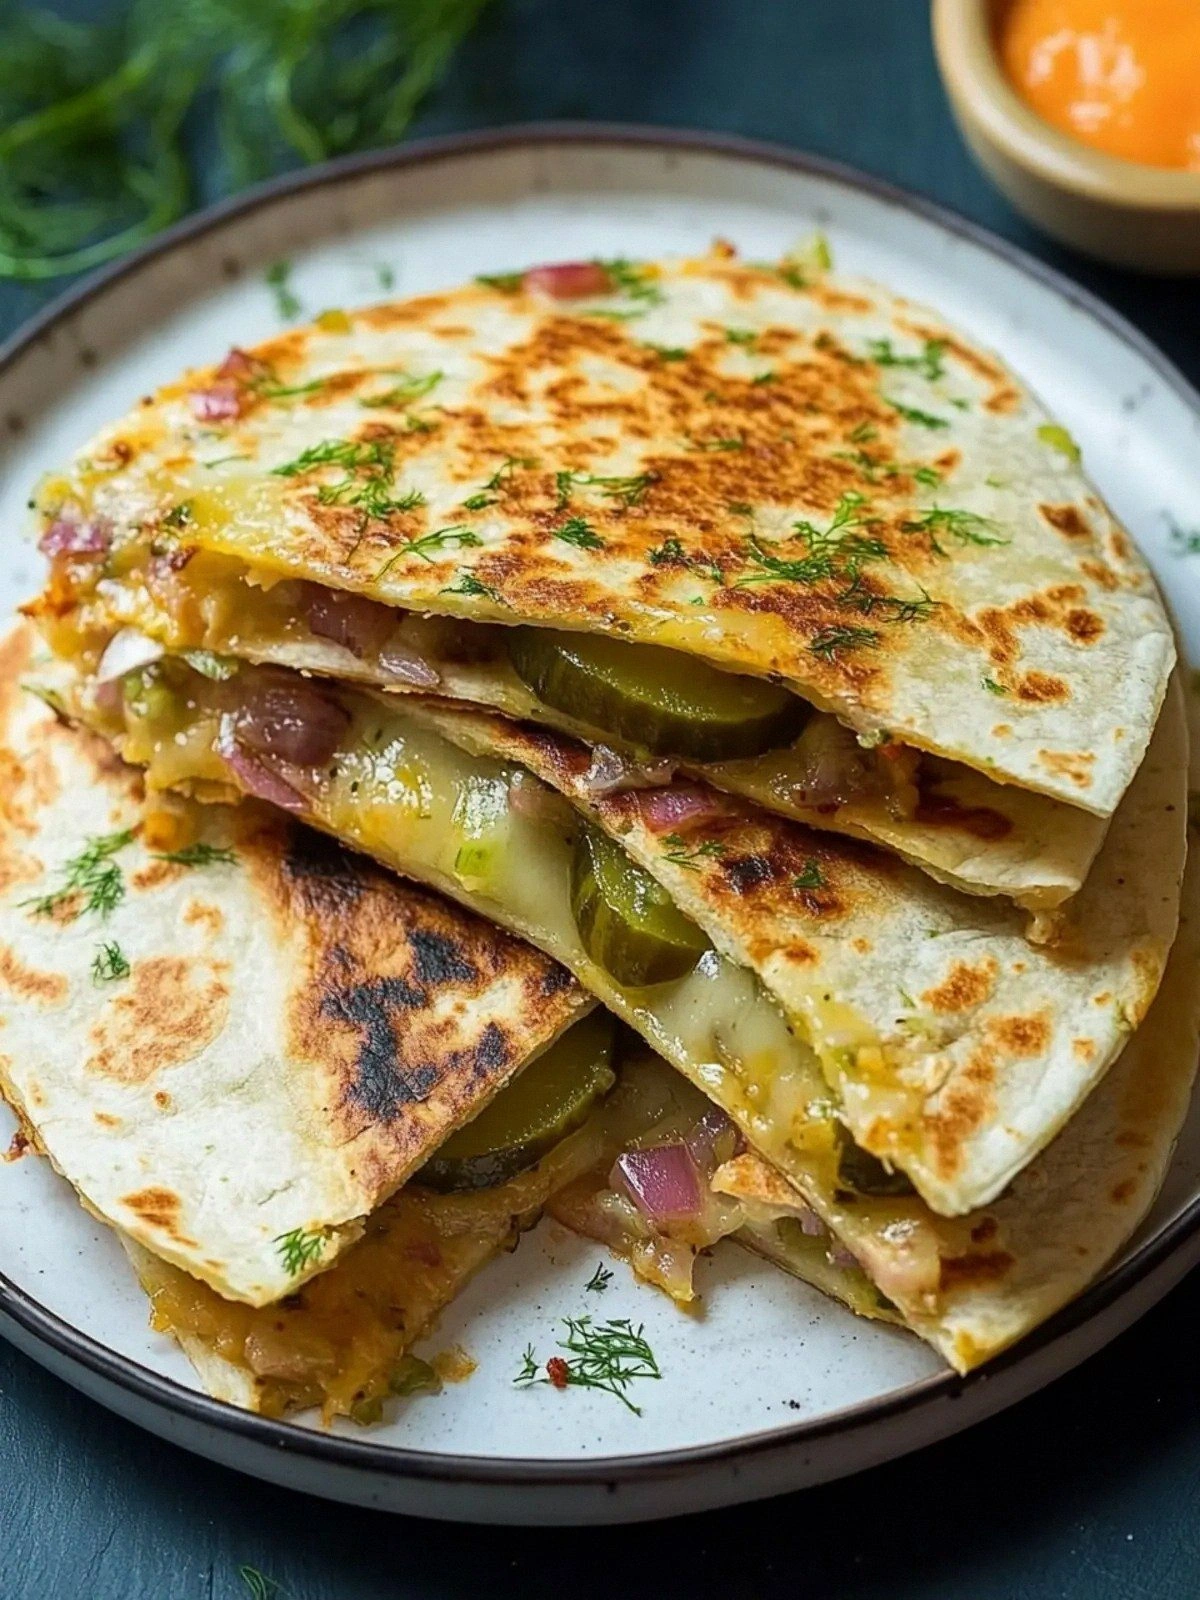
- Taste: The combination of sharp dill, creamy cheese, and tangy pickles creates a flavor profile that is both bold and balanced. The pickles add a refreshing bite that cuts through the richness, while the cheese provides a silky, indulgent base. The result is a snack that feels both comforting and exciting, a true culinary revelation. It’s a flavor that will keep you coming back for more.
- Texture: The crispy tortilla edges contrast beautifully with the molten cheese and crunchy pickle chips, delivering a multi‑sensory experience. The cheese melts into a velvety coating that clings to every bite, while the chips offer a satisfying crunch. This textural harmony makes each bite a delightful surprise, keeping you engaged from the first to the last bite.
- Simplicity: With only five ingredients, this recipe is a breeze to prepare, yet it delivers maximum flavor impact. No complex sauces or elaborate techniques—just a few quick steps that bring out the best in each component. It’s a recipe that even a novice can master.
- Uniqueness: The use of dill pickle chips as a key ingredient sets this dish apart from traditional quesadillas. This unexpected twist adds a fresh, zesty dimension that is rarely seen in snack recipes. It’s a fresh take that will surprise and delight your taste buds.
- Crowd Reaction: Friends and family will be amazed by the flavor burst and the crisp, golden crust. It’s the kind of dish that turns a casual gathering into a memorable culinary moment. The quesadilla’s playful twist will spark conversation and laughter.
- Ingredient Quality: Using high‑quality dill Havarti cheese and fresh pickle chips elevates the dish to gourmet status. The cheese’s creamy texture and the pickles’ bright flavor are essential to achieving the perfect balance. Quality ingredients make a noticeable difference in taste.
- Cooking Method: A simple stovetop pan‑frying technique ensures a crispy exterior while keeping the interior perfectly melted. The method is quick, easy, and effective, making it ideal for a busy schedule.
- Make‑ahead Potential: The quesadilla can be assembled ahead of time and reheated, making it a convenient option for parties or busy evenings. The flavors hold up well, and the crispness is restored with a quick pan or oven heat.
Inside the Ingredient List
The Flavor Base
At the heart of this quesadilla is the dill Havarti cheese, a creamy, semi‑hard cheese with a subtle nutty flavor that melts like a dream. The cheese’s mildness allows the dill pickle chips to shine without being overwhelmed. If you can’t find dill Havarti, a mild cheddar or Gruyère will work, but the flavor profile will shift slightly toward a sharper cheddar bite. The cheese’s high fat content ensures a silky melt, creating a luscious coating that feels indulgent yet balanced.
The Texture Crew
The wheat tortilla is the foundation that holds everything together. Its sturdy yet pliable nature allows for a crisp exterior while staying soft on the inside. A fresh tortilla will give you a better texture than one that’s been sitting in the pantry for weeks. The dill pickle chips add an unexpected crunch that punctuates the creamy cheese, giving each bite a satisfying snap. If you prefer a softer bite, you can replace the chips with sliced pickles, but the chip’s texture is integral to the signature feel of this dish.
The Unexpected Star
Dill pickle chips are the secret weapon that elevates this quesadilla from ordinary to extraordinary. Their bright green color and sharp dill flavor provide a burst of freshness that cuts through the richness of the cheese. The chips also contribute a delightful crunch that contrasts with the soft tortilla. If you can’t find dill pickle chips, you can crumble dill pickles or use dill pickle relish for a different texture, but the chip’s bite is irreplaceable.
The Final Flourish
Sour cream and ranch dressing are the finishing touches that bring the dish together. The sour cream’s tanginess balances the sharpness of the dill, while the ranch adds a subtle herbaceous note that ties everything together. Together, they create a creamy sauce that coats the tortilla like velvet, ensuring each bite is moist and flavorful. If you’re watching calories, you can replace ranch with a light Greek yogurt for a healthier option.
Everything's prepped? Good. Let's get into the real action. I’ll keep you on your toes with a few micro‑challenges that will make the cooking process feel like a game. Each step is designed to keep you engaged and to ensure the final product is flawless. If you’re ready, let’s dive in.
The Method — Step by Step
- Prep the Pan: Heat a nonstick skillet over medium heat until it’s hot but not smoking. Lightly spray with oil or spread a thin layer of butter for an extra crisp. Let the pan settle for about 30 seconds; this ensures an even cooking surface and prevents the tortilla from sticking. The moment the skillet is ready, you’ll hear a faint hiss that signals it’s just the right temperature. This is the moment of truth.
- Lay the Tortilla: Place the wheat tortilla on the skillet and let it warm for 10–12 seconds. This initial warming step helps the tortilla expand slightly and creates a golden base. Watch the edges; they should start to lift and develop a faint golden color. If the edges brown too quickly, lower the heat to medium‑low. This step is essential for achieving a crispy yet pliable crust.
- Add the Cheese: Sprinkle a generous amount of dill Havarti cheese across the entire surface of the tortilla. The cheese should cover the tortilla evenly, creating a thick, melty blanket. The cheese’s high fat content will melt smoothly, forming a creamy, golden layer that’s irresistible. Let the cheese melt for 30–45 seconds before adding the next layer.
- Incorporate the Pickle Chips: Evenly distribute the dill pickle chips over the melted cheese. The chips should sit just beneath the cheese, so they’re slightly coated but still visible. The crunch of the chips will give a delightful contrast to the soft cheese. Don’t overcrowd the tortilla; a moderate amount ensures every bite has the perfect balance of flavors.
- Top with Creamy Sauce: Drizzle a thin line of sour cream along the center of the tortilla. Follow with a drizzle of ranch dressing on top of the sour cream. The combination of both sauces will create a creamy, tangy coating that ties the flavors together. The sauce should be thin enough to seep into the cheese but thick enough to add a silky finish.
- Seal the Quesadilla: Carefully fold the tortilla in half, pressing gently to seal the edges. Use a spatula to press down firmly, ensuring the fillings are fully enclosed. If you’re worried about the tortilla sticking, you can lightly oil the spatula for a smooth flip. The sealed quesadilla should feel snug, with the fillings tightly packed inside.
- Cook the Sealed Side: Let the quesadilla cook for 3–4 minutes on the sealed side. The heat will melt the cheese further and allow the tortilla to crisp up. Keep an eye on the color; it should be a deep golden brown. If the tortilla starts to burn, lower the heat and cook for a few more minutes.
- Flip and Finish: Flip the quesadilla carefully and cook for an additional 2–3 minutes on the other side. The second side should develop a crisp, caramelized crust while the cheese remains perfectly melted. This is the moment when the aroma reaches its peak, filling the kitchen with a savory, buttery scent.
- Rest Before Cutting: Remove the quesadilla from the skillet and let it rest for 1–2 minutes. This brief pause allows the cheese to set slightly, making the quesadilla easier to slice. The rest also lets the flavors meld, creating a harmonious taste experience. Don’t rush; a short rest is crucial for the best bite.
- Serve and Enjoy: Slice the quesadilla into wedges and serve immediately while the cheese is still warm and gooey. Pair it with a side of fresh salsa or a light cucumber salad for a balanced meal. The first bite should feel like a crunchy, creamy explosion, followed by the tangy finish of dill pickle chips. Enjoy the moment of pure culinary bliss.
That's it — you did it. But hold on, I've got a few more tricks that'll take this to another level. The next section will dive into insider tips that will help you avoid common pitfalls and elevate the flavor even further. I promise you, these small tweaks will make a big difference.
Insider Tricks for Flawless Results
The Temperature Rule Nobody Follows
Many people think a high heat is the key to a crisp quesadilla, but that’s a myth. The right temperature is medium‑low, which allows the cheese to melt evenly without scorching the tortilla. If you’re unsure, test the skillet with a drop of water; it should dance and evaporate quickly. This subtle temperature control ensures a golden crust that’s crisp on the outside and creamy on the inside.
Why Your Nose Knows Best
As soon as the cheese starts to melt, the aroma will fill the kitchen, and you’ll know the quesadilla is almost ready. The smell of toasted cheese is a reliable indicator that the interior is perfectly cooked. Trust your senses; the aroma is your best cue to flip or finish cooking. This sensory checkpoint helps you avoid overcooking and ensures a juicy, flavorful result.
The 5‑Minute Rest That Changes Everything
After you remove the quesadilla from the skillet, let it rest for exactly five minutes. This brief pause allows the cheese to set slightly, making the quesadilla easier to slice without losing its gooey center. It also lets the flavors meld together, creating a richer taste experience. I’ve seen people cut their quesadilla immediately and end up with cheese spilling everywhere; the rest prevents that mess.
Use a Nonstick Skillet for Easy Release
A high‑quality nonstick skillet is essential for a smooth cooking process. It allows you to flip the quesadilla effortlessly and prevents the tortilla from sticking. If you’re using a stainless steel pan, add a generous amount of oil to ensure the tortilla releases easily. The result is a perfectly sealed quesadilla that stays together.
Keep the Pickle Chips Fresh
Fresh pickle chips are essential for the signature crunch. If the chips are stale, they’ll lose their bite and become soggy. Store them in an airtight container at room temperature, and use them within a week for maximum crispness. A fresh chip delivers a bright, tangy burst that keeps the quesadilla exciting.
Creative Twists and Variations
This recipe is a playground. Here are some of my favorite ways to switch things up:
Spicy Jalapeño Crunch
Swap the dill pickle chips for crushed jalapeños to add heat. The peppery bite complements the creamy cheese, creating a fiery, flavorful experience. This version is perfect for those who like a little kick in their snacks.
Veggie‑Loaded Delight
Add sliced bell peppers, spinach, or avocado to the filling. The vegetables bring a fresh, vibrant note that balances the richness of the cheese. This twist turns the quesadilla into a wholesome, colorful meal.
Vegan Version
Use a plant‑based cheese like Daiya or a vegan cheddar and substitute the ranch with a vegan dressing. The result is a dairy‑free quesadilla that still delivers on flavor and texture. It’s a great option for vegans or those with lactose intolerance.
Breakfast Boost
Fold in scrambled eggs and a sprinkle of chives before sealing the tortilla. This creates a savory breakfast quesadilla that’s both hearty and satisfying. It’s a quick way to start the day with a burst of flavor.
Sweet Surprise
For a dessert twist, add a drizzle of honey and a handful of chopped strawberries before sealing. The sweet and tangy combination makes for a playful, dessert‑style quesadilla that’s surprisingly delicious.
Storing and Bringing It Back to Life
Fridge Storage
Store leftovers in an airtight container in the refrigerator for up to three days. Keep the quesadilla flat to preserve the crisp edges. When you’re ready to eat, reheat in a skillet over medium heat until the cheese is melted.
Freezer Friendly
Wrap the quesadilla tightly in foil and place it in a freezer bag. Freeze for up to two weeks. When reheating, unwrap and place on a baking sheet, then bake at 350°F (175°C) for 15 minutes or until heated through.
Best Reheating Method
For the best texture, reheat the quesadilla in a skillet with a small amount of oil. Heat over medium heat, flipping once, until the tortilla is crisp and the cheese is melted. Add a splash of water before reheating to keep the cheese from drying out.