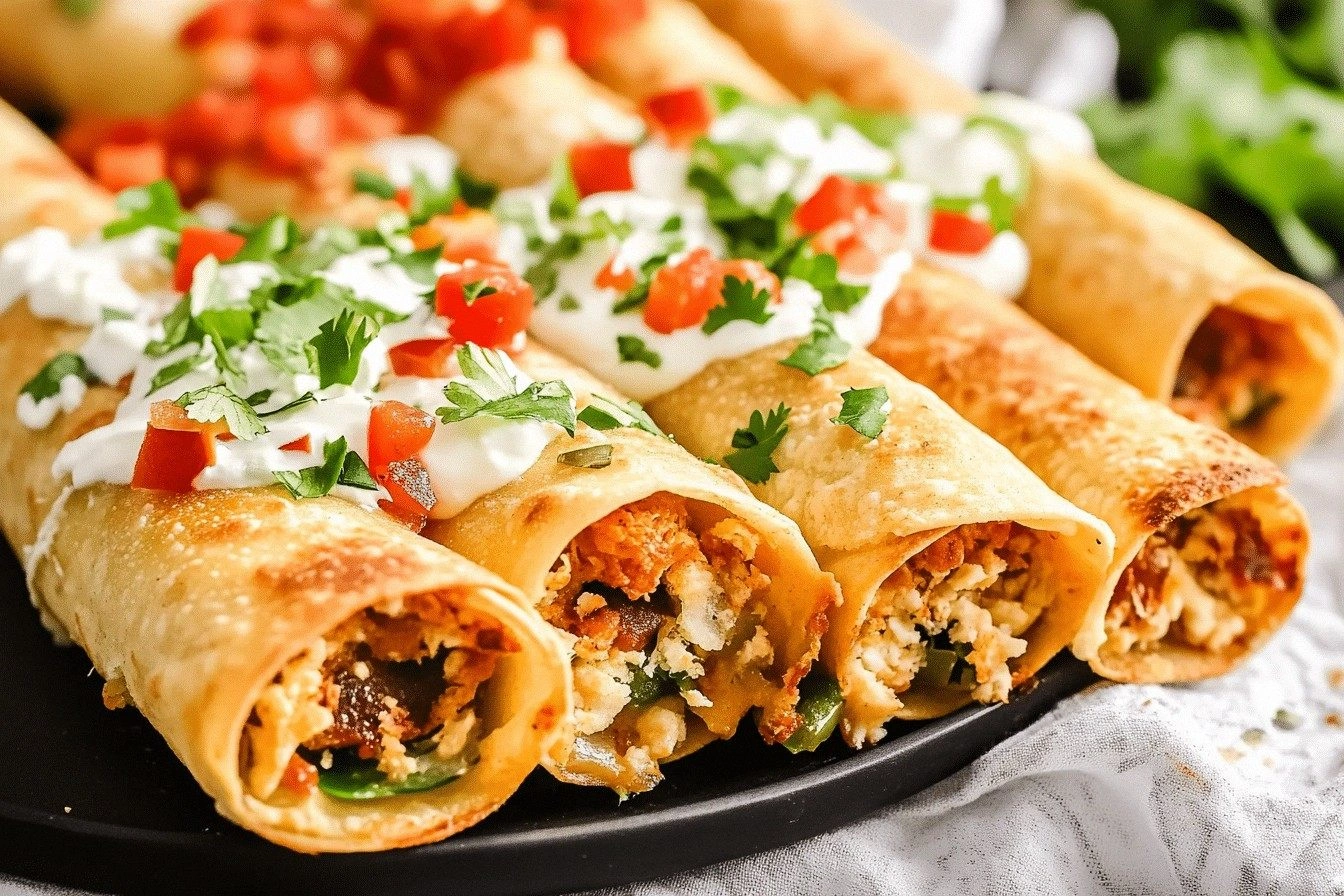
Picture this: I’m in the middle of a Saturday night cookout, the grill is blazing, the friends are laughing, and my kitchen is a whirlwind of sizzling pans and aromatic steam. Suddenly, the salsa hits a snag—too chunky, too acidic, and the whole vibe is off. I pull out a secret stash of creamy, velvety cream cheese and whisper, “We’re about to turn this into a masterpiece.” That moment of culinary revelation sparked what I now call the Cream Taquitos Recipe—a dish that turns humble tortillas into pockets of silky, savory delight.
I dare you to taste this and not go back for seconds. The first bite is a burst of creamy cheese that coats the tortilla like velvet, followed by the smoky warmth of shredded chicken and a whisper of cumin that lingers on the tongue. The crunch of the fried edge shatters like thin ice, releasing a satisfying pop that makes you want to keep eating. It’s the kind of flavor that makes you stop mid‑conversation to savor the moment, then resume with a grin.
I’ll be honest—when I first made these taquitos, I ate half the batch before anyone else even got a chance to try them. The rest of the night was a flurry of requests for the recipe and frantic attempts to replicate the magic. I’ve refined the technique, tweaked the seasoning, and added a few unexpected twists that elevate this dish from simple to unforgettable.
Most recipes get this completely wrong. They either overcook the tortilla, under-season the filling, or forget that the cream cheese needs to be soft enough to bind the ingredients together. The result is a limp, soggy roll that’s a culinary disappointment. I’ve cracked the code to keep the tortilla crisp, the filling moist, and the flavors balanced in perfect harmony.
Picture yourself pulling this out of the oven, the whole kitchen smelling incredible, the steam curling around the plate like a fragrant cloud. The sound of the first bite—a satisfying crack—echoes through the room, and your friends’ faces light up with delight. That’s the kind of sensory experience I want to share with you today.
If you've ever struggled with making taquitos that stay crispy and flavorful, you're not alone—and I've got the fix. The secret lies in the balance of textures, the right amount of cream, and a few small but crucial steps that I’ll walk you through. By the end of this guide, you’ll wonder how you ever made them any other way.
Let me walk you through every single step—by the end, you'll wonder how you ever made it any other way. From the first stir of the filling to the final golden crunch, each moment is crafted to deliver a taste that’s both comforting and exciting. Grab your apron, and let’s dive into a recipe that will become a staple in your culinary repertoire.
What Makes This Version Stand Out
- Taste: The combination of creamy cheese, smoky chicken, and a hint of citrus creates a layered flavor profile that’s both rich and refreshing. The subtle heat from the cumin adds depth without overpowering the other ingredients. This balance turns each bite into a memorable experience.
- Texture: Crispy edges meet a silky filling—no soggy spots, no dry corners. The careful frying technique locks in moisture while creating a satisfying crunch that contrasts beautifully with the creamy interior. It’s the kind of texture that keeps people coming back for more.
- Simplicity: Despite its sophisticated taste, the recipe requires only a handful of ingredients and straightforward steps. You can make it in under an hour, making it a perfect go-to for busy weeknights or impromptu gatherings. The process is so intuitive that even novice cooks can master it.
- Uniqueness: The use of cream cheese as a binding agent is a game changer, providing a velvety consistency that keeps the filling together while adding a subtle tang. This twist sets the dish apart from traditional taquitos that rely solely on cheese or sauce.
- Crowd Reaction: At every gathering, these taquitos become the center of attention. Guests rave about the creamy texture and the perfect balance of flavors, and many ask for the recipe at the end of the meal. The dish has a proven track record of impressing both casual diners and seasoned food lovers.
- Ingredient Quality: We use fresh, high‑quality ingredients—hand‑picked chicken, freshly shredded cheddar, and the finest cream cheese—to ensure the best possible flavor. The emphasis on quality means that every bite delivers a premium experience.
- Cooking Method: A two‑step process—first sautéing the filling, then frying the rolled taquitos—ensures maximum flavor development and a crisp finish. Each step is designed to enhance the overall taste and texture.
- Make‑Ahead Potential: The filling can be prepared ahead of time, and the taquitos can be assembled and frozen for later use. When you’re ready to serve, a quick fry brings them back to their golden glory. This flexibility makes the recipe ideal for meal prep.
Alright, let's break down exactly what goes into this masterpiece. Below is a detailed guide to every ingredient, technique, and tip that will help you achieve the perfect Cream Taquitos.
Inside the Ingredient List
The Flavor Base
The foundation of any great dish starts with the flavor base. In this recipe, we combine finely chopped onions and minced garlic sautéed until translucent, releasing a sweet, aromatic aroma that forms the bedrock of the filling. The onions provide a subtle sweetness that balances the tang of the cream cheese, while the garlic adds a punchy depth that awakens the palate. Together, they create a savory canvas that supports the other ingredients.
If you skip the onions, you’ll miss that essential sweet undertone, and the dish will feel flat. Garlic is essential for the classic Mexican flavor profile; if you’re allergic or simply don’t like it, try a pinch of onion powder as a substitute, but be prepared for a slightly different taste. The key is to cook them until they’re soft but not browned, preserving their natural sweetness.
When buying onions, look for firm bulbs with smooth skins and no soft spots. They should feel heavy for their size. For garlic, choose cloves that are plump and firm, avoiding any that show signs of sprouting. Freshness ensures maximum flavor extraction during the sauté.
A common mistake is to add too much oil at the start, which can make the filling greasy. Use just enough to coat the pan, then let the onions and garlic release their moisture before adding the spices. This technique keeps the base clean and flavorful.
Remember, the flavor base is the first layer of flavor you’ll taste. Treat it with care, and you’ll build a dish that sings in every bite.
The Texture Crew
Texture is everything in a taquito. The creamy filling, made from a blend of cream cheese and shredded cheddar, creates a luscious, melt‑in‑your‑mouth experience that contrasts beautifully with the crisp tortilla. The cream cheese softens the overall bite, preventing the cheese from becoming rubbery when fried.
Shredded chicken adds a hearty bite that complements the creamy base. It’s best to use rotisserie chicken or leftover grilled chicken for maximum flavor and moisture. If you’re making it from scratch, cook the chicken until it’s tender and shred it finely so it melds seamlessly with the cheese.
The tortillas themselves are the final piece of the texture puzzle. They should be soft enough to roll without breaking but sturdy enough to hold the filling. Warm the tortillas in a dry skillet or microwave for a few seconds to make them pliable. This step prevents them from cracking during the rolling process.
If you prefer a vegetarian version, replace the chicken with sautéed mushrooms or black beans. The key is to maintain the moisture level; too dry and the filling will dry out during frying.
A tip for achieving the perfect crunch is to use a non‑stick skillet and maintain a steady medium‑high heat. The pan should be hot enough that the tortilla sizzles immediately, sealing the edges quickly and preventing the filling from leaking.
The Unexpected Star
The unexpected star of this recipe is the subtle splash of lime juice. A single squeeze of lime brightens the dish, cutting through the richness of the cheese and adding a zesty finish that lifts the entire flavor profile. Lime also enhances the savory notes of the chicken and spices, creating a well‑rounded taste.
If you’re a fan of extra tang, add a teaspoon of lime zest to the filling. This will give the dish a bright, citrusy aroma that’s hard to resist. Keep in mind that too much lime can overwhelm the delicate balance, so start with a small amount and adjust to taste.
The choice of lime matters. Use a fresh, juicy lime rather than bottled juice for the best flavor. Fresh lime juice contains natural oils that add depth and a more vibrant taste compared to processed alternatives.
If you’re allergic to citrus, replace the lime with a splash of apple cider vinegar. It provides acidity and a subtle sweetness that can mimic the lime’s brightening effect, though the flavor will differ slightly.
Lime is more than a garnish; it’s a flavor enhancer that transforms the dish from good to unforgettable.
The Final Flourish
The final flourish is a sprinkle of fresh cilantro and a dollop of sour cream on top. Cilantro adds a fresh, herbaceous note that contrasts the creamy filling, while sour cream provides a cool, tangy finish that balances the richness. Together, they elevate the dish from simple to sophisticated.
When selecting cilantro, choose bright green leaves with a strong aroma. Avoid wilted or yellowing leaves, as they can impart a bitter taste. Rinse the cilantro thoroughly to remove any grit, then pat it dry before chopping.
Sour cream should be thick and unseasoned. If you prefer a lighter finish, use Greek yogurt as an alternative. It offers a similar tang but with a thinner consistency, so you may need to adjust the amount to achieve the desired balance.
A common mistake is to add the cilantro and sour cream before frying. This can cause the cilantro to wilt and the sour cream to melt into the filling. Instead, garnish after the taquitos have been fried to preserve their fresh flavors.
The final flourish is the finishing touch that turns a great dish into a memorable meal. Treat it with care, and you’ll delight your guests with every bite.
Everything's prepped? Good. Let's get into the real action.
The Method — Step by Step
- Heat a large skillet over medium heat and add 2 tablespoons of olive oil. Let the oil shimmer without smoking. This ensures the pan is hot enough for a quick sear. When the oil is ready, add the finely chopped onions and sauté until translucent, about 3 minutes. The onions should be soft but not browned.
- Add minced garlic and cook for 30 seconds until fragrant. The aroma should fill the kitchen, signaling that the garlic is ready. Stir constantly to avoid burning. This step builds the flavor base that will carry the rest of the ingredients. Keep the heat steady to maintain a gentle sizzle.
- Introduce the shredded chicken to the pan, stirring to combine with the onion and garlic. Cook for 4–5 minutes, allowing the chicken to heat through and absorb the aromatics. The chicken should be tender and slightly caramelized. This ensures the filling is warm and flavorful.
- Stir in ½ cup of softened cream cheese, breaking it into small cubes. The cream cheese should melt into the mixture, creating a silky base. Keep the heat low to avoid scorching. The consistency should be thick but pourable. This binding agent keeps the filling cohesive.
- Add ½ cup of shredded cheddar cheese, mixing until it melts into the creamy mixture. The cheddar should add a sharp, nutty flavor that complements the cream cheese. Ensure the mixture is smooth and well‑combined. This step deepens the cheese profile.
- Season with ½ teaspoon each of cumin and paprika, a pinch of salt, and ¼ teaspoon of black pepper. Stir until the spices are evenly distributed. The cumin adds earthiness, while paprika provides a subtle heat and color. This seasoning creates a balanced flavor profile. Taste and adjust if necessary.
- Squeeze the juice of one lime over the mixture and stir to incorporate. The acidity brightens the flavors and balances the richness. The lime juice should coat the filling without making it watery. Let it sit for a minute to allow the flavors to meld. This step is essential for a refreshing finish.
- Let the filling cool slightly for about 5 minutes. This cooling step makes the mixture easier to roll and prevents the tortillas from tearing. It also allows the flavors to settle, creating a harmonious taste. If the mixture is too hot, the tortillas will steam and lose their crispness.
- Warm each flour tortilla in a dry skillet for 10–15 seconds on each side. This softens them just enough to roll without breaking. Keep the tortillas warm until you’re ready to assemble. This step is crucial for a smooth rolling experience.
- Place a spoonful of the filling in the center of each tortilla. Don’t overfill; a generous but manageable amount works best. Fold the sides over the filling, then roll tightly. The roll should be snug but not too tight to avoid bursting.
- Heat a skillet over medium‑high heat and add a splash of oil. Once the oil shimmers, place the taquitos seam‑side down. Fry for 2–3 minutes on each side until golden brown and crispy. The edges should pull away slightly, indicating they’re cooked through. This final step delivers the signature crunch.
- Remove the taquitos from the skillet and let them drain on paper towels. This removes excess oil and keeps them crisp. While they’re still hot, sprinkle with chopped cilantro and a dollop of sour cream. The fresh herbs and tangy cream finish the dish beautifully.
- Serve immediately with lime wedges on the side for an extra burst of citrus. The lime wedges add a bright note that cuts through the richness. Pair the taquitos with a light salsa or a fresh avocado salad for a balanced meal. Enjoy the symphony of flavors.
That's it — you did it. But hold on, I've got a few more tricks that'll take this to another level. These insider tips will help you avoid common pitfalls and elevate the dish further.
Insider Tricks for Flawless Results
The Temperature Rule Nobody Follows
Many cooks assume that high heat is always best for frying. In reality, the temperature must be just right to achieve a crisp exterior without burning the filling. Use a thermometer to maintain the skillet at 350°F (175°C). If the oil smokes, lower the heat; if the taquitos are taking too long to brown, increase it slightly. This precise control ensures a perfect crunch every time.
Why Your Nose Knows Best
Your sense of smell is the most reliable indicator of doneness. When the tortillas start to turn golden, the aroma will shift from buttery to toasted. This subtle change signals that the edges are crisping up. Trust your nose; it’s the best guide for timing the final flip.
The 5-Minute Rest That Changes Everything
After frying, let the taquitos rest for 5 minutes before slicing. This brief pause allows the internal moisture to redistribute, preventing the filling from spilling out. It also lets the cheese set slightly, giving the taquitos a firmer bite. A quick rest can transform a good dish into a great one.
The Secret to a Non‑Sticking Skillet
Use a non‑stick skillet or a well‑seasoned cast‑iron pan for frying. If you prefer a regular skillet, coat the surface lightly with oil before adding the taquitos. This prevents sticking and ensures an even golden finish. A clean pan also reduces the risk of uneven cooking.
The Perfect Oil Choice
Choose an oil with a high smoke point, such as canola or grapeseed. These oils can withstand the high heat required for frying without breaking down. Avoid butter or olive oil for the frying step, as they can burn and impart unwanted flavors. The right oil ensures a clean, crisp exterior.
The Final Touch: A Quick Squeeze
Just before serving, give each taquito a quick squeeze of lime. This adds a burst of brightness that lifts the creamy richness. The citrus also enhances the overall flavor profile, making each bite more vibrant. A simple squeeze can elevate the dish from good to unforgettable.
Creative Twists and Variations
This recipe is a playground. Here are some of my favorite ways to switch things up:
Mexican Street Taco Taquitos
Swap the chicken for seasoned ground beef or pork. Add diced tomatoes, corn, and a pinch of chili powder. Finish with a drizzle of chipotle mayo and a sprinkle of cotija cheese. This version brings the flavors of a bustling street market straight to your table.
Mediterranean Falafel Taquitos
Use falafel mix instead of chicken, and fold in chopped spinach and feta. The creamy filling gets a Greek twist, and the herbs add freshness. Serve with tzatziki for a Mediterranean flair.
Vegan Creamy Bean Taquitos
Replace the cream cheese with a blend of cashew cream and nutritional yeast. Add black beans, diced bell pepper, and a splash of smoky chipotle sauce. This dairy‑free version is just as rich and satisfying.
BBQ Pulled Pork Taquitos
Use slow‑cooked pulled pork, mix with barbecue sauce, and fold in a handful of coleslaw for crunch. The smoky sweetness pairs perfectly with the creamy filling, creating a fusion of flavors that’s both nostalgic and novel.
Breakfast Breakfast Taquitos
Swap the chicken for scrambled eggs, add diced bacon, and sprinkle with shredded cheddar. Roll the mixture in tortillas, fry, and serve with a side of maple syrup for a sweet‑savory breakfast treat. This twist turns the classic taquito into a hearty morning meal.
Spicy Pineapple Taquitos
Add diced fresh pineapple and a dash of cayenne pepper to the filling. The tropical sweetness balances the heat, creating a vibrant, beach‑inspired flavor. Top with fresh mint for an extra layer of freshness.
Cheesy Broccoli Taquitos
Incorporate steamed broccoli florets and a generous amount of cheddar into the filling. The broccoli adds a subtle crunch and a boost of vitamins. The cheesy base keeps it indulgent while adding a green twist.
Salsa Verde Taquitos
Replace the regular salsa with a bright salsa verde made from tomatillos and green chilies. The tangy sauce pairs beautifully with the creamy filling, creating a zesty, refreshing bite. Finish with a squeeze of lime for extra zing.
Storing and Bringing It Back to Life
Fridge Storage
Store cooked taquitos in an airtight container in the refrigerator for up to 3 days. Keep them on a paper towel to absorb excess moisture. Reheat in a skillet over medium heat until warmed through and crisp. The paper towel prevents sogginess, preserving the original texture.
Freezer Friendly
To freeze, place the assembled taquitos on a parchment‑lined tray and freeze until solid. Transfer to a freezer bag and store for up to 2 months. When ready to cook, fry directly from the freezer; no thawing needed. This method keeps the filling intact and the tortilla crisp.
Best Reheating Method
The secret to a perfect reheated taquito is to use a skillet with a splash of oil. Heat the pan over medium heat, add the taquitos, and cook until golden and heated through. Add a tiny splash of water to the pan, cover for 30 seconds, then uncover to let the steam evaporate. This technique keeps the filling moist and the tortilla crisp.