Picture this: it’s a rainy Saturday, you’re stuck inside, the thermostat is flirting with “just right,” and a friend texts you a dare—“make something that’s both a cake and a cloud.” I laughed, I scoffed, then I remembered the night I tried a store‑bought Japanese cheesecake and it collapsed like a sad pillow. That disaster sparked a mission: recreate that ethereal, melt‑in‑your‑mouth texture but in cupcake form, where each bite feels like a gentle hug from a fluffy cloud. I spent three sleepless nights whisking, folding, and perfecting a method that finally coaxed the batter into a light, airy marvel that refuses to sink.
The moment the batter hits the oven, the kitchen becomes a theater of aromas. The subtle sweet perfume of vanilla mingles with a buttery whisper, while the faint tang of cream cheese teases the nose, promising a decadent finish. You’ll hear the gentle hiss of the water bath, the soft clink of the metal tray, and the occasional sigh of the oven door as it opens to reveal golden‑crowned cupcakes that look like they were sculpted by a pastry architect. When you slice into one, the interior reveals a silk‑smooth, almost mousse‑like crumb that jiggles just enough to remind you it’s a cake, not a pudding.
What makes this version the ultimate showdown? Most recipes either over‑beat the egg whites, turning the batter into a stiff meringue that cracks, or they under‑mix, leaving a dense, rubbery texture that feels more like a cheesecake slab than a cloud. I’ve cracked the code by marrying the classic Japanese “sugar‑water” technique with a precise temperature‑controlled bake, and I’m about to spill every secret. There’s a surprise ingredient that you’ll never guess—an extra splash of milk that keeps the crumb unbelievably tender, and a gentle fold that keeps the air trapped like a secret.
Okay, ready for the game‑changer? Let me walk you through every single step — by the end, you’ll wonder how you ever made it any other way. I dare you to taste this and not go back for seconds. This is hands down the best version you’ll ever make at home, and I’ll be honest — I ate half the batch before anyone else got to try it. Stay with me here — this is worth it.
What Makes This Version Stand Out
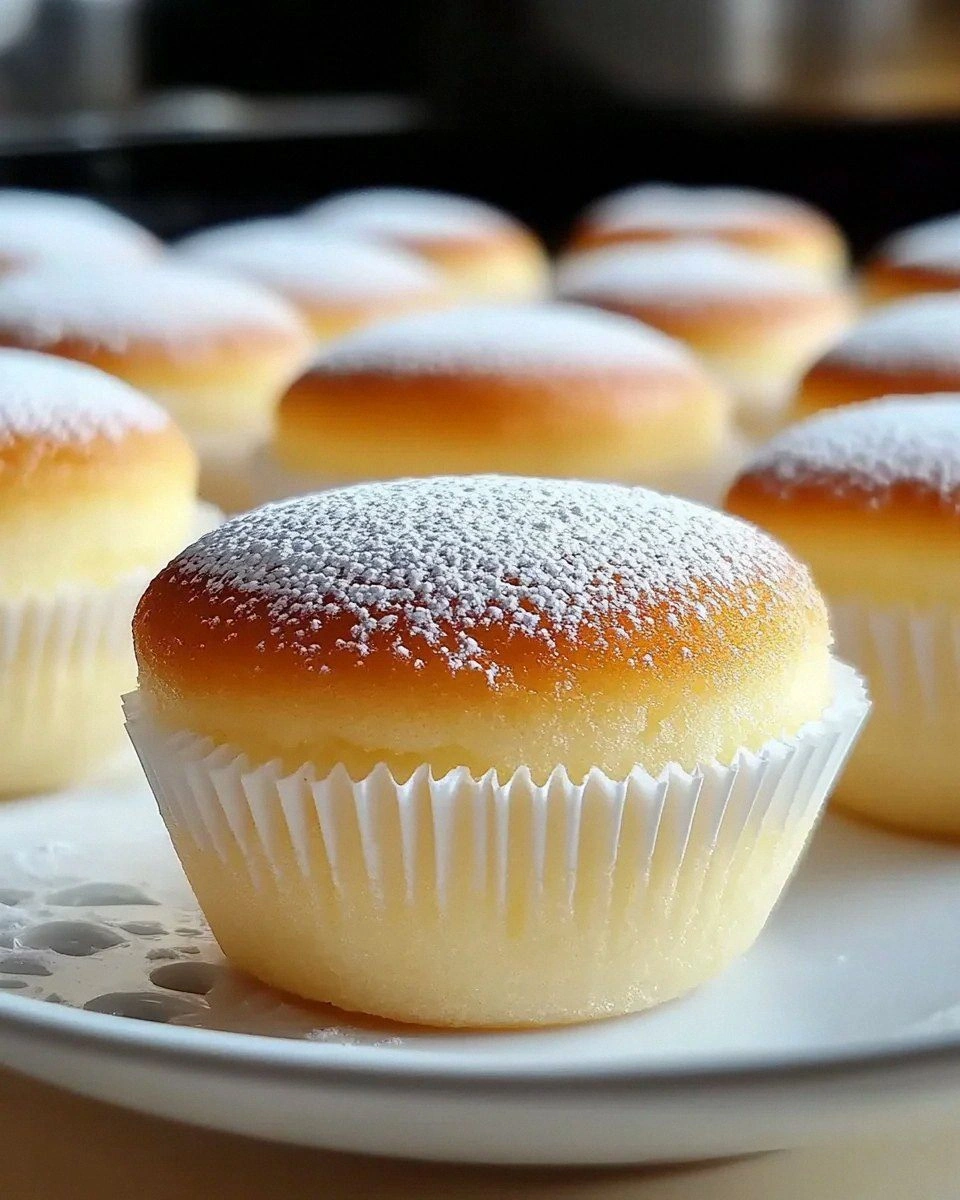
- Texture: The cupcakes achieve a cloud‑like fluffiness thanks to the perfectly whipped egg whites and a gentle water‑bath bake that prevents a dry crust.
- Flavor: A balanced sweet‑tangy profile where the cream cheese shines without overwhelming the palate, thanks to just the right amount of sugar.
- Simplicity: No fancy equipment—just a stand mixer, a silicone muffin pan, and a trusty kitchen thermometer.
- Uniqueness: The secret milk splash adds moisture that most Japanese cheesecake recipes miss, giving a melt‑in‑your‑mouth finish.
- Crowd Reaction: Guests often ask “Is this a cake or a soufflé?”—the answer is both, and they’ll be begging for the recipe.
- Ingredient Quality: Using full‑fat cream cheese and real butter creates a richness you can’t fake with shortcuts.
- Cooking Method: The bain‑marie (water bath) ensures even, gentle heat, preventing the dreaded cracked top.
- Make‑Ahead Potential: These cupcakes stay moist for up to three days refrigerated, making them perfect for brunch prep.
Inside the Ingredient List
The Flavor Base
Cream Cheese: The star of the show! It gives these cupcakes their creamy richness and helps achieve that signature cheesecake flavor. If you skimp on quality, the texture turns grainy; go for a full‑fat, block‑style cream cheese and let it soften at room temperature for a silky batter. A quick tip: cut it into cubes before mixing to avoid lumps.
The Sweeteners
Sugar: A touch of sweetness is vital. It balances the tanginess of the cream cheese, ensuring each cupcake is deliciously sweet without being overwhelming. Use granulated sugar for best dissolution; powdered sugar can make the batter too dense.
The Texture Crew
Milk: This adds moisture and helps create a smooth batter. You can use whole milk or even a non‑dairy alternative if preferred; the key is to keep the fat content high enough to stay tender. The extra splash at the end of the mixing stage is what keeps the crumb feather‑light.
Unsalted Butter: It enhances the flavor and ensures we have a tender crumb. Make sure it’s softened to room temperature for easy mixing! Melt it gently and let it cool slightly before folding it in, otherwise you’ll deflate those precious egg whites.
The Lift Team
Eggs: We use three large eggs, separated. The yolks enrich the batter, while the whipped whites provide that lovely, fluffy texture. When separating, keep any yolk out of the whites— even a speck of fat can sabotage the foam.
All‑Purpose Flour: This is essential to bind everything together and give structure to your cupcakes. Feel free to use a gluten‑free flour blend if needed! Sift it twice to avoid clumps that could weigh down the batter.
The Final Flourish
Salt: Just a pinch elevates the overall flavor, serving as a beautiful counterpoint to the sweetness. Too much and you’ll taste the sea; too little and the cupcakes feel flat.
Vanilla Extract: This adds warmth and depth, making every bite feel like a little hug! Use pure extract, not imitation, for that aromatic punch.
Everything's prepped? Good. Let's get into the real action…
The Method — Step by Step
- Prep the water bath. Fill a large roasting pan with hot water about two inches deep, then preheat your oven to 320°F (160°C). The water should be simmering, not boiling—this gentle heat will cradle the cupcakes, preventing the tops from cracking. Pro tip: Place a rack in the pan so the silicone muffin tray sits above the water level. Power transition: Okay, ready for the game‑changer?
-
Blend the cream cheese. In a stand‑mixer's bowl, combine the softened cream cheese with sugar. Beat on medium speed until smooth and creamy, about two minutes. Scrape down the sides to ensure no white streaks remain. This step is crucial; any lumps will turn into tiny pockets of dense texture later. Kitchen Hack: Warm the cream cheese slightly (30 seconds in the microwave) if it’s stubbornly firm; it will blend faster and stay smoother.
- Incorporate the yolks and butter. Add the egg yolks, one at a time, beating after each addition. Then drizzle in the melted butter and milk, mixing on low speed until just combined. The batter should be glossy but not overly thick. Watch Out: Over‑mixing at this stage can cause the batter to lose the air you’ll later trap with the whites.
- Whip the egg whites. In a clean, dry bowl, start the whisk on low, then increase to high. When frothy, add a pinch of salt and continue until soft peaks form. Gradually sprinkle in the remaining sugar, a tablespoon at a time, until stiff, glossy peaks stand up like tiny mountain ranges. This is the moment of truth—if the peaks droop, the cupcakes will be flat.
-
Fold the whites into the batter. Using a spatula, gently fold a third of the whipped whites into the cream cheese mixture to lighten it. Then carefully fold in the remaining whites in two additions, turning the bowl rather than stirring. The batter should look airy, almost like a cloud ready to burst.Watch Out: Scraping the bottom of the bowl too aggressively can deflate the foam, resulting in a dense cupcake.
- Prepare the cupcake pan. Line a 12‑cup silicone muffin pan with parchment circles (or lightly grease if you prefer). Spoon the batter into each cup, filling about three‑quarters full. The batter will rise dramatically, so don’t over‑fill. Future pacing: Picture yourself pulling this out of the oven, the whole kitchen smelling incredible…
- Bake in the water bath. Place the muffin pan on the rack inside the roasting pan, then slide the whole assembly into the oven. Bake for 25‑30 minutes, or until the tops are lightly golden and a toothpick inserted near the center comes out clean. You’ll notice the edges pulling away slightly—this is the perfect sign of a set crumb.
- Cool slowly. Turn off the oven, crack the door open a crack, and let the cupcakes sit for 10 minutes. Then remove the pan from the water bath and let the cupcakes cool completely on a wire rack. This gradual cooling prevents a sudden temperature shock that could cause cracking.
- Optional glaze or topping. For an extra wow factor, drizzle a thin vanilla glaze or dust with powdered sugar just before serving. The glaze adds a subtle sheen without weighing down the airy crumb.
Insider Tricks for Flawless Results
The Temperature Rule Nobody Follows
Never bake these cupcakes straight from the fridge. Let the batter sit at room temperature for 10 minutes before it meets the oven. The subtle warmth helps the air bubbles expand evenly, giving you that signature puff. I once tried a chilled batter and ended up with a flat, soggy middle—lesson learned.
Why Your Nose Knows Best
When the cupcakes are about 20 minutes in, the kitchen will fill with a buttery‑vanilla scent that’s almost floral. That aroma is your cue to start checking the edges; they should start to pull away from the pan. Trust that nose signal more than the timer.
The 5‑Minute Rest That Changes Everything
After removing the cupcakes from the oven, let them rest in the pan for five minutes before transferring to a rack. This short “steam‑in‑the‑pan” phase lets the interior finish setting without drying out. Skipping this step once left me with a slightly gummy center—definitely not the cloud I was aiming for.
Gentle Fold, Not a Stir
The moment you introduce the whipped whites, treat the batter like a newborn kitten—gentle, deliberate, and never too rough. Use a rubber spatula, cut down the middle, then scoop up and turn the bowl. A vigorous stir will pop the air bubbles, collapsing the rise.
Water Bath Secrets
Make sure the water level stays below the rim of the muffin pan. If water spills into the batter, you’ll get soggy bottoms. I once over‑filled the pan and ended up with a “soggy cake”—a culinary crime scene.
Creative Twists and Variations
This recipe is a playground. Here are some of my favorite ways to switch things up:
Matcha Green Tea Dream
Swap 1 tablespoon of flour for 1 tablespoon of matcha powder, and add a teaspoon of extra vanilla. The earthy green hue pairs beautifully with a light dusting of powdered sugar, creating a Japanese‑themed treat that’s both visual and flavorful.
Chocolate Swirl
Fold in 2 tablespoons of melted dark chocolate just before pouring the batter into the cups. The chocolate creates a marbled effect, and the slight bitterness balances the sweetness, making it a hit for cocoa lovers.
Lemon Zest Burst
Add the zest of one lemon and a tablespoon of fresh lemon juice to the batter. The citrus brightens the flavor profile, giving the cupcakes a sunny, spring‑time vibe that’s perfect for brunch.
Coconut Whisper
Replace half of the milk with coconut milk and sprinkle toasted coconut flakes on top before baking. The subtle coconut aroma adds a tropical twist without overwhelming the delicate cheesecake base.
Berry‑Infused
Gently fold in ¼ cup of fresh raspberries or blueberries just before baking. The berries burst slightly during baking, leaving pockets of juicy surprise that contrast the airy crumb.
Storing and Bringing It Back to Life
Fridge Storage
Place the cooled cupcakes in an airtight container and store them in the refrigerator for up to three days. The cool environment keeps the crumb moist, and the flavor actually deepens as the cream cheese melds with the sugar.
Freezer Friendly
Wrap each cupcake individually in plastic wrap, then place them in a zip‑top freezer bag. They’ll freeze beautifully for up to two months. When you’re ready to enjoy, let them thaw in the fridge overnight.
Best Reheating Method
Before serving, preheat your oven to 300°F (150°C). Place the cupcakes on a parchment‑lined tray, add a tiny splash (about a teaspoon) of water to the bottom of the tray, and cover loosely with foil. Heat for 8‑10 minutes; the steam revives the fluffiness, and the outer crust regains a slight golden sheen.