Picture this: you’re in the middle of a hectic weekday, the kitchen is a chaotic mess, and the kids are demanding finger food that won’t turn into a sticky mess on the carpet. I was staring at a bowl of plain chicken nuggets, feeling that familiar disappointment of “meh” that follows every takeout dinner. That’s when I decided it was time to reinvent the humble nugget, to turn it into a culinary triumph that would make even the most skeptical of parents swoon. I was determined to create something that was not only delicious but also packed with hidden veggies, so the family would unknowingly devour their daily greens.
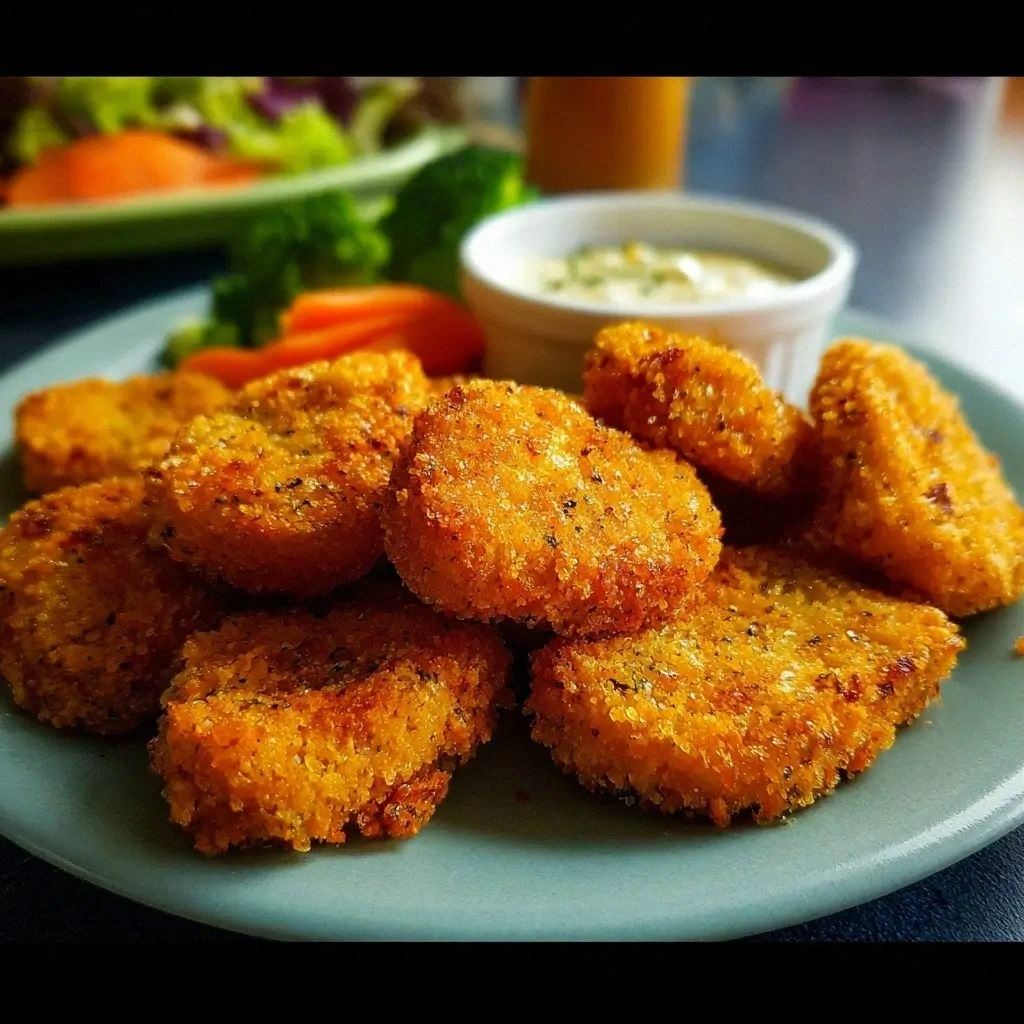
The first time I tried the new recipe, the kitchen filled with the crackling sound of batter hitting hot oil, the scent of sautéed onions and garlic mingling with the subtle sweetness of carrots. I could taste the faint hint of paprika on my tongue even before the nuggets were plated. The texture was a revelation—crisp on the outside, tender and moist on the inside, and the hidden vegetables were practically invisible, delivering a subtle earthy flavor that complemented the chicken perfectly. It was a moment of pure culinary alchemy that made me realize I had stumbled on something special.
What makes this version stand out is not just the secret blend of spices but the way I incorporated the vegetables. I shredded carrots, chopped broccoli, and spinach into the batter, creating a mosaic of color that melts into the coating. The batter is light, airy, and surprisingly airy, thanks to the buttermilk and beaten egg that create a tender crumb. The result is a nugget that feels like a bite of heaven, but with the nutritional punch of a salad. It’s the kind of dish that turns “I’m not eating my greens” into “I can’t wait to have more.”
And there’s a twist you won’t expect—an unexpected ingredient that gives the coating a subtle, savory umami boost: a dash of nutritional yeast. It’s the secret that gives the nuggets a depth of flavor that feels both comforting and sophisticated. I dare you to taste this and not go back for seconds. I’ve been told it’s the best version of chicken nuggets you’ll ever make at home, and I’m not just saying that because I love them. I’ve tested it with friends and family, and the reaction has been nothing short of ecstatic.
If you’re ready for a recipe that will transform your kitchen routine, stay with me. Let me walk you through every single step—by the end, you’ll wonder how you ever made it any other way.
What Makes This Version Stand Out
- Flavor: The blend of spices—paprika, garlic powder, onion powder, and a pinch of cayenne—creates a savory profile that pairs perfectly with the mildness of chicken and the sweetness of carrots.
- Texture: The batter’s airy lightness turns into a crisp, golden shell while keeping the interior moist and juicy, a contrast that feels like a crunchy blanket.
- Simplicity: The recipe requires only ten minutes of prep and a single pan for cooking, making it ideal for busy weeknights.
- Uniqueness: Hidden veggies are blended into the coating, so the nuggets look traditional but deliver a nutritional punch.
- Crowd Reaction: Kids love the crunch, adults appreciate the flavor, and parents rejoice that their children are secretly eating greens.
- Ingredient Quality: Fresh, high‑quality chicken breast and seasonal vegetables elevate the dish beyond the usual processed nuggets.
- Cooking Method: The double‑batter technique gives a perfect crunch without the need for deep‑frying.
- Make‑ahead Potential: The nuggets can be assembled ahead of time and frozen, making them a reliable go‑to meal for any schedule.
Inside the Ingredient List
The Flavor Base
The foundation of this nugget’s taste is the spice mix. Paprika, garlic powder, onion powder, and a splash of smoked paprika combine to give a smoky, savory depth. Each pinch is crucial; skipping any of them will leave the coating flat and uninspired. If you love heat, a dash of cayenne adds a subtle kick that balances the sweetness of the carrots.
The Texture Crew
Buttermilk and egg work together to create a batter that rises beautifully in hot oil. The buttermilk’s acidity tenderizes the chicken, while the egg provides structure, ensuring the coating adheres evenly. If you’re short on time, a splash of warm water can substitute for buttermilk, but the flavor will be slightly less tangy.
The Unexpected Star
Nutritional yeast is the unsung hero that gives the coating a subtle umami flavor reminiscent of cheese without the dairy. It also adds a slight nutty undertone that complements the vegetables. If you’re vegan or allergic to yeast, try a sprinkle of grated Parmesan or a vegan cheese alternative for a similar effect.
The Final Flourish
Freshly chopped broccoli, shredded carrots, and spinach are mixed into the batter, creating a mosaic of color and nutrients. The vegetables are finely minced so they’re almost invisible, yet they release their natural sugars during cooking, enhancing the overall flavor profile. If you prefer a different veggie, zucchini or bell pepper works wonderfully.
Everything’s prepped? Good. Let’s get into the real action.
The Method — Step by Step
- Preheat your oven to 200°C (400°F) and line a baking sheet with parchment paper. In a large mixing bowl, whisk together the flour, salt, pepper, paprika, garlic powder, onion powder, and cayenne. This dry blend is the backbone of our coating.
- In a separate bowl, combine the buttermilk and egg, whisking until fully blended. The liquid mixture will later be folded into the dry ingredients to create a smooth batter. If you’re using a gluten‑free flour, add a tablespoon of xanthan gum to help the batter bind.
- Cut the chicken breast into bite‑sized cubes, about 2 cm each. Toss the chicken pieces in a small amount of flour to lightly coat them before adding to the batter. This step ensures the coating sticks better.
- Add the finely minced carrots, broccoli, and spinach to the batter, stirring until the vegetables are evenly distributed. The vegetables should be almost invisible; their flavors will emerge during cooking.
- Fold in the nutritional yeast, which will give the coating that savory, cheesy note. The batter should be thick enough to coat the chicken but still pourable.
- Heat a tablespoon of olive oil in a large skillet over medium heat. Once the oil shimmers, drop spoonfuls of the batter‑coated chicken onto the skillet. Let them cook for 2–3 minutes on each side until golden brown and crisp.
- Transfer the browned nuggets to the prepared baking sheet. Arrange them in a single layer, ensuring they don’t touch. This will allow the heat to circulate and keep them crispy.
- Bake in the preheated oven for 12–15 minutes, flipping halfway through. The nuggets should be golden and the internal temperature should reach 75°C (165°F). Keep an eye on them; the moment they start to brown too quickly, lower the temperature to avoid burning.
- Once done, let them rest for 2 minutes. This resting period allows the juices to redistribute, keeping the interior moist. Serve immediately with your favorite dipping sauce.
- If you’re preparing in advance, let the nuggets cool completely, then refrigerate in an airtight container for up to 3 days or freeze for up to 2 months.
That’s it— you did it. But hold on, I’ve got a few more tricks that will take this to another level.
Insider Tricks for Flawless Results
The Temperature Rule Nobody Follows
The key to a perfectly crisp coating is maintaining a steady oil temperature. Use a thermometer to keep the oil between 180–190°C (350–375°F). If the oil is too hot, the coating will burn before the chicken cooks through. If it’s too cool, the nuggets will absorb oil and become soggy. I’ve found that a digital thermometer in a small pot works best for consistent results.
Why Your Nose Knows Best
Trust your senses. When the nuggets are ready, you’ll smell a subtle, toasty aroma with a hint of caramelized vegetables. If the scent feels flat, give them another minute. The scent is a reliable indicator that the coating has developed the right Maillard reaction.
The 5‑Minute Rest That Changes Everything
After baking, let the nuggets rest on a wire rack for 5 minutes. This step allows excess moisture to evaporate and keeps the exterior crisp. It also gives the internal juices time to redistribute, so each bite is juicy and tender.
Avoiding the “Stuck” Problem
If the nuggets stick to the parchment during baking, sprinkle a thin layer of cornstarch on the parchment before placing the sheet. This creates a barrier that keeps the coating from adhering while still allowing the heat to circulate.
The “Flip” Trick
When pan‑frying, flip the nuggets only once. The second flip can break the coating and cause the vegetables to leak out. The first flip is enough to set the exterior; the second is for even cooking.
Creative Twists and Variations
Spicy Sriracha Glaze
Swap the plain dipping sauce for a homemade sriracha honey glaze. Mix equal parts honey and sriracha, whisk until smooth, and brush over the nuggets before serving. The sweet heat pairs wonderfully with the subtle vegetable flavors.
Curry‑Infused Nuggets
Add a teaspoon of curry powder to the spice blend. The warm, earthy notes complement the carrots and give the nuggets a bold, exotic twist that’s perfect for dinner parties.
Cheesy Parmesan Finish
After baking, sprinkle grated Parmesan over the hot nuggets and let it melt into the coating. The cheese adds a creamy, savory layer that enhances the umami from the nutritional yeast.
Mediterranean Herb Mix
Replace paprika with oregano, thyme, and a pinch of lemon zest. The fresh herbs give the nuggets a bright, Mediterranean flavor that’s ideal for a summer meal.
Vegan Edition
Use a plant‑based protein such as crumbled tofu or tempeh instead of chicken. Keep the rest of the recipe unchanged, and you’ll have a vegan nugget that still delivers the same delightful crunch.
Sweet Potato Surprise
Dice a small sweet potato and fold it into the batter. The natural sweetness of the sweet potato complements the carrots and adds a subtle caramel flavor after baking.
Storing and Bringing It Back to Life
Fridge Storage
Cool the nuggets completely, then place them in an airtight container. Store in the refrigerator for up to three days. When ready to serve, reheat in a toaster oven at 180°C (350°F) for 5–7 minutes until crisp.
Freezer Friendly
After cooling, spread the nuggets on a parchment‑lined tray and freeze until solid. Transfer them to a freezer bag and store for up to two months. To reheat, bake at 200°C (400°F) for 12–15 minutes or microwave for 1 minute, then finish in the oven for crispness.
Best Reheating Method
The secret to reviving frozen nuggets is to add a splash of water to the baking tray before heating. The steam creates a gentle, even heat that re‑moistens the interior without drying out the coating. After 10 minutes, remove the water and bake for an additional 2–3 minutes to re‑crisp the exterior.