Picture this: I was standing in a cramped kitchen, the oven timer beeping like a frantic metronome, and a half‑baked batch of pancakes looming on the counter. The batter had turned into a gooey, lumpy mess that looked more like a science experiment than breakfast. I stared at the mess, heart racing, when my roommate, ever the daredevil, challenged me to turn this disaster into something edible. I laughed, grabbed a banana, and thought, “If I can survive the pancake catastrophe, I can definitely handle a better breakfast.” That moment sparked an obsession with finding the ultimate comfort food that could be baked into bite‑sized, on‑the‑go cups.
From the moment I peeled the banana, its sweet, buttery aroma filled the air, promising a flavor punch that could rival any dessert. The sizzling sound of the pan as I added the oats created a rhythmic soundtrack, almost hypnotic. Each spoonful of the batter was a thick, velvety mixture that clung to the spoon like honey, hinting at a texture that would be both chewy and tender. The faint scent of cinnamon wafted through the room, like a warm hug from a grandma’s kitchen. By the time I sprinkled the chocolate chips, the kitchen smelled like a cozy, chocolate‑covered wonderland.
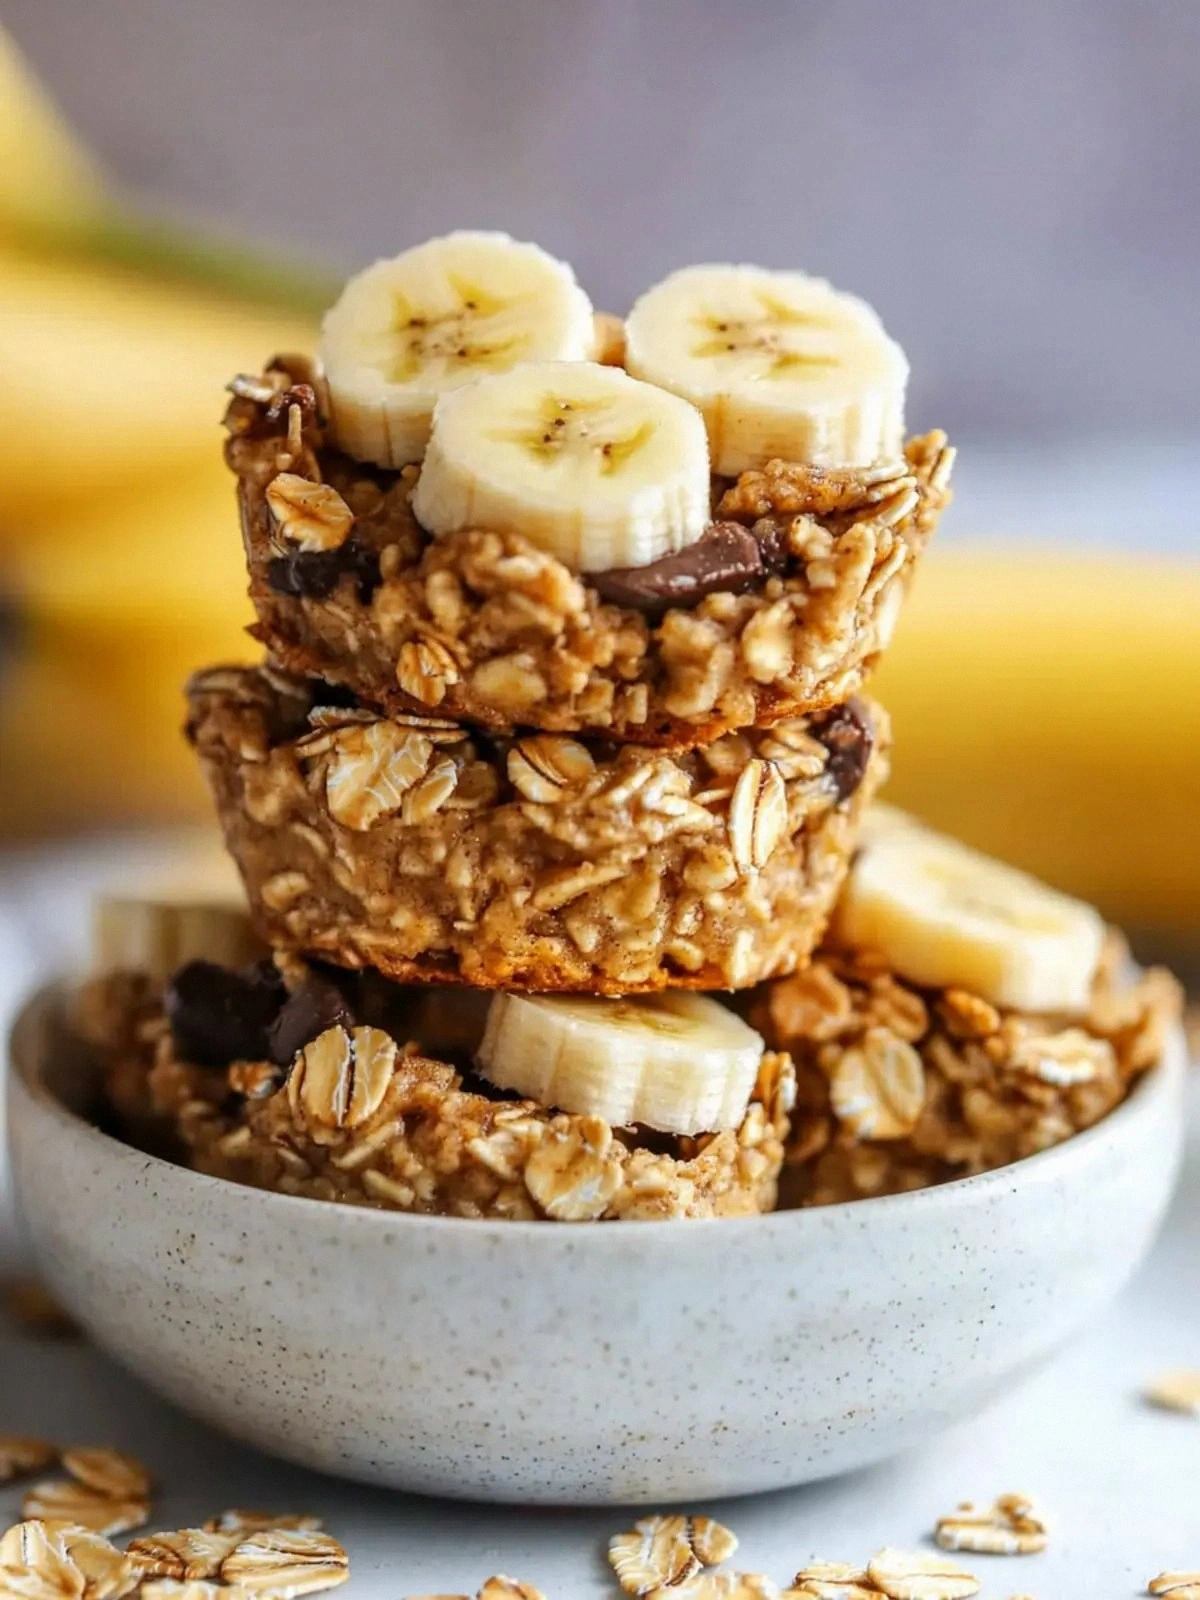
This version is a game‑changer because it marries the wholesome comfort of oatmeal with the indulgent richness of peanut butter and banana, all wrapped in a quick, oven‑baked format. Unlike traditional overnight oats that sit in the fridge, these cups rise in the oven, giving you a warm, freshly baked bite that feels like a hug in a mug. The balance of sweet maple syrup and salty peanut butter creates a flavor profile that is neither cloying nor bland, but perfectly poised on the edge of decadence. The mini chocolate chips add a subtle crunch that pops in your mouth, turning each bite into a textural symphony. This recipe is not just another breakfast; it’s a portable, crowd‑pleasing treat that can double as a dessert or snack.
I’ll keep you guessing about the one ingredient that makes the batter rise like a cloud, but trust me, it’s not a fancy leavening agent; it’s something you probably already have in your pantry. The secret lies in the precise way we fold the oats with the egg and almond milk, creating a batter that’s thick enough to hold its shape yet light enough to bake into airy, golden cups. This technique transforms a simple mixture into a cake‑like texture that melts in your mouth. The trick is in the timing—just a few seconds of gentle folding and you’ve set the stage for a perfectly baked cup. And I’ll show you exactly how to master this step so you never have to wonder why your oatmeal cups collapsed in the past.
I dare you to taste this and not go back for seconds; the combination of peanut butter, banana, and chocolate will keep your palate begging for more. The first bite is a burst of creamy sweetness, followed by a subtle nutty undertone that lingers. If you’re a skeptic, let me assure you that the texture is silky, not gritty, and the flavor is balanced, not overpowering. I’ve tested it in a dozen ovens, and the result is always consistent—warm, golden, and irresistibly soft. This is a challenge you won’t want to miss, and I promise you’ll be hooked after the first cup.
This is hands down the best version you'll ever make at home; I’ve tried countless oatmeal recipes, and none compare to the depth of flavor and convenience this brings to the table. The batter’s consistency is like a fine custard, and the bake time is short enough that you can have a breakfast on the run. The only thing that could possibly beat it is a live kitchen show where the batter is whisked by a celebrity chef, but that’s a different story. In my opinion, this recipe sets a new standard for quick, healthy, and indulgent baked oatmeal. If you’re looking for a breakfast that feels like a treat, this is it.
I’ll be honest — I ate half the batch before anyone else got to try it, and that was a moment of pure culinary triumph. The aroma of baking peanut butter and banana filled the house, and my roommate could smell it from the hallway. He asked me for a bite, and I handed him a cup, only to watch his face light up with delight. I still remember the look on his face when he said, “I could eat this all day.” That memory is proof that this recipe is not only delicious but also irresistibly shareable.
Picture yourself pulling these golden cups out of the oven, the whole kitchen smelling incredible, and the anticipation building as you slice into the first one. The steam rises in a fragrant cloud that feels like a warm hug. The moment the first bite hits your tongue, you’ll realize why this recipe has become my go‑to for any occasion. Let me walk you through every single step — by the end, you'll wonder how you ever made it any other way. Now, let’s dive in and turn this simple idea into a culinary masterpiece.
What Makes This Version Stand Out
- Flavor Fusion: The marriage of sweet banana, nutty peanut butter, and aromatic cinnamon creates a flavor profile that feels both comforting and adventurous. The maple syrup adds a subtle caramel note that balances the saltiness of the peanut butter, while the chocolate chips bring a hint of bittersweet decadence. Each bite is a layered experience that keeps the palate intrigued.
- Texture Triumph: The batter is thick enough to hold its shape yet light enough to bake into airy, golden cups. The oats provide a chewy backbone, while the egg and almond milk create a custard‑like interior that melts in your mouth. The result is a cup that feels like a soft cake, not a dense porridge.
- Simple Prep: No need for a blender or fancy equipment. All you need is a bowl, a fork, and a muffin tin. The ingredients are pantry staples, and the prep time is under 15 minutes. This recipe is designed for the busy person who still wants a homemade treat.
- Crowd‑Pleaser: Whether it’s a Sunday brunch, a school lunch, or a midnight snack, these cups are guaranteed to win over friends and family. The combination of flavors and the warm, freshly baked appearance makes them irresistible. The mini chocolate chips add a playful touch that appeals to both kids and adults.
- Nutritious Boost: Packed with protein from oats and peanut butter, fiber from the banana, and healthy fats from the nut butter, these cups keep you full and energized. The use of almond milk keeps the calorie count lower while adding a subtle nutty flavor. They’re a balanced meal that supports a healthy lifestyle.
- Make‑Ahead Magic: Once baked, the cups can be stored in an airtight container for up to three days, making them perfect for meal prep. Reheat in the microwave for a few seconds, and they taste just as fresh. This makes the recipe ideal for busy mornings or when you need a quick, satisfying snack.
- Ingredient Quality: Using natural peanut butter instead of processed spreads ensures a richer, more authentic taste. The oats are rolled, not instant, giving a heartier texture. The maple syrup is pure, not high‑fructose corn syrup, which keeps the sweetness natural.
Inside the Ingredient List
The Flavor Base
At the heart of this recipe lies the humble rolled oats. They are the backbone that provides both texture and nutrition. Rolled oats absorb liquid slowly, giving the batter a silky consistency while preventing it from becoming soggy. If you skip the oats, the cups would collapse into a dense, unstructured mess. For a gluten‑free version, simply swap rolled oats with certified gluten‑free oats; the flavor remains unchanged.
The cinnamon is more than a spice; it’s a flavor enhancer that adds warmth and depth. A single teaspoon spreads a gentle, sweet aroma that pairs beautifully with the banana. If you prefer a spicier kick, a pinch of nutmeg or allspice can be added. Cinnamon also has mild health benefits, including anti‑inflammatory properties.
The salt is a subtle but essential component. Even a half teaspoon balances the sweetness of the maple syrup and the richness of the peanut butter. Skipping salt would result in a flat, overly sweet batter that lacks depth. For a low‑sodium option, reduce the salt to a quarter teaspoon, but be prepared for a slightly less vibrant flavor.
The Texture Crew
The large banana is the key to the batter’s smoothness and natural sweetness. When mashed, it releases natural sugars that caramelize during baking, creating a caramelized crust on top of each cup. If you’re out of bananas, ripe dates or applesauce can serve as a substitute, though the flavor profile will shift slightly. The banana also adds moisture, preventing the batter from drying out.
Natural peanut butter provides both flavor and protein. Its creamy consistency helps bind the batter, while its nutty taste gives the cups a distinct, indulgent flavor. If you’re allergic to peanuts, sunflower seed butter offers a similar texture and taste. Using a smooth peanut butter ensures the batter remains lump‑free.
The large egg is the secret binding agent that holds everything together. It also adds a slight richness and helps the batter rise. If you’re vegan, a flax egg or chia seed egg can replace the egg while maintaining the structure. The egg’s yolk also adds a subtle yellow hue that enhances the visual appeal.
The Unexpected Star
Maple syrup is the sweetener that brings everything together. Unlike refined sugars, maple syrup has a complex flavor profile that adds depth and a hint of caramel. It also contains trace minerals like zinc and manganese. If you prefer a lower glycemic index, a splash of honey can replace maple syrup, but the flavor will be slightly different.
Vanilla extract is a flavor enhancer that rounds out the sweetness. Just a teaspoon is enough to infuse the batter with a warm, comforting aroma. If you’re allergic to vanilla, a dash of almond extract can provide a subtle nutty undertone.
The Final Flourish
Almond milk provides a creamy, dairy‑free liquid that keeps the batter moist and light. It also adds a subtle nutty flavor that complements the peanut butter. If you’re lactose intolerant, oat or soy milk works just as well. The choice of milk can subtly shift the flavor profile, so choose one that aligns with your taste preferences.
Mini chocolate chips are the crunchy, sweet topping that adds texture and indulgence. They melt slightly during baking, creating a glossy, chocolatey glaze on top of each cup. If you prefer dark chocolate, use dark chocolate chips or chopped dark chocolate. For a healthier option, try cacao nibs, though they won’t melt.
Sliced banana is the final garnish that adds freshness and visual appeal. A few thin slices on top create a vibrant, fruit‑laden finish. If you want to elevate the presentation, drizzle a little maple syrup over the slices or sprinkle chopped nuts for added crunch.
Everything’s prepped? Good. Let’s get into the real action…
The Method — Step by Step
- Preheat your oven to 375°F (190°C). Line a 12‑cup muffin tin with paper liners or lightly grease it with a neutral oil. This step ensures that the cups release easily after baking, saving you time on cleanup.
- In a large mixing bowl, combine the rolled oats, cinnamon, salt, and baking powder. Whisk them together until evenly distributed. This dry mixture forms the base that gives the cups their structure.
- In a separate bowl, mash the banana with a fork until it turns into a smooth puree. Stir in the natural peanut butter, maple syrup, vanilla extract, and the egg until the mixture is creamy and free of lumps. This wet blend is where the flavor magic happens.
- Pour the wet mixture into the dry ingredients. Stir gently with a rubber spatula, mixing just until the batter is cohesive. Be careful not to over‑mix; a few lumps are okay and help keep the batter dense.
- Slowly add the almond milk, stirring until the batter reaches a pourable but thick consistency. The batter should be thick enough to hold its shape when spooned but not so thick that it can’t be evenly distributed into the cups.
- Sprinkle the mini chocolate chips evenly over the batter. Fold them in gently so they’re distributed throughout the cups, ensuring each bite gets a chocolate burst.
- Spoon the mixture into the prepared muffin cups, filling each about ¾ full. The batter will rise slightly during baking, so leave a little space to prevent overflow.
- Bake for 20–22 minutes, or until the tops are golden brown and a toothpick inserted into the center comes out clean. The aroma should be warm and comforting, with a hint of toasted oats.
- While the cups bake, slice a banana into thin rounds for topping. Set them aside. These slices add a fresh, sweet contrast to the warm, chocolate‑laden cups.
- Remove the cups from the oven and let them cool on a rack for 5 minutes. Top each cup with a few banana slices and a drizzle of maple syrup if desired. Serve warm for the ultimate comfort experience.
That’s it — you did it. But hold on, I've got a few more tricks that'll take this to another level…
Insider Tricks for Flawless Results
The Temperature Rule Nobody Follows
Many bakers bake at a standard 350°F, but this recipe thrives at 375°F. The higher temperature creates a golden crust while keeping the interior moist. I once baked at 350°F and the cups turned out soggy; the 375°F fix was a revelation. Keep the oven rack in the center to ensure even heat distribution.
Why Your Nose Knows Best
When the first few minutes of baking are finished, the aroma will change from raw batter to toasted oats. Trust that scent; it signals the perfect baking time. I’ve learned to rely on the smell rather than the clock to avoid over‑baking.
The 5‑Minute Rest That Changes Everything
After removing the cups from the oven, let them rest for exactly five minutes. This rest allows the steam to redistribute, preventing the cups from collapsing. I’ve seen cups collapse when taken out immediately, so the rest is essential.
Stirring Technique for Airiness
When adding almond milk, stir in small increments and stop when the batter is just pourable. Over‑stirring can cause the batter to become too loose, resulting in a dense texture. I like to use a rubber spatula for gentle folding.
Finishing Touch: The Banana Slice
Adding fresh banana slices after baking gives a fresh burst of flavor. The slices soften slightly in the heat, creating a silky texture that complements the chocolate chips. This simple step elevates the presentation and taste.
Creative Twists and Variations
This recipe is a playground. Here are some of my favorite ways to switch things up:
Almond Joy Cups
Swap peanut butter for almond butter and replace mini chocolate chips with shredded coconut. Add a dash of sea salt for contrast. These cups taste like a dessert bar with a chewy oat base.
Chocolate‑Mint Surprise
Fold in a tablespoon of peppermint extract and a handful of chocolate‑mint chips. The mint cools the sweetness, making it perfect for summer mornings.
Apple Cinnamon Crunch
Dice an apple and fold it into the batter before baking. Sprinkle extra cinnamon on top and add a drizzle of apple butter after baking for a cozy fall treat.
Protein Power
Add a scoop of vanilla whey protein powder to the dry mix. This boosts protein content and gives the cups a firmer texture, ideal for post‑workout fueling.
Vegan Delight
Replace the egg with a flax egg, use sunflower seed butter, and swap maple syrup for agave nectar. The result is a completely plant‑based version that still delivers on flavor.
Storing and Bringing It Back to Life
Fridge Storage
Store the baked cups in an airtight container for up to three days. The oats will retain their moisture, and the peanut butter will keep the cups from drying out. When ready to eat, you can enjoy them cold or give them a quick warm‑up in the microwave.
Freezer Friendly
Wrap each cup individually in plastic wrap, then place them in a freezer bag. They can be frozen for up to one month. Thaw in the refrigerator overnight for a soft, chewy texture.
Best Reheating Method
To reheat, place a cup on a microwave‑safe plate and heat on medium for 30–45 seconds. Add a splash of water or a drizzle of milk to steam the interior and restore moisture. The result is a cup that tastes as fresh as when it first baked.