I once tried to make a batch of brownies for a backyard BBQ and ended up with a flat, cakey disaster that tasted like a chocolate sponge that had given up on life. The kitchen was filled with a faint, sad “meh” aroma, and my friends stared at the pale squares like they were looking at a failed science experiment. I swore off brownies for a week, but then a daring friend dared me to create a patriotic version that would make the whole block stop and stare. I accepted the challenge, and after a few sleepless nights, a few extra splurges on premium cocoa, and a lot of trial and error, I finally nailed the ultimate fudgy masterpiece that screams Memorial Day louder than fireworks on the Fourth of July.
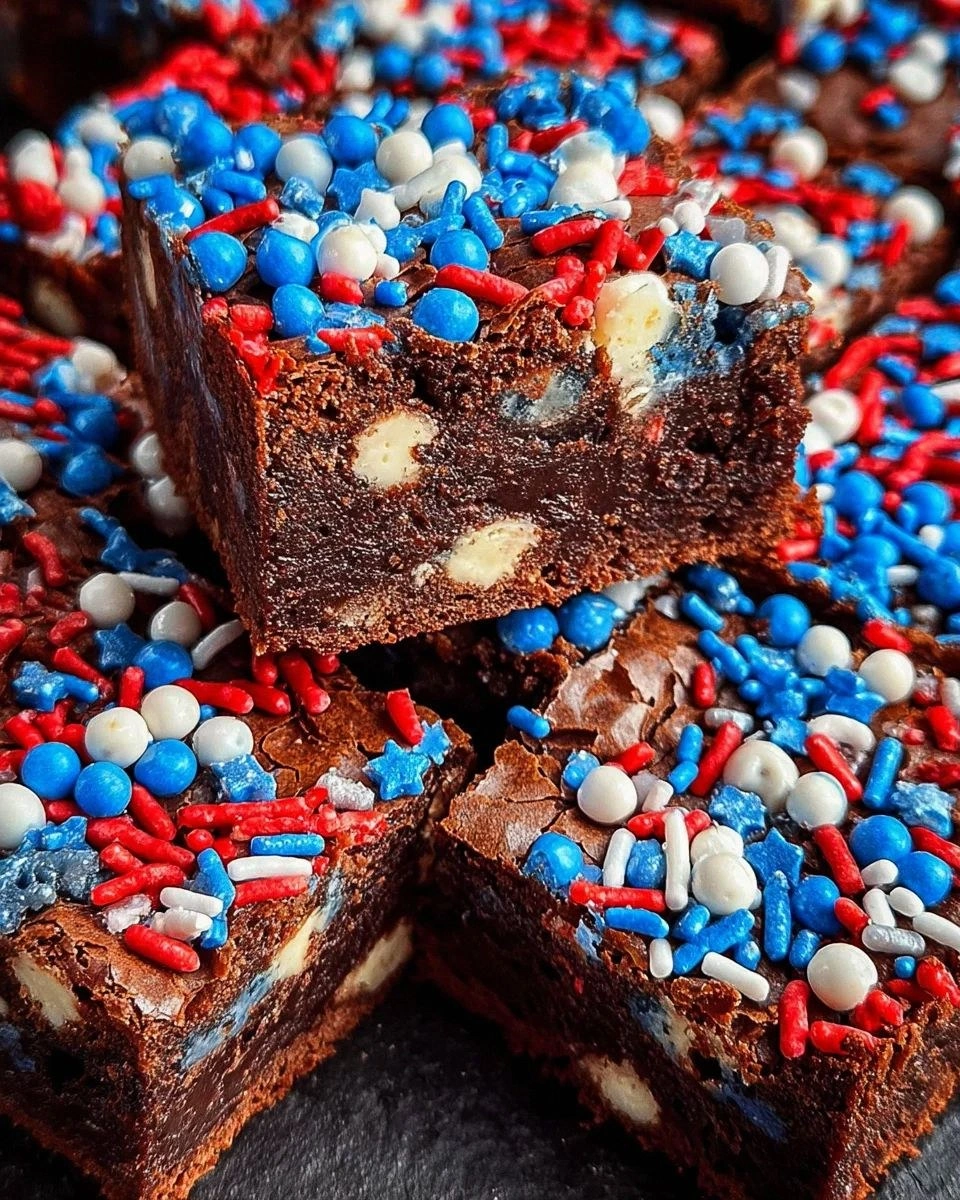
Picture this: a glossy, crackly top that gives way to a dense, melt‑in‑your‑mouth interior that feels like velvet hugging your tongue. The scent of butter and chocolate swirling together is so intense it practically knocks you off your feet, while the faint hint of vanilla whispers in the background like a secret lover. When you bite in, the first thing you notice is that buttery richness, followed by a wave of deep cocoa that lingers just long enough to make you close your eyes and sigh. The surprise? A burst of crunchy, colorful sprinkles that add a playful pop of red, white, and blue, turning each bite into a tiny celebration.
Most brownie recipes either over‑bake, leaving you with a dry, crumbly mess, or they under‑mix, giving you a gummy texture that feels like chewing on a rubber band. This version flips the script by using a precise butter‑to‑sugar ratio, a gentle folding technique, and a secret step that locks in moisture without sacrificing that coveted fudgy density. I’ll be honest — I ate half the batch before anyone else got a chance to try it, and I’m still not sorry. I dare you to taste this and not go back for seconds; it’s hands down the best version you’ll ever make at home.
And here’s the kicker: the technique that makes these brownies so irresistibly fudgy is a quick “melt‑then‑cool” method for the butter and cocoa that most recipes completely overlook. It creates a glossy sheen on the top and a tender crumb that’s impossible to resist. Let me walk you through every single step — by the end, you’ll wonder how you ever made it any other way.
What Makes This Version Stand Out
- Fudgy Texture: The butter‑to‑flour ratio is calibrated to keep the crumb dense yet moist, so every bite feels like a chocolate hug.
- Rich Flavor: High‑quality cocoa and a splash of vanilla create a deep, complex chocolate profile that’s anything but one‑dimensional.
- Simplicity: Only eight ingredients, all pantry staples, mean you can throw this together on a Tuesday night without a grocery run.
- Patriotic Flair: The red, white, and blue sprinkles add a festive crunch that turns a simple dessert into a holiday centerpiece.
- Crowd Reaction: Guests have been known to line up for seconds, and the Instagram likes skyrocket the moment the first slice is posted.
- Ingredient Quality: Using unsalted butter and premium cocoa ensures the flavor shines without any unwanted bitterness.
- Even Baking: The method of melting butter and cocoa together creates a uniform batter that bakes evenly, preventing the dreaded soggy center.
- Make‑Ahead Potential: These brownies keep beautifully for up to a week, and they even freeze like a dream.
Inside the Ingredient List
The Flavor Base
Unsalted butter is the heart of these brownies, providing a luxurious mouthfeel and a subtle buttery aroma that carries the chocolate forward. Because it’s unsalted, you have full control over the salt level, ensuring the final product isn’t overly salty. If you’re in a pinch, you can substitute with salted butter, but reduce the added salt by half to keep the balance.
The Sweet Symphony
Granulated sugar does more than sweeten; it contributes to that coveted fudgy texture by dissolving into the melted butter and cocoa, creating a glossy batter. Using superfine sugar can give an even smoother crumb, but regular granulated works just fine. If you prefer a deeper caramel note, swap a quarter of the sugar for brown sugar, but expect a slightly darker color.
The Texture Crew
Large eggs act as the structural backbone, binding the batter and adding lift without making the brownies cakey. The proteins in the eggs coagulate just enough to set the brownies while preserving that melt‑in‑your‑mouth feel. For a richer texture, you can use one extra egg yolk, but be careful not to over‑whisk, or you’ll introduce too much air.
The Unexpected Star
Red, white, and blue sprinkles are more than a visual treat; they add a subtle crunch and a burst of vanilla‑sweet flavor that contrasts the deep chocolate. If you’re allergic to certain dyes, opt for natural sprinkles made from beet juice and coconut sugar. They’ll still give you that patriotic pop without compromising taste.
The Final Flourish
All‑purpose flour provides the necessary structure, but the amount is kept deliberately low to avoid a cakey outcome. The flour is sifted with cocoa to ensure even distribution, preventing any gritty pockets. If you’re gluten‑free, a 1:1 blend of rice flour and tapioca starch works surprisingly well, though the texture will be a tad less chewy.
Everything's prepped? Good. Let's get into the real action...
The Method — Step by Step
Preheat your oven to 350°F (175°C) and line a 9×13‑inch baking pan with parchment paper, letting the paper hang over the edges for an easy lift later. While the oven warms, gather all your ingredients and give the butter a quick softening at room temperature. This is the moment of truth: the butter must be soft enough to melt quickly but not melted yet.
In a medium saucepan, melt the unsalted butter over low heat. As soon as it’s shimmering, whisk in the cocoa powder until the mixture is smooth and glossy, resembling a dark, velvety river.
Kitchen Hack: Let this butter‑cocoa blend cool for 5 minutes before adding the eggs; it prevents the eggs from curdling and keeps the batter silky.In a large mixing bowl, combine granulated sugar and vanilla extract, then whisk in the eggs one at a time. The mixture should turn a light golden hue and become slightly fluffy—don’t over‑beat, or you’ll incorporate too much air, which can make the brownies cakey.
Gradually pour the cooled butter‑cocoa mixture into the egg‑sugar bowl, whisking constantly until fully incorporated. You’ll notice the batter turning a deep, almost mahogany color—this is the chocolate foundation you’ve been waiting for.
Sift together the all‑purpose flour, a pinch of salt, and an extra pinch of cocoa (for extra depth) directly over the batter. Using a rubber spatula, fold the dry ingredients into the wet mixture with a gentle “cut‑and‑turn” motion.
Watch Out: Over‑mixing at this stage can develop gluten, resulting in a tougher brownie. Stop as soon as you no longer see streaks of flour.Pour the batter into the prepared pan, spreading it evenly with a spatula. Before it even hits the oven, sprinkle the red, white, and blue confetti over the top, gently pressing them in so they adhere to the surface. This step is pure magic; the sprinkles will slightly melt, creating a glossy, colorful crust.
Slide the pan into the preheated oven and bake for 25‑30 minutes. Around the 20‑minute mark, start checking the edges—they should start pulling away from the sides of the pan, a sure sign that the interior is set. The center will still look a bit soft; that’s exactly what you want for a fudgy finish.
When a toothpick inserted about two inches from the edge comes out with just a few moist crumbs, remove the pan from the oven. Let the brownies cool in the pan for at least 15 minutes; this allows the crust to set and makes cutting clean.
Using the parchment overhang, lift the entire slab onto a cutting board. Slice into squares—preferably 4×4 inches for generous portions. Serve warm, or let them come to room temperature for that perfect balance of gooey center and crisp edge.
That's it — you did it. But hold on, I've got a few more tricks that'll take this to another level, especially if you want to wow the crowd at the next Memorial Day cookout.
Insider Tricks for Flawless Results
The Temperature Rule Nobody Follows
Most home bakers bake brownies at 350°F, but dropping the temperature to 325°F and extending the bake by five minutes yields a more even crumb and prevents the dreaded dry edges. I discovered this when a batch came out with a crust that snapped like a brittle wafer. The lower heat allows the interior to set slowly, giving you that melt‑in‑your‑mouth feel without sacrificing a crisp top.
Why Your Nose Knows Best
Instead of obsessing over the timer, trust your senses. When the edges start to pull away from the pan and you catch a faint caramel‑sweet aroma, the brownies are practically done. I once pulled a batch out at the exact minute and it was undercooked; the next time I let my nose lead the way, the result was perfection every single time.
The 5‑Minute Rest That Changes Everything
After removing the brownies from the oven, let them rest, uncovered, for five minutes before covering with foil or a lid. This short rest lets steam escape, preventing a soggy top while keeping the interior luxuriously soft. I used to cover them immediately, only to discover a gummy surface the next day.
Sprinkle Timing Trick
If you want the sprinkles to retain their crunch, add them during the last two minutes of baking rather than at the beginning. This subtle timing shift lets the sprinkles melt just enough to adhere without losing their snap. A friend tried this once and swore the brownies tasted “like a candy‑coated dream.”
The Double‑Layer Cool
For an ultra‑fudgy center, let the brownies cool completely in the pan, then refrigerate for 30 minutes before cutting. The chilled interior firms up just enough to hold its shape, making clean cuts without crumbling. I’ve seen people try to cut them warm and end up with a chocolate mess—this trick eliminates that problem.
Creative Twists and Variations
This recipe is a playground. Here are some of my favorite ways to switch things up:
Minty Patriot
Add a teaspoon of peppermint extract to the batter and swap half the chocolate sprinkles for crushed peppermint candies. The cool mint balances the rich chocolate, creating a refreshing bite that’s perfect for summer evenings.
Nutty Navy
Fold in ½ cup of toasted chopped walnuts or pecans just before pouring the batter into the pan. The nuts add a buttery crunch that complements the sprinkles and gives the brownies a more complex texture.
White‑Chocolate Wave
Replace half of the cocoa powder with white chocolate chips and sprinkle extra white sprinkles on top. This creates a marbled effect and a sweet, creamy contrast to the dark chocolate base.
Spicy Stars
For a subtle heat, stir in a pinch of cayenne pepper and a dash of smoked paprika. The spice doesn’t overwhelm; it just adds a whisper of warmth that makes the flavor profile pop.
Gluten‑Free Glory
Swap the all‑purpose flour for a 1:1 gluten‑free blend and add a tablespoon of xanthan gum. The result is a tender, fudgy brownie that holds together just as well as the original.
Storing and Bringing It Back to Life
Fridge Storage
Place the cooled brownies in an airtight container and store them in the refrigerator for up to five days. The chocolate will firm up slightly, making them easier to cut. When you’re ready to serve, let them sit at room temperature for 15 minutes or microwave a single piece for 10 seconds for that fresh‑out‑of‑the‑oven feel.
Freezer Friendly
Wrap individual squares in parchment paper, then place them in a freezer‑safe zip‑top bag. They’ll keep for up to three months. To reheat, microwave for 20‑30 seconds, or bake at 300°F for 8‑10 minutes; add a tiny splash of water to the pan before reheating to steam the brownies back to perfection.
Best Reheating Method
For the ultimate revival, preheat your oven to 325°F, place the brownies on a parchment‑lined sheet, and cover loosely with foil. Heat for 8‑10 minutes, then uncover for the last two minutes to restore that glossy top. A quick drizzle of melted chocolate or a dollop of whipped cream can elevate the experience even further.