I still remember the day I ruined three lemon blueberry desserts in a row. The first one tasted like a lemon had a fistfight with a sugar bowl and lost. The second emerged from the oven looking like a purple bruise wrapped in wet cardboard. By the third attempt, my kitchen smelled like a citrus grove had exploded, my dog was hiding under the couch, and I was ready to swear off fruit desserts forever. Then, right when I was about to surrender to store-bought mediocrity, I stumbled on a technique so forehead-slappingly simple that it felt like cheating. Fast-forward a dozen trials, and this lemon blueberry dessert now disappears faster than free concert tickets. Friends hover by the oven like seagulls at a beach picnic; neighbors "casually" drop by when they smell the buttery crust cooling on the counter.
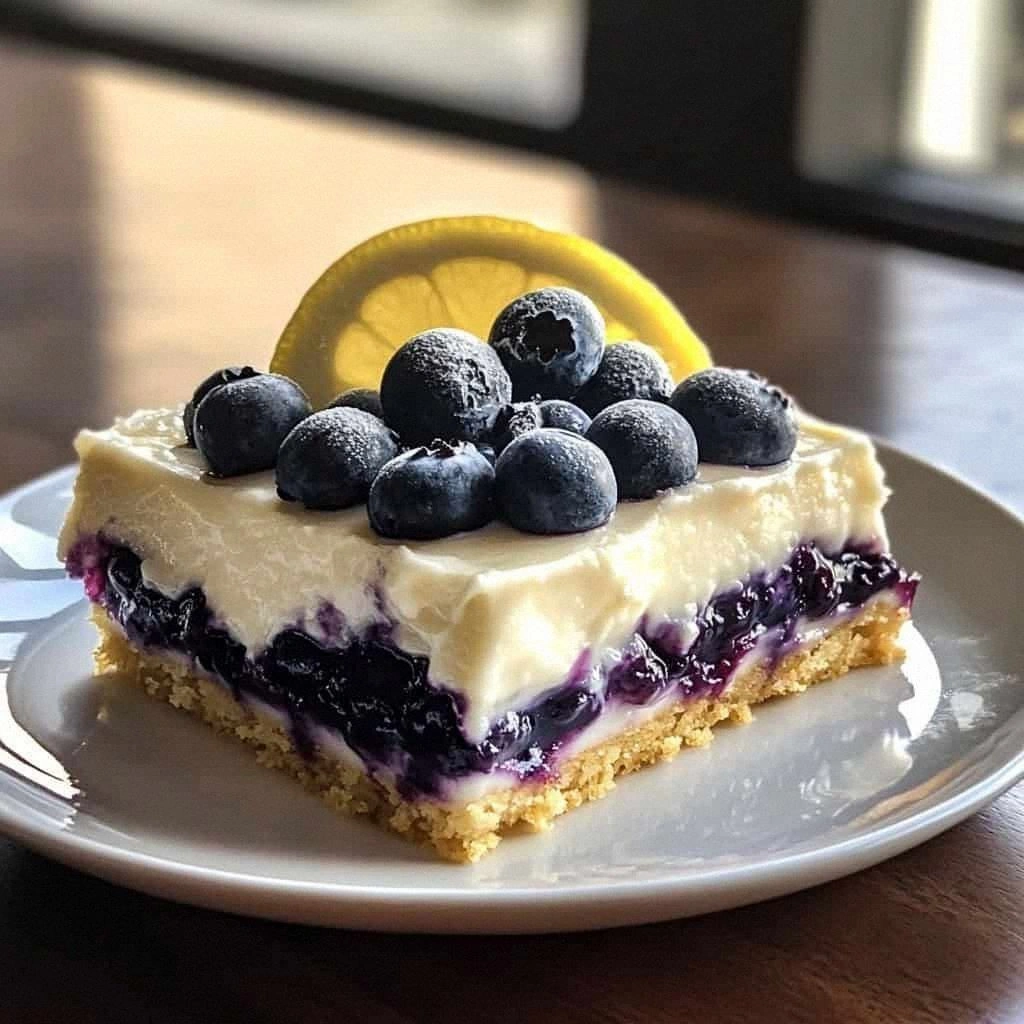
Picture this: a base that shatters under your fork like golden, sugared ice, giving way to a lava flow of blueberries that have burst into the most insane shade of indigo. Bright lemon zest freckles every bite, making your tongue do that happy little electric dance. The aroma alone will make you close your eyes involuntarily—floral, buttery, and sunshiny all at once. I've seen people take one bite, freeze, and then wordlessly hold out their plate for seconds before they've even swallowed the first. If you've ever thought lemon blueberry desserts were just polite, summery pastries for garden parties, prepare for a wild re-education.
What makes this version the ultimate is a layering trick that keeps every component singing in perfect harmony. The crust stays crisp even after hours, the filling sets into a sliceable jewel rather than a puddle, and the topping bakes into a nubbly oat crown that tastes like oatmeal cookie met lemon bar and they decided to start a band. I dare you to taste it and not go back for thirds. Let me walk you through every single step—by the end, you'll wonder how you ever made it any other way.
What Makes This Version Stand Out
Flavor Bomb: Most recipes timidly whisper lemon. This one shouts it from rooftops by using both zest and juice at two different stages, so the citrus blooms in the oven and then does a second tap-dance on your palate once the dessert cools.
Texture Tango: We're talking crisp, tender, jammy, and crumbly all in one mouthful. The crust stays flaky thanks to a frozen-butter trick, while the topping bakes into buttery granola clusters that give way to a molten blueberry center.
Weeknight Simple: No stand mixer, no food processor, no blind-baking drama. One bowl for the crust, one saucepan for the filling, and a fork-stirred crumble that comes together faster than you can preheat the oven.
Blueberry Insurance: A teaspoon of cornstarch per cup of fruit means you'll get clean slices, not a tragic fruit soup that bleeds all over your platter when you try to impress guests.
Crowd Magic: I've served this at backyard barbecues, bridal showers, and a particularly rowdy game night. The pan always comes back empty, usually with someone licking the foil liner "just to be sure it's really gone."
Make-Ahead Hero: Assemble the whole thing, freeze it raw for up to a month, then bake straight from frozen whenever you need a show-stopping dessert without the day-of chaos.
Alright, let's break down exactly what goes into this masterpiece...
Inside the Ingredient List
The Flavor Base
Fresh blueberries are non-negotiable. Frozen ones bleed too much juice and turn the filling into a watery tie-dye experiment. When shopping, look for berries that still wear a faint silvery bloom—that powdery blush is natural wax that locks in flavor. If you can only find tart blueberries, bump the sugar by two tablespoons; if they're candy-sweet supermarket giants, dial it back by one. And please, for the love of dessert, taste one before you commit. I've bitten into a beautiful berry that tasted like battery acid and had to pivot to raspberries mid-recipe.
Lemon zest is where the perfume lives. Use a microplane and grate only the sunny outer layer—stop the second you see white pith or your dessert will taste like a grapefruit got angry. One medium lemon yields about a tablespoon of zest, so grab two just in case. Pro tip: zest before you juice; trying to microplane a squeezed half-lemon is a circus act you don't want to perform before company arrives.
The Texture Crew
All-purpose flour does double duty here: it anchors the crust and thickens the filling. For the crumble, I sneak in a spoonful of the same flour to bind the oats so you get chunky, cookie-like clusters instead of sandy gravel. If you're gluten-free, swap in a cup-for-cup blend plus a teaspoon of xanthan gum for elasticity. The world won't end, but the crust will be a touch more tender—some consider that an upgrade.
Cold butter is the secret handshake between flaky and tender. I cube it, spread the cubes on a plate, and pop them in the freezer while I measure everything else. When the fat hits the hot oven, the water inside turns to steam and creates tiny pockets that translate to shattering layers. Margarine or coconut oil will work in a pinch, but expect a denser, chewier result—still tasty, just different dance moves.
The Unexpected Star
Cornstarch is the quiet overachiever. It mingles with the berry juices and lemon acid to form a glossy, sliceable gel that holds its shape even when warm. Too little and you'll need a spoon to serve; too much and you risk a chalky aftertaste. If you're out, arrowroot or tapioca starch work at the same ratio, but they'll give you a slightly more translucent, jelly-like set rather than the velvety custard vibe we want.
The Final Flourish
Rolled oats bring nutty chew and a homespun look. Skip instant oats; they dissolve into mush and you'll lose the textural contrast. If you're feeding an oat-skeptic, pulse them once in a blender for a finer crumb that still bakes up crisp. And don't even think about skipping the pinch of cinnamon—it doesn't scream spice, it just makes the blueberries taste bluer, like turning up the saturation on a photo.
Everything's prepped? Good. Let's get into the real action...
The Method — Step by Step
- Start by preheating your oven to 375°F (190°C). Yes, I know every recipe says this first, but here's the thing—ovens lie. Mine runs hot enough to toast marshmallows on the outside while the inside stays chilly. Grab an oven thermometer, hang it on the center rack, and actually wait for the needle to settle. While the oven works up a sweat, line an 8-inch square pan with foil so it overhangs two sides like handles. Spray it generously; stuck fruit sugars are the stuff of dish-washing nightmares.
- Make the crust. Whisk flour, sugar, and salt in a bowl the size of your dreams—wide enough that you won't fling flour onto the cat when the butter comes in. Add those frozen butter cubes and toss to coat. Now, using just your fingertips, rub the butter into the flour. Think of snapping your fingers quietly; you're aiming for flat shards the size of oat flakes, not breadcrumb uniformity. Stop the second most pieces are pea-sized. Drizzle in ice water a tablespoon at a time, fluffing with a fork like you're tossing a delicate salad. When you squeeze a handful it should clump stubbornly, not crumble like dry sand. Press this mixture evenly into the bottom of your lined pan. Pop it into the freezer while you mix the filling; the colder it hits the oven, the puffier the layers.
- Cook the filling. Combine three cups of blueberries with sugar, cornstarch, lemon juice, zest, vanilla, and a pinch of salt in a saucepan that looks too big. Cold berries shrink as they heat, but they also burp steam, and you want room for the bubble party. Place over medium heat and stir gently with a silicone spatula. After about four minutes the sugar will dissolve and the juice will start to look like liquid sapphire. Keep stirring until the mixture thickly coats the spatula—when you draw a line across the bottom of the pan, it should stay visible for a slow count of three. Remove from heat and fold in the remaining cup of raw berries; they provide the juicy pops that keep the texture from turning into jammy monotony.
- Pour the glossy filling over the chilled crust and spread it into an even layer. Try not to drool; success smells like summer camp and fresh laundry had a delicious baby.
- Mix the crumble topping. In the same crust bowl—yes, the unwashed one—combine flour, brown sugar, oats, cinnamon, and the remaining cold butter cubes. Use your fingers again, but this time go for a clumpy, gravelly mix. You want some pieces the size of hazelnuts so they bake into crunchy nuggets. Sprinkle the crumble generously over the berries; don't tamp it down or you'll lose those airy pockets.
- Bake for 30–35 minutes, rotating halfway. The crumble should bronze like a beach-goer in July, and the filling should burble up around the edges in thick, slow bubbles that look like molten gemstones. If the top browns too quickly, tent loosely with foil and keep going; under-baking is the number-one crime I see home bakers commit out of fear of "burning" the topping.
- Cool for at least an hour. I know, warm blueberry desserts are irresistible, but cutting too soon turns the filling into a purple tsunami that oozes out and drowns your beautiful layers. Patience rewards you with clean, photogenic squares that you can lift out using the foil handles.
- Finish with a snowfall of powdered sugar and serve alongside vanilla ice cream that melts into creamy rivers, cutting the bright citrus like silk against sunlight. That first bite? Pure magic—crunch, then slump, then a bright zap of lemon that makes your salivary glands throw a parade.
That's it—you did it. But hold on, I've got a few more tricks that'll take this to another level...
Insider Tricks for Flawless Results
The Temperature Rule Nobody Follows
Most recipes tell you to cool desserts completely, but they rarely mention that cornstarch-set fillings continue to firm up as they drop from hot to room temp to chilled. If you want that Instagram-worthy clean cut, chill the whole pan for two hours after the initial room-temp rest. Use a chef's knife dipped in hot water, wiped dry, and you'll slice through like the berries are made of velvet. A friend tried skipping this step once—let's just say her "squares" became patriotic pudding parfaits instead.
Why Your Nose Knows Best
When the crumble starts to smell like toasted granola and the lemon perfume turns from sharp to rounded and honey-like, you're thirty seconds from perfect. Set a timer for that final half-minute and stand nearby. Ovens have hot spots, and the difference between bronzed and bitter can be one commercial break. If you catch a whiff of caramel edging toward burnt, yank it out immediately; residual heat will finish the job on the counter.
The 5-Minute Rest That Changes Everything
After cooling, tent the pan loosely with foil and let it sit on the counter for five extra minutes. This brief sauna re-humidifies the very top layer of crumble, taking it from crisp to shatteringly crisp without crossing into dry. It's the same reason professional pastry chefs rest croissants after baking—texture is fleeting, and this micro-steam locks it in.
Creative Twists and Variations
This recipe is a playground. Here are some of my favorite ways to switch things up:
Lime Raspberry Riff
Swap lemon for lime zest and juice, and trade blueberries for raspberries. The seeds add a cheeky crunch, and the tang is like a tropical vacation in dessert form. Serve with coconut sorbet and pretend you're on a beach where calories don't count.
Peach Bourbon Jam Session
Replace half the berries with diced ripe peaches and spike the filling with a tablespoon of bourbon. The alcohol cooks off, leaving behind smoky vanilla notes that make grown-ups sigh contentedly and reach for another piece "just to be social."
Ginger Pear Glow-Up
Use pears and add a teaspoon of grated fresh ginger to both the filling and the crumble. The gentle heat sneaks up after the sweet, like a polite spice that clears its throat instead of shouting. Perfect for autumn potlucks when pumpkin pie feels too predictable.
Savory Brunch Flip
Cut the sugar in half, add a pinch of black pepper and fresh thyme leaves, and serve this as a brunch side dish alongside salty ham or prosciutto. Sweet-savory crossover episodes are the plot twists everyone secretly loves.
Mini Mason Jar Marvels
Press the crust into twelve half-pint jars, par-bake for ten minutes, then layer filling and crumble on top. Reduce baking time to twenty minutes. Suddenly you've got portable picnic desserts that travel like champions and make you look like a Pinterest wizard.
White Chocolate Cloud
Drizzle melted white chocolate over the cooled crumble and let it set. The creamy sweetness tempers the citrus and adds visual drama—those Instagram likes won't farm themselves.
Storing and Bringing It Back to Life
Fridge Storage
Cover tightly with the overhanging foil or transfer squares to an airtight container. Refrigerate for up to four days. After that, the crumble starts to taste like refrigerated air—not spoiled, just tired. If you're storing the whole pan, slide a sheet of parchment under the foil to prevent metallic condensation drip marks on the topping.
Freezer Friendly
Wrap individual squares in plastic wrap, then in foil, and freeze for up to two months. Thaw overnight in the fridge or on the counter for two hours. The crust won't be quite as shattery, but the flavor stays bright. For a quick fix, microwave on 50% power for thirty seconds, then finish in a 350°F oven for five minutes to re-crisp.
Best Reheating Method
To revive day-old squares, pop them in a 325°F oven for eight minutes. Add a tiny splash of water on the pan underneath to create steam; it re-moisturizes the filling without turning the crumble soggy. Serve warm with a fresh scoop of ice cream and watch yesterday's dessert become today's encore performance.